Введение
This guide will teach you how to remove the rumble motors that are located in the grips of the controller.
Выберете то, что вам нужно
-
-
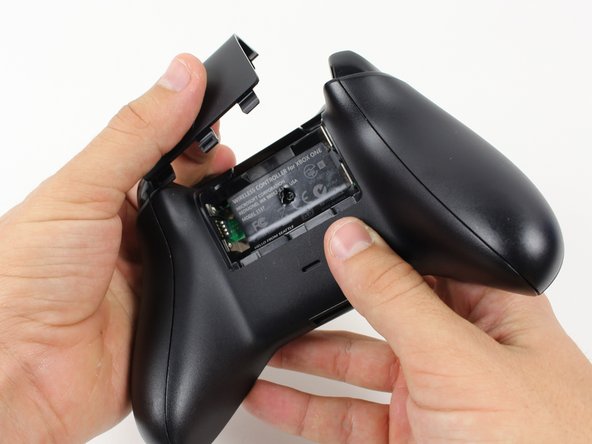
Grip the controller firmly to remove the side handles, wedging a spudger into the seam between the front and handle plates.
-
Pry the side plate away from the front plate by moving the spudger back and forth. You will need to do this all the way around the side plate's seam.
One you take it off, is it possible to click it back in?
As long as you don’t exceed the couple tons you need to take it off you should be able to put it back.
Brandon -
I don’t have a squdger
getting those handles back on seems impossible, they just dont fit as well, a gap remains even after snapping into place.
Dont think ill be doing this in the future
edit: wiggled the bo9ttom middlewith the handles off and somethign finally “clicked” into place for that extra 1/4 mm for the down arrow on my D-Pad to click back up into place!.
-
-
-
Use a screwdriver and punch a hole directly in the center of the label.
-
Remove the five 10mm screws located on the back of the controller using the TR8 Security Torx Screwdriver.
It's a t8 or t9 security bit btw, I got the top two out with a regular T8, but the bottom two and middle needed a T9 Security bit.
All five faceplate/backplate screws in the controller I disassembled were T8 security fasteners.
The T8 is only good for the middle screw on my One S controller. The others require something bigger
These requires SECURITY Torx bits (they have a cannulated hole in the driver). I don't believe the iFixIt branded driver is cannulated but you can buy a set of bits from DeWalt DWAX200 which is overkill but has what you need.
The driver that iFixIt sells is cannulated.
where do you get this dumb ass screw driver
You can bypass it with a 1.5mm flathead.
thank you for this. worked for me
TR9. A $10 kit from Walmart has the bit/driver in it and extra goodies to make life simple.
As weird as it sounds, the top 2 came out for me with a flathead- but the bottom two and the middle one wont
-
-
-
-
De-solder the soldered joints while holding the red and black wires down on the top motherboard.
-
To reassemble your device, follow these instructions in reverse order.
To reassemble your device, follow these instructions in reverse order.
Отменить: Я не выполнил это руководство.
14 участников успешно повторили данное руководство.
7 Комментариев
Hey I let my motor hang off when I was taking apart my controller and it tore off the motherboard on one side of my controller, is there a way to repair that?
Hi Mark,
Assuming that nothing beyond some solder came off with the wires, you can try resoldering the motor's wires back into place. Make sure to check exactly where they are meant to connect, and not to accidentally solder anything else on the board.
Liam Gow -
It would be nice to show the positioning of the motors in the frame since they are not symmetrical. The left one has a larger weight.
Where can I buy these rumble motors?
I'm had to de remove the rumble motors from the board temporarily. I didn't take a picture of what it looked like before I de soldered the wires. I know the pads they need to be re soldered to. But don't know in what order. Is there any pictures you know of on how these controllers are wired so I don't solder them into the wrong spot?
Will it cause issues to simply remove the rumble motors and not reinstall them? I need one controller that cannot vibrate. It'll only be used for a single game that regardless of the settings used (including any special things in an elite controller) it will still f'n vibrate. If it will not cause issued I will mod one of my other controllers.
Thanks in advance


