Перейти к основному содержанию

Xbox Philips DVD Drive Disassembly

Выберете то, что вам нужно

  1. Xbox Philips DVD Drive Disassembly, Hard Drive: шаг 1, изображение 1 из 1
    • Make sure your Xbox is safely unplugged and is laying on a flat, stable surface.

  2. Xbox Philips DVD Drive Disassembly: шаг 2, изображение 1 из 1
    • Turn the Xbox over to reveal the four rubber feet.

    • Use a metal spudger to pry off the four rubber feet.

  3. Xbox Philips DVD Drive Disassembly: шаг 3, изображение 1 из 2 Xbox Philips DVD Drive Disassembly: шаг 3, изображение 2 из 2
    • There are 2 more screws hidden under the two labels on the bottom of the case.

    • You can either remove the labels or simply feel for the screw holes through the labels and then cut or punch a hole through them.

  4. Xbox Philips DVD Drive Disassembly: шаг 4, изображение 1 из 1
    • Remove the six T20 Torx screws securing the top cover to the bottom cover.

  5. Xbox Philips DVD Drive Disassembly: шаг 5, изображение 1 из 2 Xbox Philips DVD Drive Disassembly: шаг 5, изображение 2 из 2
    • Once the bottom and top shells are no longer attached, carefully turn the Xbox right-side-up, lift and remove the top cover.

  6. Xbox Philips DVD Drive Disassembly: шаг 6, изображение 1 из 2 Xbox Philips DVD Drive Disassembly: шаг 6, изображение 2 из 2
    • Remove the three 3 mm T10 screws securing the hard drive to the Xbox.

    • There is one screw on the rear left side of the hard drive that is only visible when the IDE ribbon cable is lifted up. The other two are at the front right and left sides of the hard drive.

    • The screw on the lower left corner of the disk drive is not in the hole that it appears to be in, but rather just closer to the corner.

  7. Xbox Philips DVD Drive Disassembly: шаг 7, изображение 1 из 2 Xbox Philips DVD Drive Disassembly: шаг 7, изображение 2 из 2
    • Free the hard drive power cable from the carrier for sufficient slack to lift the hard drive out.

    • Lift the plastic hard drive carrier out of the Xbox case.

  8. Xbox Philips DVD Drive Disassembly: шаг 8, изображение 1 из 3 Xbox Philips DVD Drive Disassembly: шаг 8, изображение 2 из 3 Xbox Philips DVD Drive Disassembly: шаг 8, изображение 3 из 3
    • Remove the four 3.4 mm T15 Torx screws from the plastic hard drive carrier (two screws per side).

    • Carefully remove the hard drive from the plastic carrier. Gentle rocking will see the hard drive come out quite easily.

  9. Xbox Philips DVD Drive Disassembly: шаг 9, изображение 1 из 2 Xbox Philips DVD Drive Disassembly: шаг 9, изображение 2 из 2
    • Pull both the hard drive data ribbon cable and the power cable straight up from the hard drive.

    • They may be firmly seated, so be careful trying to remove them. DO NOT pull the wires as you may damage the cable assembly.

  10. Xbox Philips DVD Drive Disassembly, Disc Drive: шаг 10, изображение 1 из 3 Xbox Philips DVD Drive Disassembly, Disc Drive: шаг 10, изображение 2 из 3 Xbox Philips DVD Drive Disassembly, Disc Drive: шаг 10, изображение 3 из 3
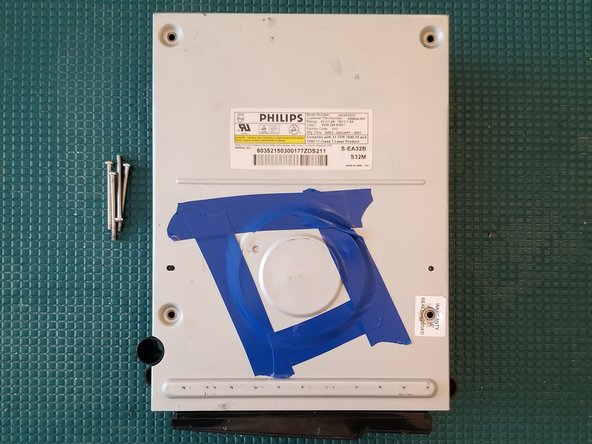
    • Remove the disk drive. It should come right out.

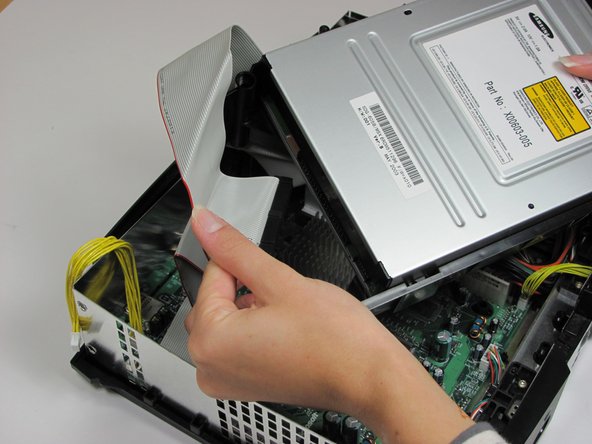
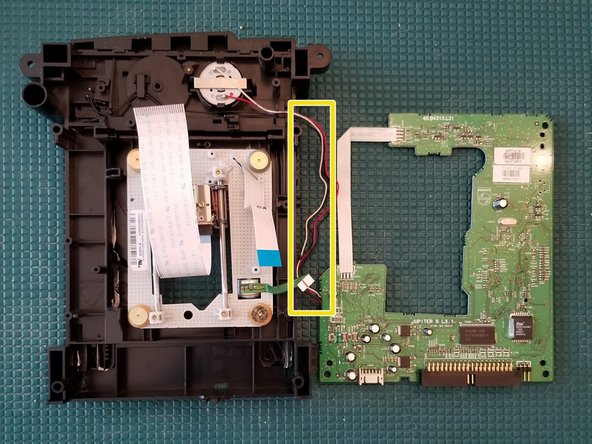
    • Unplug the ribbon cable and yellow cables from back of disk drive.

  11. Xbox Philips DVD Drive Disassembly: шаг 11, изображение 1 из 1
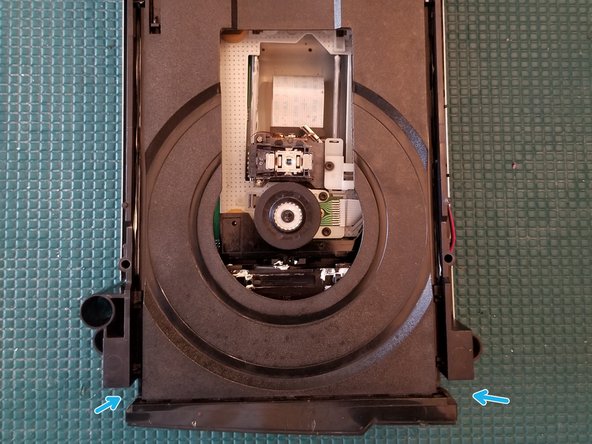
    • Pry back the black plastic tabs around the disk drive in order to remove it from its housing. Once removed, set the drive aside.

    • ONLY REMOVE IF DEAD!

  12. Xbox Philips DVD Drive Disassembly, Remove Top Shell: шаг 12, изображение 1 из 2 Xbox Philips DVD Drive Disassembly, Remove Top Shell: шаг 12, изображение 2 из 2
    • Remove 4 PH2 screws

    • Remove top cover

  13. Xbox Philips DVD Drive Disassembly, Manually Eject Drive: шаг 13, изображение 1 из 3 Xbox Philips DVD Drive Disassembly, Manually Eject Drive: шаг 13, изображение 2 из 3 Xbox Philips DVD Drive Disassembly, Manually Eject Drive: шаг 13, изображение 3 из 3
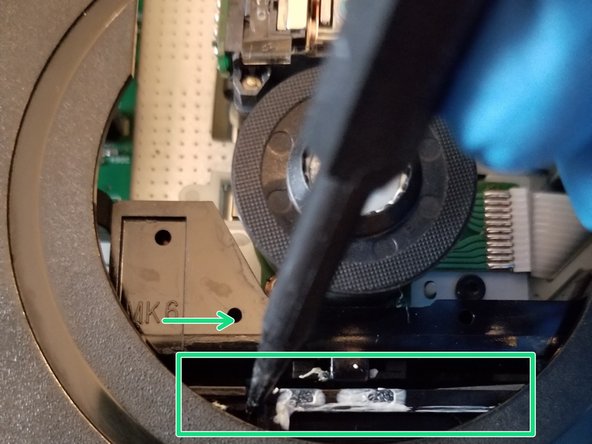
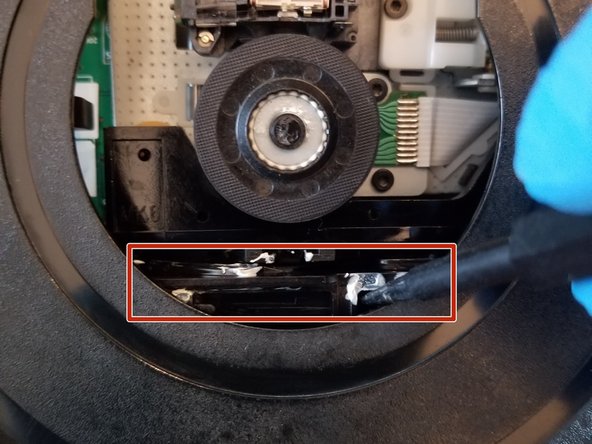
    • With the pointed end of a spudger slide this piece to the right

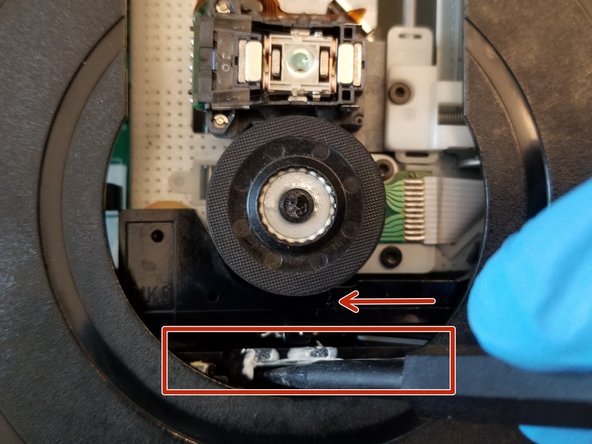
    • Laser assembly will drop about a quarter inch

    • Drive door will open about a quarter inch and can now be manually opened

  14. Xbox Philips DVD Drive Disassembly, Manually Close Drive: шаг 14, изображение 1 из 3 Xbox Philips DVD Drive Disassembly, Manually Close Drive: шаг 14, изображение 2 из 3 Xbox Philips DVD Drive Disassembly, Manually Close Drive: шаг 14, изображение 3 из 3
    • Gently slide drive door closed.

    • Slide this piece to the left.

    • Laser assembly will raise about a quarter inch.

    • Drive door is now secured.

  15. Xbox Philips DVD Drive Disassembly, Remove Lower Shell: шаг 15, изображение 1 из 1
    • After removing the lower shell DO NOT place the drive down as you typically would. You may damage the lower ribbon cable rendering the drive useless

  16. Xbox Philips DVD Drive Disassembly, Pull Cables From Brackets: шаг 16, изображение 1 из 2 Xbox Philips DVD Drive Disassembly, Pull Cables From Brackets: шаг 16, изображение 2 из 2
    • Loop the wires out from their retaining brackets.

  17. Xbox Philips DVD Drive Disassembly, Separate PCB: шаг 17, изображение 1 из 3 Xbox Philips DVD Drive Disassembly, Separate PCB: шаг 17, изображение 2 из 3 Xbox Philips DVD Drive Disassembly, Separate PCB: шаг 17, изображение 3 из 3
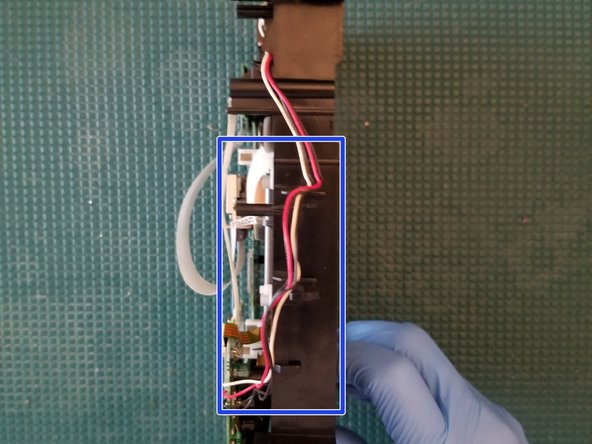
    • With the drive upside down, gently pull back on the ribbon cable retaining tabs and pull out the ribbon cable.

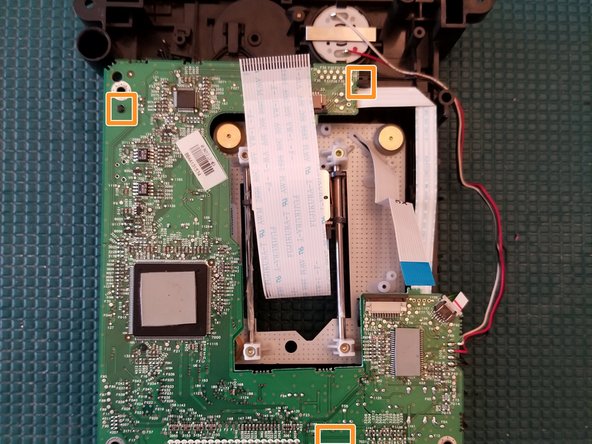
    • There are 2 plastic tabs and 1 post holding the board in place. Lift up on the post, slide PCB to the left and then forward.

    • Reverse process to reattach PCB

    • Rotate PCB right and place to the side

    • There's just enough length in the cable to place the board in a PCB holder to replace capacitors.

Заключение

To reassemble your device, follow these instructions in reverse order.

Navy Vet 2015

Участник с: 06/25/15

7 296 Репутация

Автор 15 руководств

Один комментарий

This is for the VAD6035/21

Jason - Ответить

Добавить комментарий

Просмотр статистики:

За последние 24часов: 4

За последние 7 дней: 44

За последние 30 дней: 134

За всё время: 5,106