Введение
This guide helps you to disassemble your Xbox Series X|S controller (model 1914).
Выберете то, что вам нужно
-
-
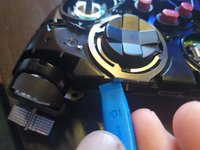
The second step is to remove the side plates that rest against your palms. This can be done with an iFixit opening tool or some iFixit opening picks.
-
If you have an opening tool, insert it near the tip as shown and "pry" the side plate away from the controller. You'll hear a click as the clips come loose. Slide the tool around the plate, prying as you encounter resistance, until it comes free.
-
If you only have opening picks, press them between the side and front plates. At first, you'll only be able to insert them in certain spots; push them in as deeply as you can until you have a few in place. Then, wiggle and slide the picks until you hear the clips loosen.
-
-
-
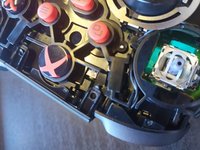
Remove 5 screws shown on the picture using the T8H (hollow) bit.
-
-
-
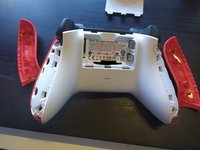
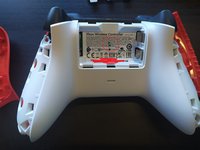
Now the front plate is removed we can also remove the backplate.
-
If you are going further in the guide, you do need to remove the joysticks, but can leave the d-pad in place.
-
-
-
-
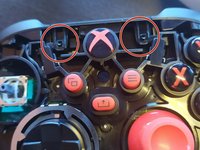
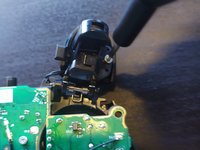
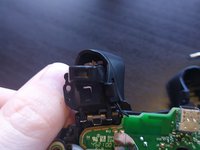
Now we are going to take off the little plate between the bumpers to futher access the controller.
-
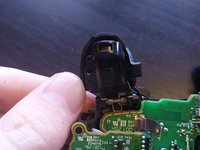
Start by pushing the two little plastic pieces on either side of the xbox on/off button.
-
Just push the little pieces up and away from the controller (plate may shoot away so hold it a little).
-
-
-
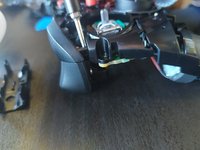
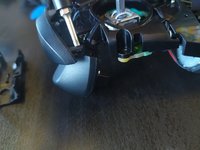
To remove the bumper, on either sides are little pieces of platic just like the ones we just undid, just push it away from the controller. I like to use the screwdriver for this ones since its a little smaller and gets behind the plastic easier.
-
-
-
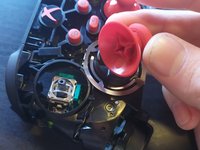
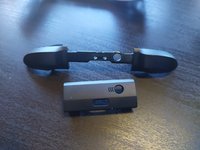
Next we are going to remove the trigger caps. Use a T6 bit for this.
-
Remove the screws on the backsides of the caps and just gently push the plastic around the trigger from the outside towards the inside
-
-
-
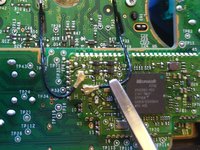
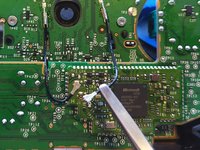
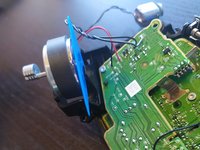
To remove the motherboard (top one) we first disconnect the Bluetooth antennas. We do this by slowly lifting up the connectors on the side of the motherboard.
-
-
-
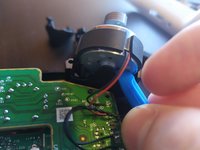
Now remove the big rumble motors by pushing a little plastic piece back and lifting the motor up (remember to minimize strain on the wires).
-
Next we need to remove the little rumble motors in the triggers from the top, just make sure the wires aren't connected to the chassis anymore.
-
-
-
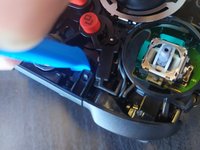
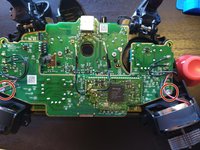
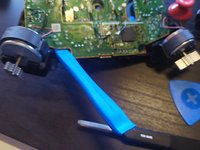
Next we remove the two screws in the bottom corners (using T6 bit). Next we can lift the motherboard up. NOTE that the 3.5mm jack is not soldered and just sandwiched between the two boards.
-
For removing the motherboard just simply lift it from one of the corners without bending it too much. (sorry the camera was out of focus)
-
-
-
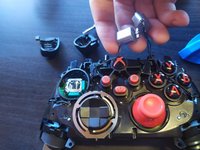
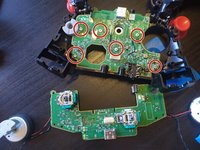
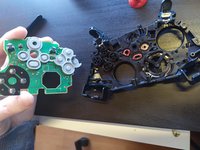
Now we remove the last six screws (still T6). After those you can lift the daughter board. The buttons will be loose after removing, so take care not to lose them.
-


To reassemble your device, follow these instructions in reverse order.
I just want to say that I really hope this guide can help people as I noticed there was none available at the time of writing. If you found this helpful please leave a comment, or if you have tips for how I can improve the guide please let me know.
This was my first guide so I hope I was clear enough, good luck and most of all have fun!
*PS: The stock image of the thumbs up is a copyright free picture from Pixabay
Отменить: Я не выполнил это руководство.
67 человек успешно провели ремонт по этому руководству.

16 Комментарии к руководству
The motherboard is a printed circuit board and foundation of a computer that is the biggest board in a computer chassis. It allocates power and allows communication to and between the CPU, RAM, and all other computer hardware components. https://www.ifixit.com/Guide/Xbox+One+Wi...+resultsFull+Disassembly/148234
Thanks
Nice guide, simple but concise!
If anyone wonders some day with the Forza special edition 1914 controller, it has an additional rubberized section like the clipped on side rails. The Forza controller disassembles in the same way as this guide, you do not pry off or remove the additional inner grip strip. The additional inner grip strip is permanently bonded to the bottom shell piece, with no new screws under it or anything.
Good guide! Helped me disassemble things to find the bumper strip (LB/RB) LB button wasn't right. Fixed the support clicking the LB switch and reassembled it. My nephew should be happy about it being fixed and I now know that if the repair doesn't hold what part needs replacing! Thank you!