Перейти к основному содержанию

Xelio P1001A-BK Rear Camera Replacement

Выберете то, что вам нужно

  1. Xelio P1001A-BK Rear Camera Replacement, Back Cover: шаг 1, изображение 1 из 2 Xelio P1001A-BK Rear Camera Replacement, Back Cover: шаг 1, изображение 2 из 2
    • Remove the two 3 mm retaining screws from the side of the tablet with a Phillips #0 screwdriver.

  2. Xelio P1001A-BK Rear Camera Replacement: шаг 2, изображение 1 из 2 Xelio P1001A-BK Rear Camera Replacement: шаг 2, изображение 2 из 2
    • Insert the plastic opening tool in between the shelf halves and lift the top shelf half to detach the securing tabs.

    • There are four securing tabs located on each long side.

    • Before fully separating the shell halves, observe if the speakers are separated from the shell half. If they are still in their sockets, gently pry them loose with the plastic opening tool.

  3. Xelio P1001A-BK Rear Camera Replacement, Rear Camera: шаг 3, изображение 1 из 1
    • Locate ribbon connector, make sure it is secure.

  4. Xelio P1001A-BK Rear Camera Replacement: шаг 4, изображение 1 из 1
    • With a plastic opening tool, gently pry the camera body from its retaining socket

  5. Xelio P1001A-BK Rear Camera Replacement: шаг 5, изображение 1 из 1
    • Make sure the camera is unobstructed

  6. Xelio P1001A-BK Rear Camera Replacement: шаг 6, изображение 1 из 3 Xelio P1001A-BK Rear Camera Replacement: шаг 6, изображение 2 из 3 Xelio P1001A-BK Rear Camera Replacement: шаг 6, изображение 3 из 3
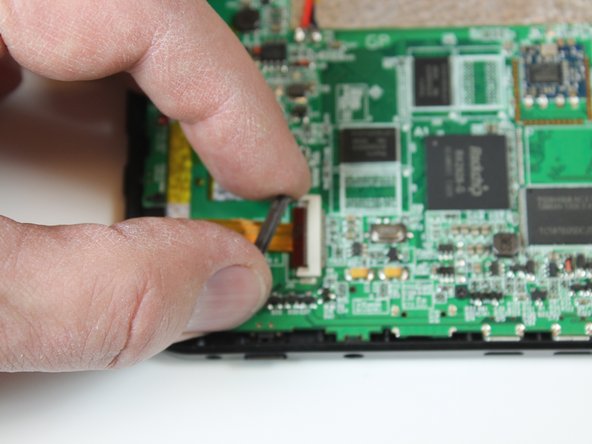
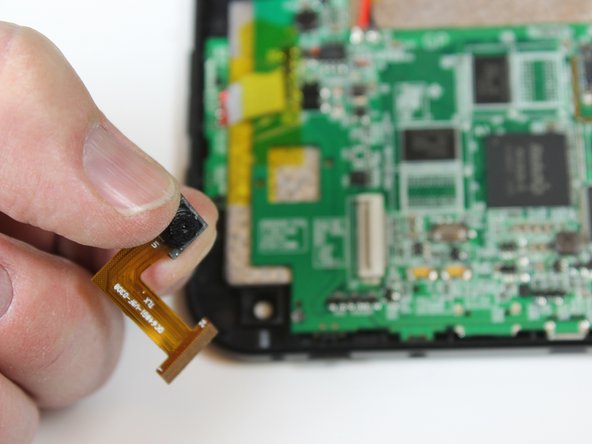
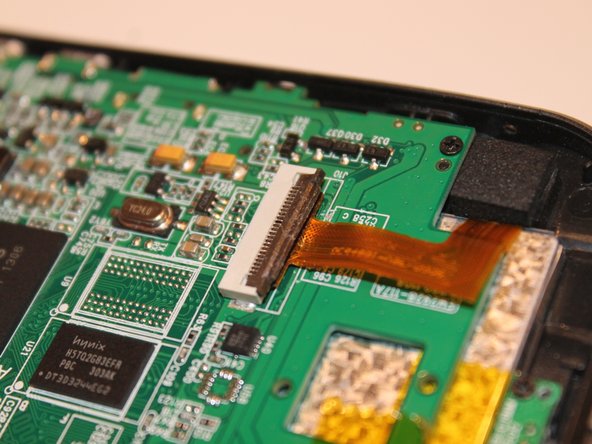
    • If there is still no picture, remove the securing tab on the ribbon connector by inserting the plastic opening tool between the tab on the ribbon cable connector body.

    • Slowly twist the opening tool to loosen the tab. Move the screwdriver to different parts of the tab to move it a little bit at a time.

    • Once the tab is loose, remove it then slide the ribbon cable from its connector and remove the camera from the tablet

  7. Xelio P1001A-BK Rear Camera Replacement: шаг 7, изображение 1 из 1
    Инструмент, используемый на этом этапе:
    Microfiber Cleaning Cloths
    $3.99
    Купить
    • With a microfiber lens cleaning cloth, clean the camera lens

  8. Xelio P1001A-BK Rear Camera Replacement: шаг 8, изображение 1 из 3 Xelio P1001A-BK Rear Camera Replacement: шаг 8, изображение 2 из 3 Xelio P1001A-BK Rear Camera Replacement: шаг 8, изображение 3 из 3
    • To install a new camera, slide the ribbon cable back into its connector

    • Reinstall the ribbon cable securing tab

    • Note the indentation that goes along the edge of the securing tab. It must be facing up to orient the tab correctly

    • Install the camera in its retaining socket

Заключение

To reassemble your device, follow these instructions in reverse order.

Caleb

Участник с: 03/11/15

101 Репутация

1 руководство автора

Команда

Colorado Springs, Team 4-2, Panko Spring 2015 Участник Colorado Springs, Team 4-2, Panko Spring 2015

UCCS-PANKO-S15S4G2

3 членов

Автор 12 руководств

0 Комментариев

Добавить комментарий

Просмотр статистики:

За последние 24часов: 0

За последние 7 дней: 0

За последние 30 дней: 0

За всё время: 120