Введение
This guide involves opening bObi Pet and separating the whole front bumper using a Phillips head screwdriver and a replacement bumper for bObi Pet.
Выберете то, что вам нужно
-
-
Before we get started, turn bObi Pet OFF and flip her over onto a flat surface.
-
Next, remove bObi Pet's dustbin. Grip the small tab on the back of the bin, and pull to remove.
-
-
-
Grip the front wheel and pull straight up, using the screwdriver for leverage.
-
The wheel will pop out and you will see two screws beneath it.
-
There is a larger screw set deeper in the wheel compartment. Use the screwdriver to remove it.
-
-
-
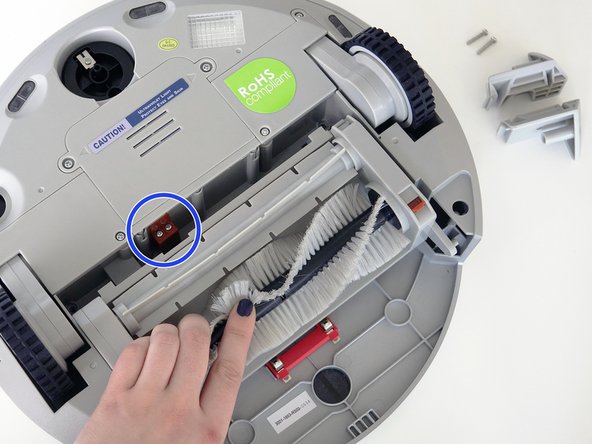
Remove the screws on both sides of bObi Pet’s dustbin. Then, remove the corner pieces that were held down by the screws.
-
Grip the brush compartment and pull down to reveal two screws on a red fastener.
-
Remove them with the screwdriver.
-
-
-
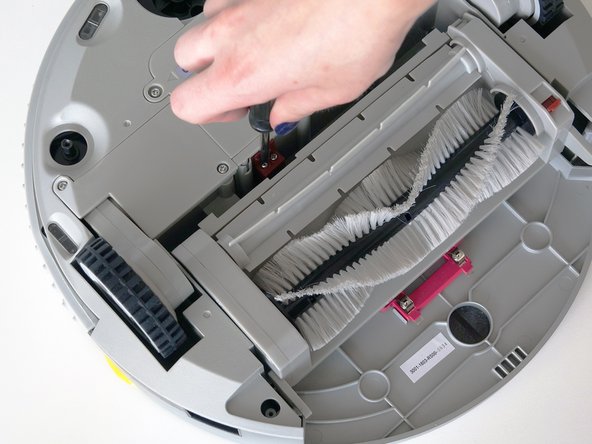
Pull the brush compartment up until the fastener is freed from bObi Pet. Then, detach the brush compartment's circuit plug and set it aside.
-
Remove the 4 screws located beneath the brush compartment.
-
-
-
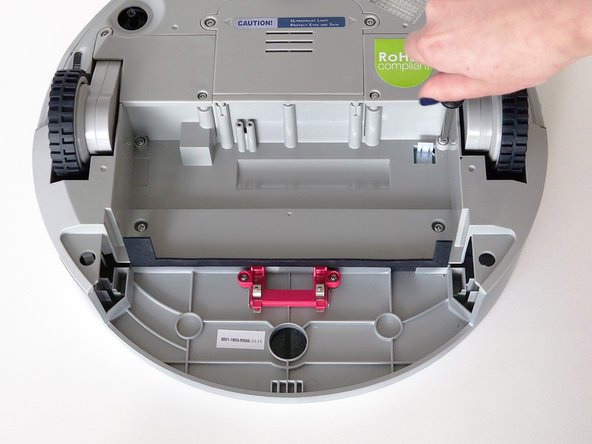
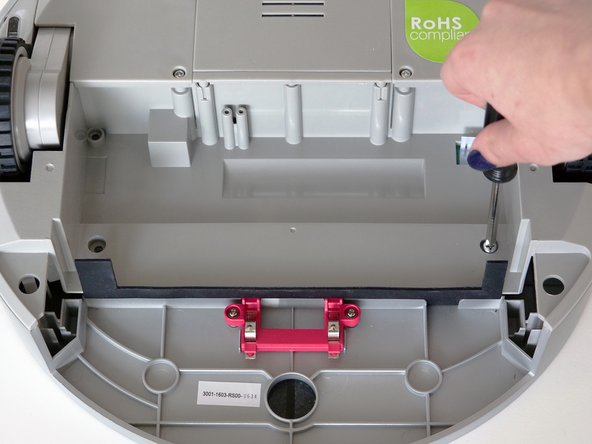
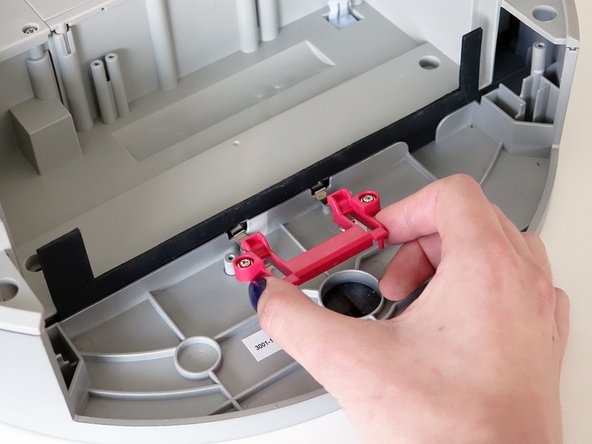
Remove the 2 screws on the dustbin’s red fastener.
-
Remove the fastener and set it aside for reassembly.
-
The cover is no longer secured, so carefully flip bObi Pet onto her wheels.
-
-
-
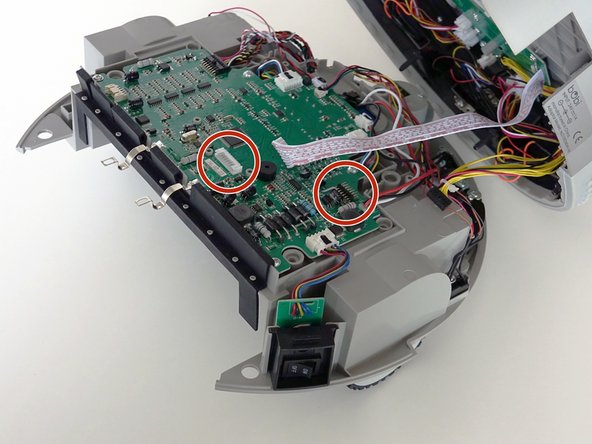
Lift the cover to reveal the main board underneath.
-
Remove the two circuit plugs connecting the lid to the mainboard.
-
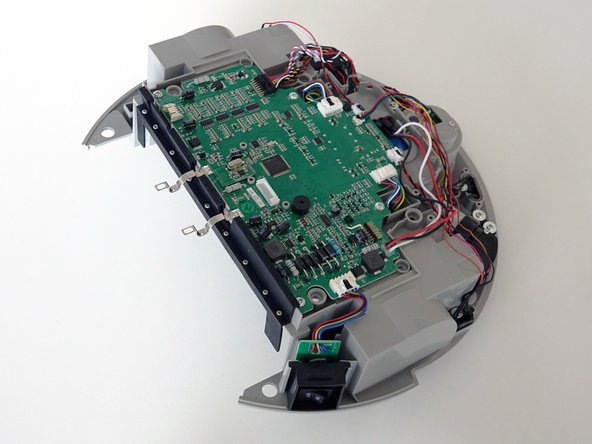
bObi Pet's cover is entirely separated, and you may now access any of her internal parts for replacement.
-
-
-
-
Flip bObi Pet’s cover over onto a flat surface so that you see 2 green circuit boards positioned at the top.
-
There are 8 circuit plugs that you will need to remove. Leave the smallest circuit plug at the top in place, and do not remove it.
-
-
-
Remove the hook holding the yellow circuit plug against the lid. Keep the small hook and all screws safely aside for later reassembly.
-
-
-
Next, remove the 4 screws connecting the bumper to bObi Pet’s lid.
-
You may nudge two of the oblong wall sensors out of their spot on bObi Pet to make room for your screwdriver. Be sure to replace them when done.
-
-
-
On the left and right sides of the bumper are bObi Pet’s sensor strips. They connect to the circuit board by red and white wires.
-
The sensor strips may be glued to the inside of the cover. Use a tool like a screwdriver to break off the glue.
-
Then, lift the whole bumper up and out.
-
-
-
Now line up bObi Pet’s new bumper with the corresponding screw posts on her lid.
-
Make sure the sensor strips slide in behind the screw posts on both ends of the bumper.
-
-
-
Once the bumper is positioned securely on the lid, reinstall the 4 screws around the inside of the bumper.
-
Once again, you may nudge 2 of the oblong wall sensors out to allow room for your screwdriver and then replace them when done.
-
-
-
Next, you’ll need to replace the plastic hook removed previously. Place the yellow wire through it, and line the hook up with the screw post on the cover.
-
When aligned, install the screw on the hook.
-
Then, attach the thick yellow wire to the lower edge of the circuit board.
-
-
-
Continue reconnecting all circuit plugs.
-
In the middle of bObi Pet’s bumper is a circuit plug for one of the 5 wall sensors. Plug this one in at the topmost spot.
-
-
-
The left side of the circuit board has 3 spaces: The top space corresponds to the wall sensor with the shortest wire and no tab on the circuit plug.
-
Just below that is where the leftmost wall sensor plugs in. It has a longer wire and a small white tab on its circuit plug.
-
The space on the very bottom is for bObi Pet’s sensor strips. They have red and white wires.
-
-
-
Repeat the previous process for the circuit plugs on the right and double check that all connections are secure.
-
Make sure the the red and white wires are tucked behind the screw posts at the ends of the bumper.
-
Make sure all the wires are tucked behind the black hooks lining the inside of the bumper before closing bObi Pet.
-
For assistance on reassembly, see: Assemble bObi Pet Post-Repair
-


To reassemble your device, follow the guide for closing bObi Pet: Assemble bObi Pet Post-Repair
To reassemble your device, follow the guide for closing bObi Pet: Assemble bObi Pet Post-Repair