Эта версия возможно содержит некорректные исправления. Переключить на последнюю проверенную версию.
Выберете то, что вам нужно
-
Этот шаг не переведен. Помогите перевести
-
Use a coin to rotate the battery locking screw 90 degrees clockwise.
-
-
Этот шаг не переведен. Помогите перевести
-
Pull the keyboard release tabs toward you and lift up on the keyboard until it pops free.
-
Flip the keyboard over, away from the screen, and rest it face-down on the trackpad area.
-
-
Этот шаг не переведен. Помогите перевести
-
Push the wire clasp away from the AirPort card and toward the display, then rotate up to free it from the RAM shield.
-
-
-
Этот шаг не переведен. Помогите перевести
-
Grasp the clear plastic tab on the AirPort card and pull toward the display.
-
-
Этот шаг не переведен. Помогите перевести
-
Hold the AirPort card in one hand and use your other hand to remove the antenna cable.
-
-
Этот шаг не переведен. Помогите перевести
-
Remove the four silver Phillips screws that secure the RAM shield.
-
-
Этот шаг не переведен. Помогите перевести
-
Grasp the metal bracket on top of the RAM shield and pull upward to remove the shield.
-
-
Этот шаг не переведен. Помогите перевести
-
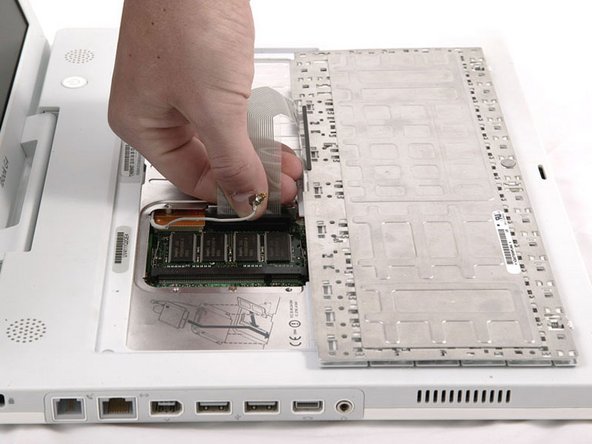
Pull the keyboard cable up from the logic board, holding the cable as close to the connector as possible.
-
-
Этот шаг не переведен. Помогите перевести
-
Release the tabs on each side of the RAM chip at the same time. These tabs lock the chip in place and releasing them will cause the chip to "pop" up.
-


Отменить: Я не выполнил это руководство.
32 участников успешно повторили данное руководство.
