Перейти к основному содержанию

iDea USA CT702 Button Replacement

Выберете то, что вам нужно

  1. iDea USA CT702 Button Replacement, Button: шаг 1, изображение 1 из 3 iDea USA CT702 Button Replacement, Button: шаг 1, изображение 2 из 3 iDea USA CT702 Button Replacement, Button: шаг 1, изображение 3 из 3
    • Place the device face up.

    • Use a plastic opening tool to gently pry open the black panel around the portholes.

  2. iDea USA CT702 Button Replacement: шаг 2, изображение 1 из 3 iDea USA CT702 Button Replacement: шаг 2, изображение 2 из 3 iDea USA CT702 Button Replacement: шаг 2, изображение 3 из 3
    • Pry the rest of the back off; slowly apply pressure from each side to break each clip connection.

  3. iDea USA CT702 Button Replacement: шаг 3, изображение 1 из 2 iDea USA CT702 Button Replacement: шаг 3, изображение 2 из 2
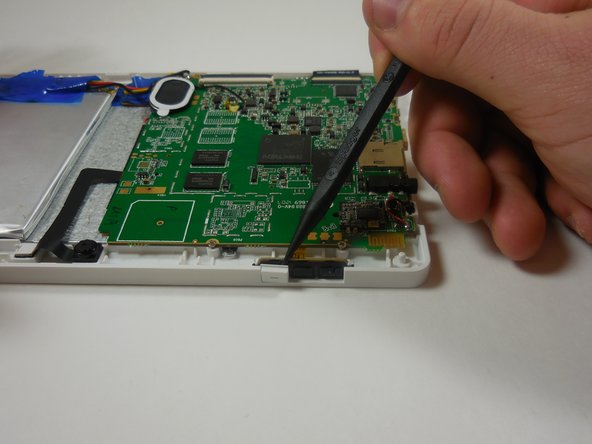
    • With a plastic spudger tool, pry the keys away from the black key mat to remove them.

    • It is easiest to start with the volume up button key and then work on freeing the next two.

  4. iDea USA CT702 Button Replacement: шаг 4, изображение 1 из 2 iDea USA CT702 Button Replacement: шаг 4, изображение 2 из 2
    • Replace the button keys, starting with the outer and ending with the innermost key.

    • The back of each button key has a notch that matches an indent on the black button mat. Match the notches and the indents to properly align the buttons.

    • To replace the back cover, follow the first three steps in reverse order.

Заключение

To reassemble your device, follow these instructions in reverse order.

Daniel Brandt

Участник с: 03/11/15

201 Репутация

Автор 2 руководств

Команда

Colorado Springs, Team 4-7, Panko Spring 2015 Участник Colorado Springs, Team 4-7, Panko Spring 2015

UCCS-PANKO-S15S4G7

3 членов

Автор 10 руководств

0 Комментариев

Добавить комментарий

Просмотр статистики:

За последние 24часов: 0

За последние 7 дней: 3

За последние 30 дней: 3

За всё время: 137