Введение
In cases where the device is not responding, this guide will help you replace the motherboard.
Выберете то, что вам нужно
-
-
Place the tablet on a flat surface, facing upwards.
-
Starting from the portholes, use the plastic opening tools to remove the back cover of the tablet from the top half.
-
Being cautious of the wire connecting the speaker and the motherboard, place the front and back portion of the tablet close in proximity.
-
-
-
Locate the five 3.5 mm black screws on the motherboard.
-
Use the #00 Phillips screwdriver to remove the screws, place them in an appropriate location.
-
-
-
Carefully peel off the tape covering the circuit boards and blue ribbons. The tape can be disposed or saved for reuse.
-
-
-
-
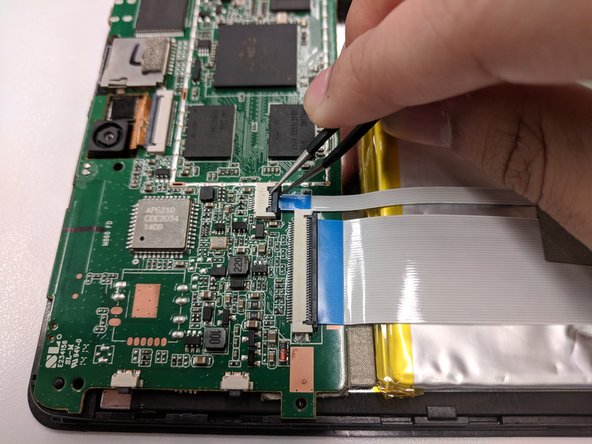
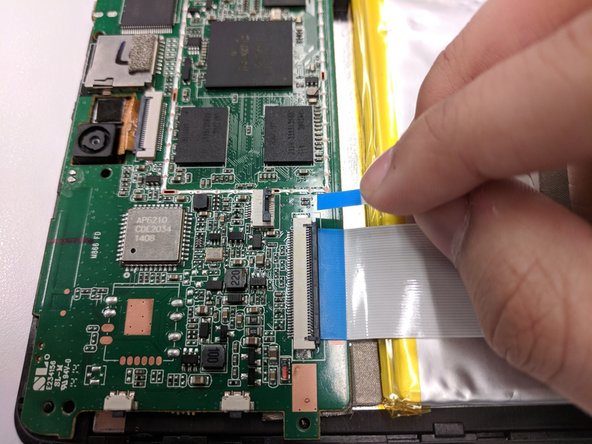
After removing the tape, two blue ribbon wires can now be accessed. To disconnect, gently lift up the plastic ZIF tabs covering the wires.
-
Upon lifting the tab, the ribbons can now be safely pulled out of their connections.
-
-
-
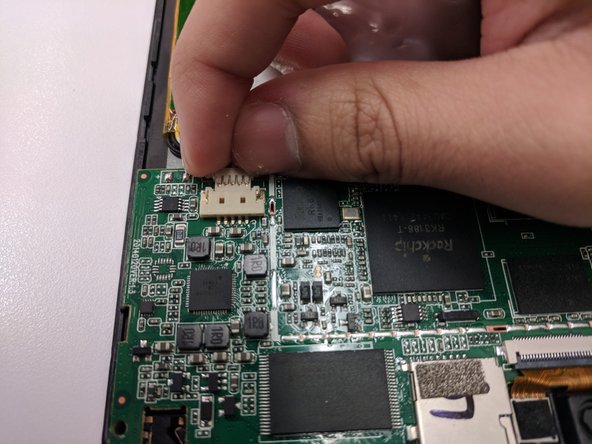
Locate the two wires connecting the speaker to the motherboard.
-
Use a soldering iron to desolder the red and black wires from their sockets.
-


To reassemble your device, follow these instructions in reverse order.
To reassemble your device, follow these instructions in reverse order.
Отменить: Я не выполнил это руководство.
Еще один человек закончил это руководство.
Команда

University of North Texas, Team S7-G5, Thomas Fall 2017 Участник University of North Texas, Team S7-G5, Thomas Fall 2017
UNT-THOMAS-F17S7G5
3 членов
Автор 8 руководств