Введение
The components that deliver the power from the batteries to the circuit might need to be replaced in case your device is still not operating after replacing batteries. Here you will learn how to replace the power delivery cables and springs.
Выберете то, что вам нужно
-
-
Place the front screen of the device on a flat surface, this allows access to the back cover. Remove the back cover from the device to access the batteries.
-
-
-
Remove the batteries from the device, allowing you to access the screws necessary for removal of the back panel.
-
-
-
Remove five black 10 mm Phillips #0 screws from the back side of the device.
-
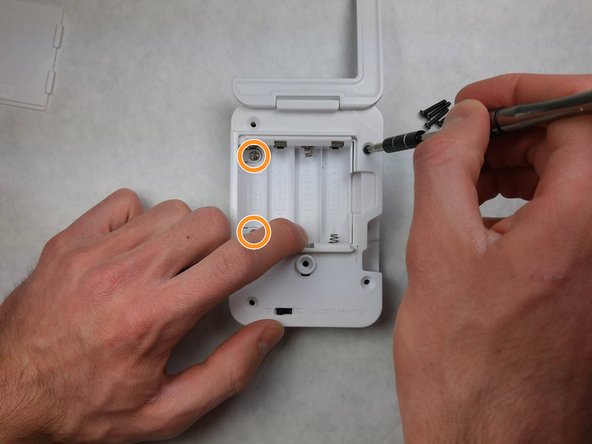
Remove two silver-colored 5 mm Phillips screws from the left side of the internal cover.
-
-
-
-
Gently and slowly pull the back cover off of the iGrill, exposing the power cables to the motherboard.
-
-
-
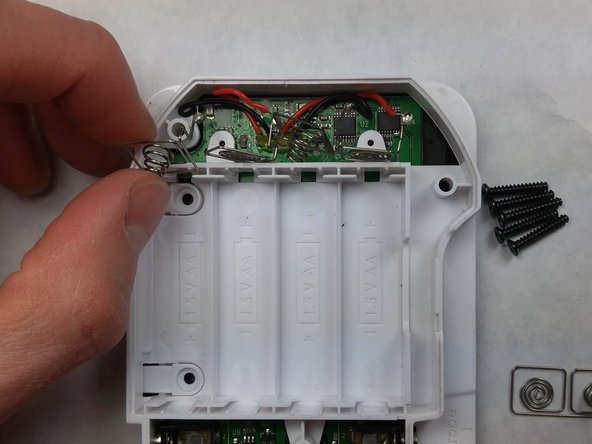
Gently pull the metal terminals to the batteries out of their plastic holders.
-
Position the metal terminals such that you will be able to pull the plastic component that holds the batteries away from the motherboard.
-
Remove the internal cover from the device.
-
-
-
After you have peeled back the rear plastic covering, you will have access to the motherboard.
-
-
-
From here, you will have access to both the metal terminals of the power transfer wires and the soldering points of the power transfer wires to the motherboard.
-
If any of these connections have been broken, repair them with a solder and soldering wire.
-


To reassemble your device, follow these instructions in reverse order.
To reassemble your device, follow these instructions in reverse order.
Отменить: Я не выполнил это руководство.
Еще один человек закончил это руководство.

Команда

IUPUI, Team 3-4, Harley Spring 2016 Участник IUPUI, Team 3-4, Harley Spring 2016
IUPUI-HARLEY-S16S3G4
4 членов
Автор 4 руководств