Перейти к основному содержанию

iMac Intel 17" Optical Drive Replacement

Абсолютно необходимое руководство
Это руководство предназначено только для использования в качестве обязательного условия для других руководств. Оно не полностью само по себе.

Выберете то, что вам нужно

  1. iMac Intel 17" Optical Drive Replacement, Optical Drive: шаг 1, изображение 1 из 1
    • Remove the two 7 mm T10 Torx screws securing the optical drive clip to the logic board.

  2. iMac Intel 17" Optical Drive Replacement: шаг 2, изображение 1 из 1
    • Remove the optical drive clip.

  3. iMac Intel 17" Optical Drive Replacement: шаг 3, изображение 1 из 1
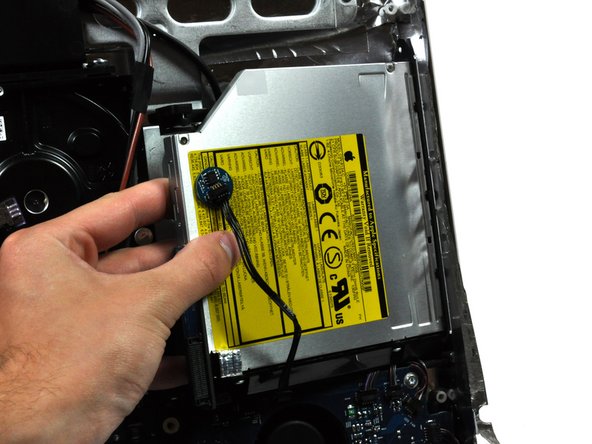
    • Pull the optical drive thermal sensor cable connector away from its socket on the logic board.

  4. iMac Intel 17" Optical Drive Replacement: шаг 4, изображение 1 из 2 iMac Intel 17" Optical Drive Replacement: шаг 4, изображение 2 из 2
    • Squeeze the two optical drive bracket ears together while pulling the drive toward yourself.

    • It may be helpful to hold the logic board down near the optical drive connector when pulling the drive toward yourself to avoid both components lifting together.

    • Pull the optical drive away from the side of the rear panel and remove it from the iMac.

Заключение

To reassemble your device, follow these instructions in reverse order.

Еще один человек закончил это руководство.

0 Комментариев

Добавить комментарий

Просмотр статистики:

За последние 24часов: 0

За последние 7 дней: 0

За последние 30 дней: 0

За всё время: 1,721