Введение
Internal Prerequisite. Pulling out logic board to access SSD power and data connectors.
Выберете то, что вам нужно
-
-
In the proceeding steps, you will disconnect the following cables:
-
SD Board
-
Left/Right Speaker and Microphone
-
Audio Port
-
Wi-Fi Antenna
-
Right Temperature Sensor, Bluetooth/Ambient Light Sensor/Camera/Left Temperature, and Hard Drive Fan
-
CPU Fan/Ambient Temperature and Power Button
-
IR Sensor
-
-
-
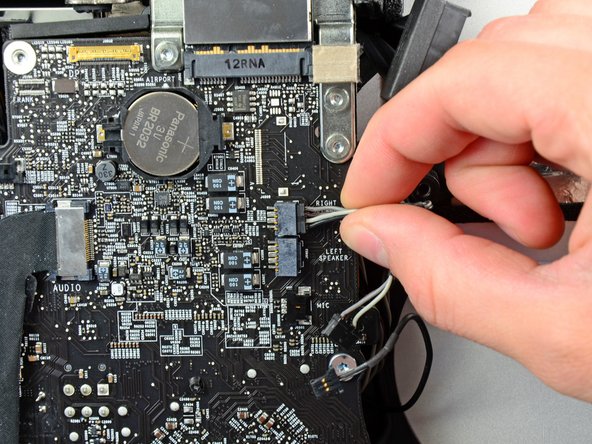
Disconnect the microphone, left speaker, and right speaker cables by pulling their connectors toward the right side of the iMac.
-
-
-
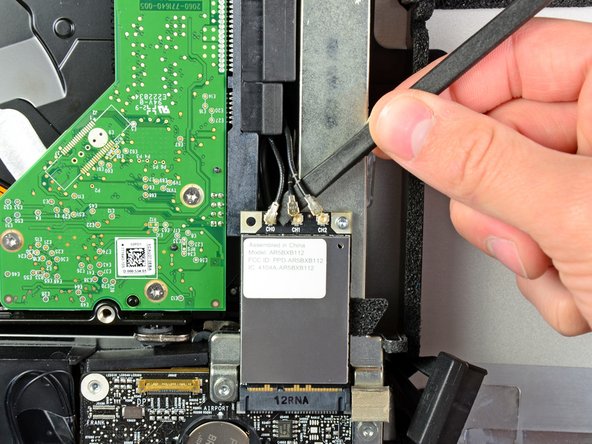
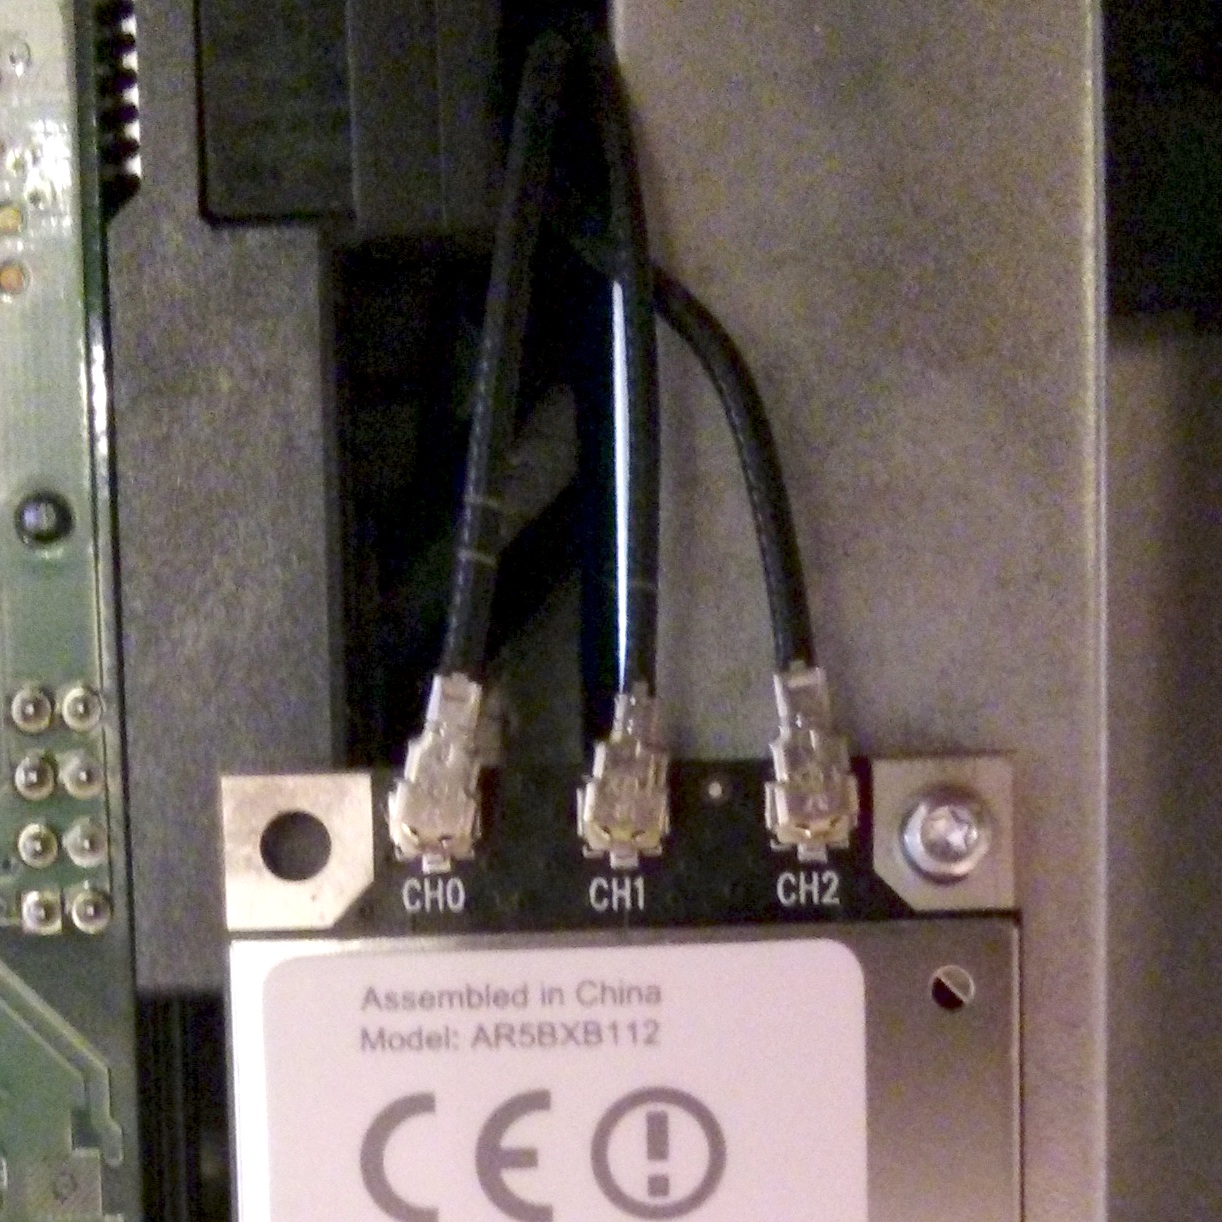
Use the flat end of a spudger to pry all three AirPort antenna connectors up from their sockets on the AirPort board.
For me it was originally the reverse order. No stripes for ch2, one for ch1 and two for ch0
As another user already posted, cables can be in the reverse order as depicted on the guide. Pay attention before disconnecting them.
E.g.:
To simplify this and since there seems to be some variable set ups, take a digital picture of the way it is before following this step so that you can put it back the way it was. (If no digicam then draw yourself a note with paper and pen).
Also for me reversed.
Also reversed for mi
I broke the pins, how can I repair it? Or where can I buy a new module? My pins are reversed as well
-
-
-
Pull the hard drive fan connector toward the top edge of the iMac to disconnect it from its socket on the logic board.
-
-
-
Use your thumbnails on both sides of the Bluetooth/ambient light sensor/camera/left temperature connector to push it toward the top edge of the iMac and out of its socket on the logic board.
-
-
-
-
Use your thumbnails to push the right temperature sensor connector toward the top edge of the iMac and out of its socket.
Yeah, my wires came out without the socket connector. Then I tried pulling out the connector to fix and it was damaged. I’m going to try putting the wires back in independently. We’ll see how that goes…
-
-
-
Pull the CPU fan/ambient temperature sensor connector toward the bottom left edge of the iMac and out of its socket on the logic board.
-
-
-
Pull the power button connector toward the bottom left corner of the iMac to disconnect it from its socket on the logic board.
Mine broke as well. At least it is only 50/50 chance. Plan to put together at the end - screen without screws - to check.
Mine came off bare ends as well. Managed to put them back. Seems like the connector on the cable is very fragile as my one came out in two pieces. The iMac is now up and running again!
-
-
-
Use your thumbs to push the IR sensor connector toward the top edge of the iMac and out of its socket on the logic board.
-
Pull the IR sensor board up from behind the front face of the outer case.
-
Remove the IR sensor and set it aside.
For some reason this connector was refusing to come out. I ended up just removing the IR sensor board, putting it in a tiny ziploc bag to protect the logic board and sensor and working around it. No worries at all.
-
-
-
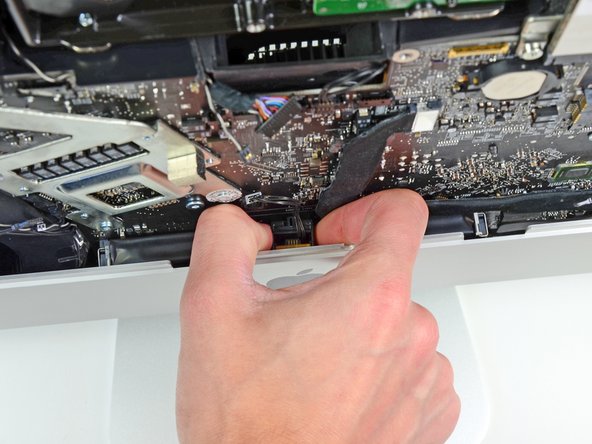
Pull the audio port cable connector toward the left side of the iMac to disconnect it from the logic board.
-
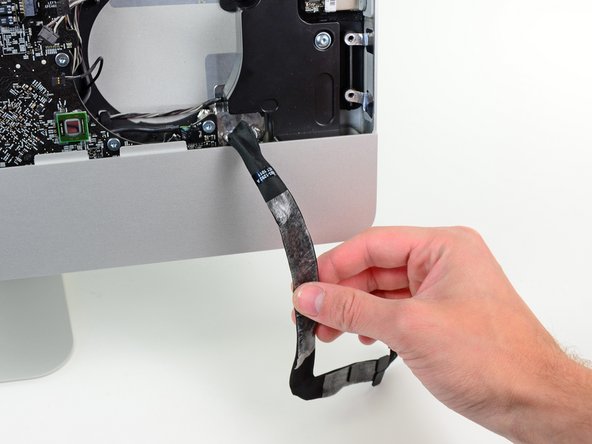
Peel the audio port cable off the front face of the logic board and let it hang down as shown in the second picture.
-
-
-
Remove the following seven screws:
-
Two 7 mm T10 torx screws
-
One 30 mm T10 Torx screw
-
Two 25 mm T10 Torx screws
-
Two 21 mm T10 Torx screws
-
-
-
Remove the following four screws from the power supply:
-
One 9.3 mm T10 coarse-threaded screw
-
One 25 mm T10 coarse-threaded screw
-
Two 22 mm fine-threaded screws
-
Pull the upper right and lower left corners of the power supply away from the rear case to dislodge the mounting posts attached to the power supply's corners.
I agree with kyoder11, no need to remove the power supply. But pay attention to not damage it when pull the logic board.
-
-
-
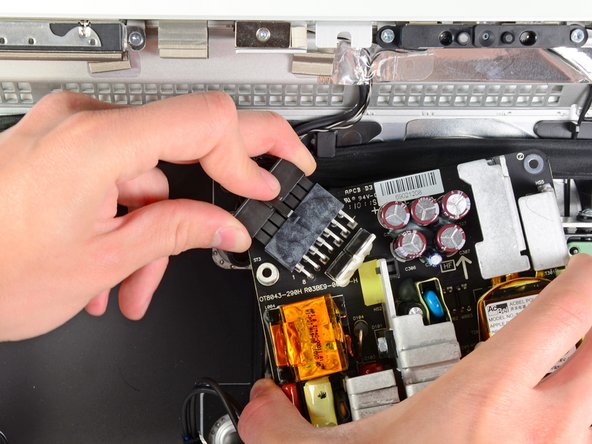
Carefully lift the power supply out of the outer case and rotate it to expose the cable lock as shown, minding the DC-out and AC-in cables still attaching it to the iMac.
-
Disconnect the DC-out cable by depressing the locking mechanism on the connector while you pull the connector away from its socket on the power supply.
-
Once the locking mechanism has cleared the socket, pull the DC-in connector away from the power supply.
-
-
-
Disconnect the AC-In cable by depressing the locking mechanism while pulling the connector away from its socket.
-
Remove the power supply from the outer case.
-
-
-
Remove the plastic wall that is installed directly to the right of the LED driver board.
-
-
-
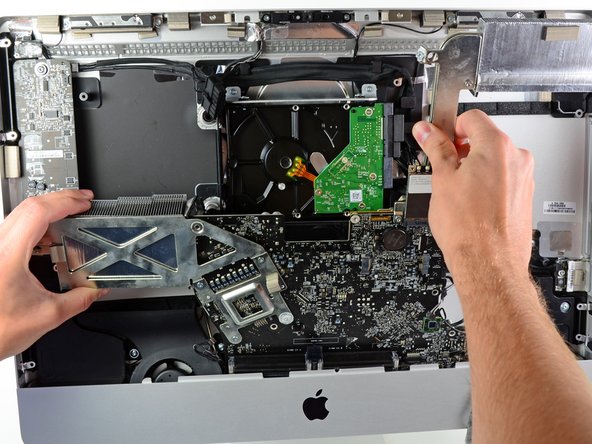
Slightly pull the logic board away from the back of the outer case, then lift it upward to clear the lower front face of the outer case.
Be careful when balancing the mother board here, you can damage the RAM bays if not careful. (Had a friend do this, good by motherboard and iMac.) Just be careful and aware of how you have it sitting.
Before you lift the logic board, remove the infra-red receiver ( have a look at the logic board replacement guide )! It will make your life a lot easier.
Like stated also in the video, it's easier if you put the iMac on its foot again.
This was a great tip. Removing the IR made my life easier when putting the board back in place.
fansntt -
-


To reassemble your device, follow these instructions in reverse order.
To reassemble your device, follow these instructions in reverse order.
Отменить: Я не выполнил это руководство.
Еще один человек закончил это руководство.
