Эта версия возможно содержит некорректные исправления. Переключить на последнюю проверенную версию.
Выберете то, что вам нужно
-
Этот шаг не переведен. Помогите перевести
-
Stick a suction cup near each of the two top corners of the glass panel.
-
If your suction cups refuse to stick, try cleaning both the glass panel and the suction cup with a mild solvent.
-
-
Этот шаг не переведен. Помогите перевести
-
Gently lift the glass panel perpendicular to the face of the LCD enough to clear the steel mounting pins attached along the underside of the top edge of the glass panel.
-
Pull the glass panel away from the lower edge of the iMac and carefully set it aside.
-
-
Этот шаг не переведен. Помогите перевести
-
Remove the eight 8 mm T10 Torx screws securing the display to the outer case.
-
-
Этот шаг не переведен. Помогите перевести
-
Slightly lift the top edge of the display out of the outer case.
-
-
-
Этот шаг не переведен. Помогите перевести
-
Pull the vertical sync cable connector out of its socket on the LED driver board near the top left corner of your iMac.
-
-
Этот шаг не переведен. Помогите перевести
-
Rotate the display out of the outer case enough to disconnect the LED backlight power cable from the LED driver board.
-
-
Этот шаг не переведен. Помогите перевести
-
Grab the plastic pull tab secured to the display data cable lock and rotate it towards upwards.
-
Pull the display data cable straight out of its socket on the logic board.
-
-
Этот шаг не переведен. Помогите перевести
-
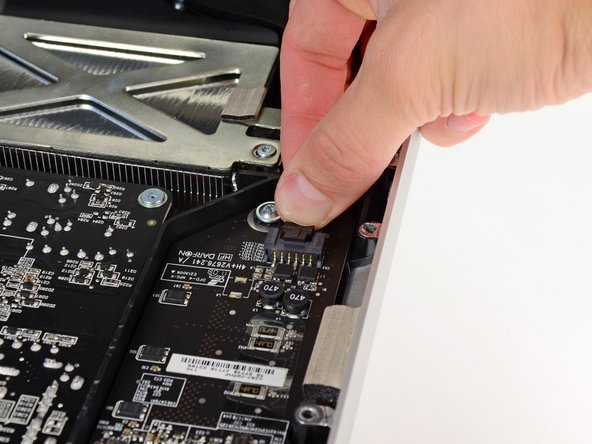
Disconnect the LCD thermal sensor cable connector from its socket on the logic board.
-
-
Этот шаг не переведен. Помогите перевести
-
Carefully pull the display toward the top edge of your iMac and lift it out of the outer case, minding any cables that may get caught.
-
-
Этот шаг не переведен. Помогите перевести
-
Use the tip of a spudger to pry the PRAM battery out of its socket on the logic board.
-


Отменить: Я не выполнил это руководство.
10 участников успешно повторили данное руководство.

2 Комментариев
Is this the same battery and procedure for the mid 2011 27”?
is this the solution of fixing the black screen after press the power bottom behind when starting or restart?