Этот документ имеет более свежие изменения. Перейти к последней непроверенной версии.
Введение
Removing the display requires cutting through the adhesive around the perimeter of the screen. After the adhesive is cut, it cannot be used to re-seal the display in place, so you'll need to apply a new set of adhesive strips.
Выберете то, что вам нужно
-
-
-
If you are re-using your existing display, you must also remove the old adhesive from the back of the display.
-
Peel off the old strips of adhesive using tweezers or your fingers. Start at the bottom and peel upward towards the top of the device.
-
After all the old adhesive is removed, carefully clean the area under the adhesive with 90% (or greater) isopropyl alcohol and a lint-free cloth. Wipe in one direction, not back and forth.
-
-
-
Start with the strip labeled 3 (or 03), which goes on the right vertical side of the rear enclosure.
-
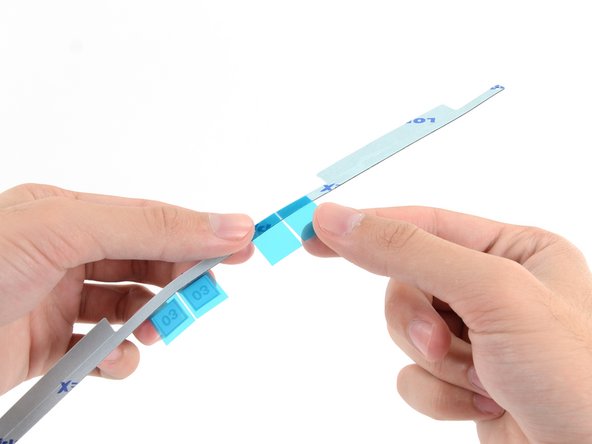
Peel the short piece of backing off the back of the strip.
-
-
-
Insert the tip of a spudger into the hole at the end of the strip from the side that still has a backing on it.
-
-
-
With the spudger still poking through the hole in the adhesive strip, push the spudger tip into the corresponding hole in the frame of the iMac.
-
Using the hole and spudger to anchor the position of the adhesive strip, line the strip up against the right edge, gently pulling up against the spudger to ensure the strip is taut, and stick it onto the frame.
-
-
-
Once you've aligned the bottom half of the adhesive strip, peel the longer piece of backing out from behind the strip.
-
-
-
Align the upper half of the strip with the right edge of the rear enclosure, and stick it down.
-
-
-
Use your finger to smooth Strip 3 along the right edge. Make sure it is neatly aligned with the right side of the frame and that it sits flat.
-
-
-
-
Work your way counter-clockwise around the perimeter of the iMac, adding three more adhesive strips in the same manner:
-
Strip 2 on the top right
-
Strip 1 on the top left
-
Strip 5 on the left vertical
-
-
-
Grasp the red film pull tab on the 4R adhesive strip and pull to remove the backing from the strip.
-
Align the strip on the bottom edge of the rear enclosure, directly to the right of the middle screw on that edge.
-
Run your finger along the length of the adhesive strip to ensure it is straight and unwrinkled, pressing down as you go to adhere the strip to the iMac.
-
-
-
Repeat the previous step for the 4L adhesive strip, placing it along the left half of the bottom edge of the iMac.
-
-
-
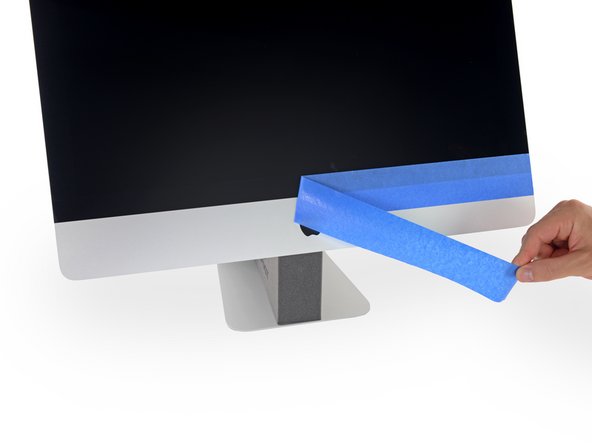
Use painter's tape or masking tape to temporarily secure the bottom edge of the display to the iMac's enclosure.
-
-
-
If you've already verified that your iMac is working correctly and are ready to seal it up, skip to Step 17.
-
Insert the display power cable into its socket on the logic board.
-
-
-
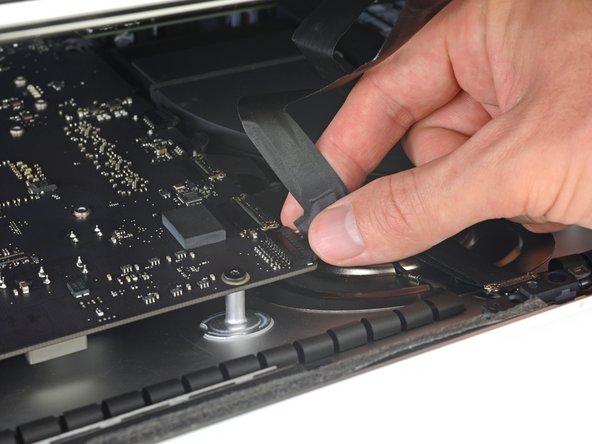
Use a pair of tweezers or your other hand to gently insert the display data cable connector into its socket on the logic board.
-
Secure the metal retaining bracket on the display data cable downwards towards the logic board.
-
-
-
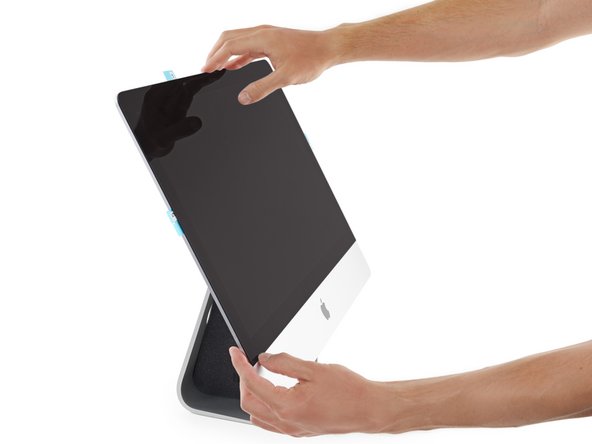
After confirming that your iMac functions properly, disconnect the display cables and carefully lean the display forward.
-
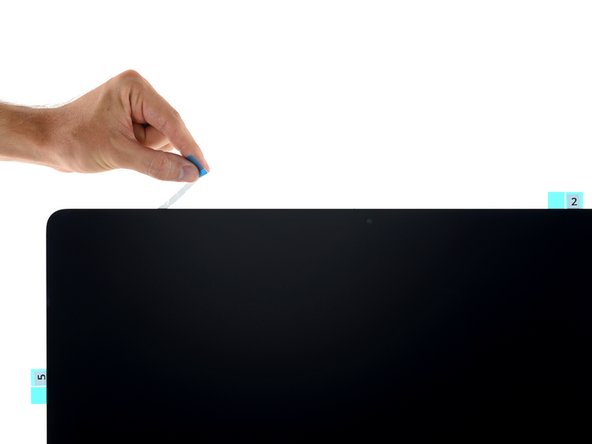
Remove the film from the 4R strip by reaching in from above and pulling the tab straight up from the bottom edge of the display.
-
-
-
Steady the display with one hand as you remove the adhesive liners in the following steps, or rest it lightly against the iMac's enclosure.
-
-
-
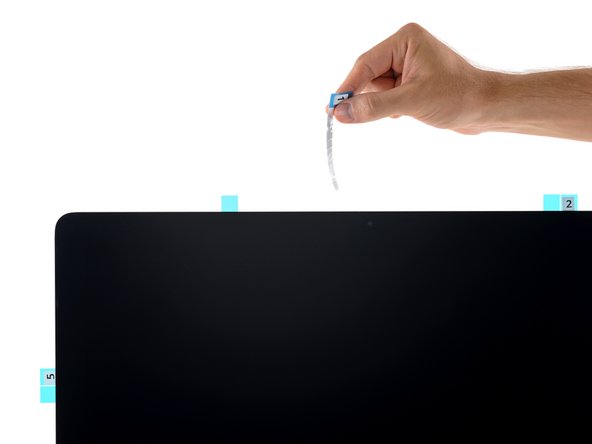
Likewise, remove the protective film from the strip that was paired with Strip 1.
-
-
-
Repeat the previous two steps to remove the protective film from all the remaining adhesive strip pairs (labeled 2, 3, and 5).
-
-
-
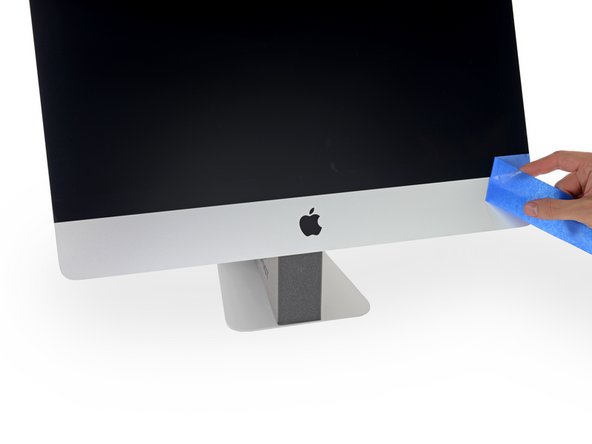
Remove the tape securing the display to the rear enclosure.
-
To ensure a strong bond, carefully tip the iMac flat on its back (with the screen facing straight up) and press carefully but firmly around all four edges of the display.
-


Отменить: Я не выполнил это руководство.
310 участников успешно повторили данное руководство.


33 Комментариев
Good Lord, why does Apple have to make it so difficult to upgrade or repair? There comes a point where design aesthetic just isn't worth it. Magnets, like I believe older iMacs use to attach the front glass, would have made it much easier. I'll take the extra bulk any day.
Have you actually done the replacement? It's actually pretty easy. Apple did everything they could to make it as painless as possible: the old adhesive separates without *any* residue, it doesn't rip apart, it doesn't make a mess. Things align like magic.
True, it could be easier. Like with the old color iMac SD. But since I don't take my iMac apart every day, doing this once or maybe twice in my computer's lifetime is a small price to pay for a *really* slim and good looking device.
I had some issues with steps 21, 22 and 23 ... the tabs would rip off. After the third one I used the plastic card to gently create some space for the strip to escape.
Thank you for this fantastic guide, and all of the iFixit guides! Just finished this replacement using the iFixit Adhesive Strips/iMac Opener tool combo--everything worked very well, except that the iMac Opener tool did not particularly like the broken glass area of the display, which bent the plastic of the "pizza cutter" wheel a little.
.
One bit of helpful advice is to use extreme care when placing the replacement display back into the iMac. Make sure that you do not put the display back in at too great of an angle, or there will be a very noticeable gap at the bottom, between the display glass and the iMac frame. Adhesive strips are not forgiving, and rarely give multiple chances!