Перейти к основному содержанию

iMac Intel 27" EMC 2546 Heat Sink Replacement

Абсолютно необходимое руководство
Это руководство предназначено только для использования в качестве обязательного условия для других руководств. Оно не полностью само по себе.

Выберете то, что вам нужно

  1. iMac Intel 27" EMC 2546 Heat Sink Replacement, Heat Sink: шаг 1, изображение 1 из 3 iMac Intel 27" EMC 2546 Heat Sink Replacement, Heat Sink: шаг 1, изображение 2 из 3 iMac Intel 27" EMC 2546 Heat Sink Replacement, Heat Sink: шаг 1, изображение 3 из 3
    • Remove the four 7.5 mm T8 screws from behind the GPU on the logic board.

    • These screws are set inside large, spring-loaded Phillips #2 screws. To prevent the larger screws from spinning when you loosen the T8 screws, hold them with a fingertip or Phillips #2 screwdriver.

  2. iMac Intel 27" EMC 2546 Heat Sink Replacement: шаг 2, изображение 1 из 1
    • Remove the bracket from behind the GPU heat sink.

  3. iMac Intel 27" EMC 2546 Heat Sink Replacement: шаг 3, изображение 1 из 1
    • Remove four black stickers from the back of the CPU heat sink.

  4. iMac Intel 27" EMC 2546 Heat Sink Replacement: шаг 4, изображение 1 из 1
    • Remove four 12.3 mm T10 screws from the back of the CPU heat sink.

  5. iMac Intel 27" EMC 2546 Heat Sink Replacement: шаг 5, изображение 1 из 3 iMac Intel 27" EMC 2546 Heat Sink Replacement: шаг 5, изображение 2 из 3 iMac Intel 27" EMC 2546 Heat Sink Replacement: шаг 5, изображение 3 из 3
    • Remove the spring plate from behind the CPU heat sink.

    • Lift and remove the backing plate from behind the CPU heat sink. The backing plate has two posts that fit into alignment holes in the logic board.

  6. iMac Intel 27" EMC 2546 Heat Sink Replacement: шаг 6, изображение 1 из 3 iMac Intel 27" EMC 2546 Heat Sink Replacement: шаг 6, изображение 2 из 3 iMac Intel 27" EMC 2546 Heat Sink Replacement: шаг 6, изображение 3 из 3
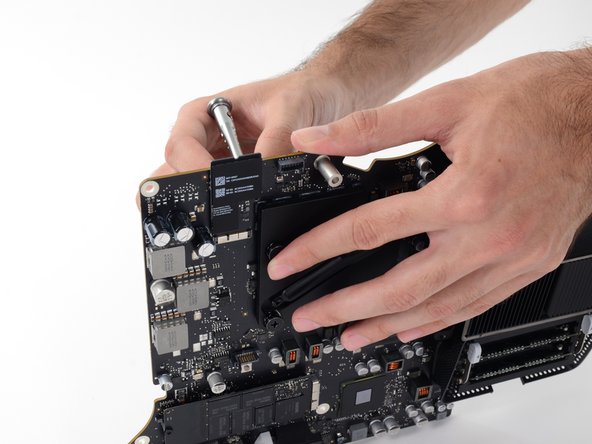
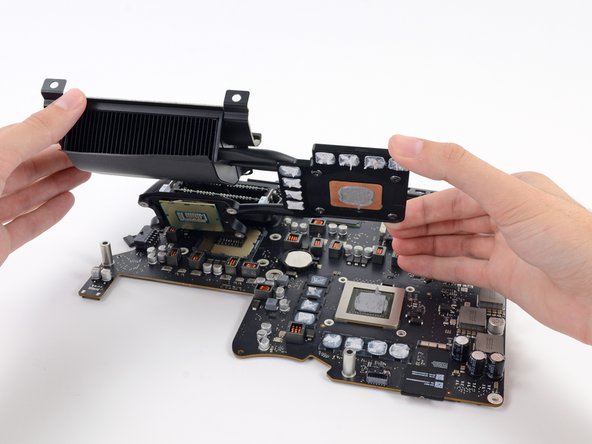
    • Lift the heat sink up from the logic board.

    • The CPU will most likely stick to the heat sink, so be careful about where you put it down.

Заключение

To reassemble your device, follow these instructions in reverse order.

Andrew Optimus Goldheart

Участник с: 10/17/09

502 807 Репутация

Автор 407 руководств

Команда

iFixit Участник iFixit

Staff

135 членов

Автор 16 767 руководств

0 Комментариев

Добавить комментарий

Просмотр статистики:

За последние 24часов: 0

За последние 7 дней: 0

За последние 30 дней: 0

За всё время: 196