Введение
Prerequisite-only to replace the front panel in the third generation iPad 4G.
Выберете то, что вам нужно
Видео обзор
-
-
Heat the iOpener for thirty seconds.
-
Throughout the repair procedure, as the iOpener cools, reheat it in the microwave for an additional thirty seconds at a time.
-
-
-
Remove the iOpener from the microwave, holding it by one of the two flat ends to avoid the hot center.
-
-
-
Fill a pot or pan with enough water to fully submerge an iOpener.
-
Heat the water to a boil. Turn off the heat.
-
Place an iOpener into the hot water for 2-3 minutes. Make sure the iOpener is fully submerged in the water.
-
Use tongs to extract the heated iOpener from the hot water.
-
Thoroughly dry the iOpener with a towel.
-
Your iOpener is ready for use! If you need to reheat the iOpener, heat the water to a boil, turn off the heat, and place the iOpener in the water for 2-3 minutes.
-
-
-
If your display glass is cracked, keep further breakage contained and prevent bodily harm during your repair by taping the glass.
-
Lay overlapping strips of clear packing tape over the iPad's display until the whole face is covered.
-
Do your best to follow the rest of the guide as described. However, once the glass is broken, it will likely continue to crack as you work, and you may need to use a metal prying tool to scoop the glass out.
-
-
Инструмент, используемый на этом этапе:Safety Glasses$3.19
-
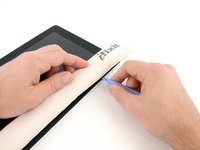
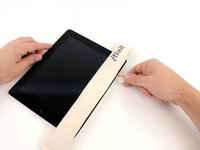
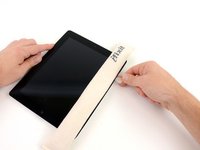
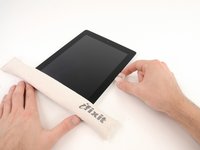
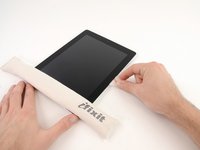
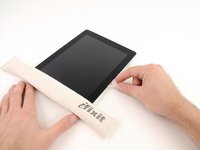
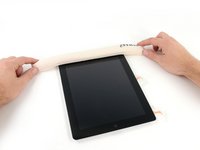
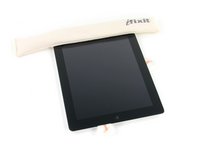
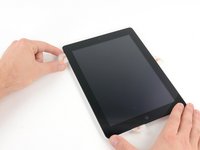
Lay the iOpener flat on the right edge of the iPad, smoothing it out so that there is good contact between the surface of the iPad and the iOpener.
-
Let the bag sit on the iPad for approximately 90 seconds before attempting to open the front panel.
-
-
-
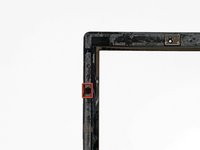
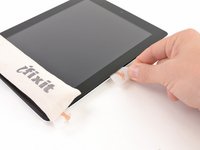
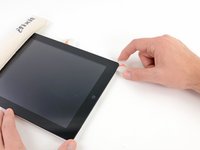
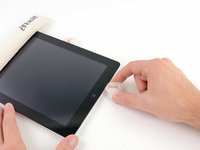
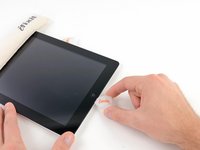
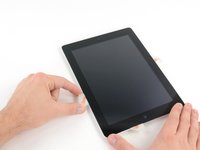
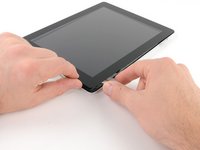
There is a small gap in the iPad's adhesive ring in the upper right corner of the iPad, approximately 2.0 inches (~5 cm) from the top of the iPad. You are going to exploit this weakness.
-
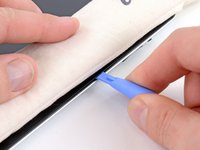
Align the tool with the mute button. Insert the tip of a plastic opening tool into the gap between the front glass and the plastic bezel. Just insert the very tip of the opening tool, just enough to widen the crack.
-
-
-
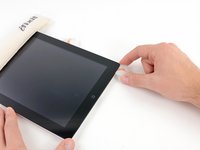
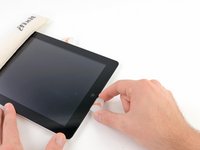
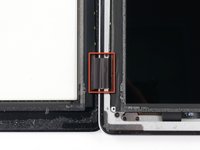
Make sure you place the tool in the proper spot—between the plastic display bezel and the front panel glass.
-
-
-
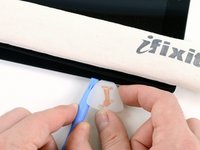
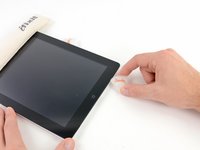
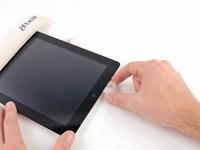
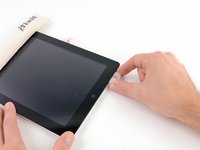
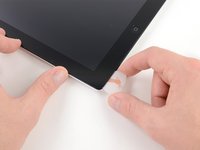
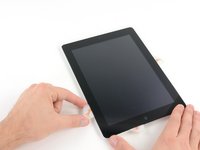
Keeping the tip of the plastic opening tool wedged between the front glass and plastic bezel, slide a plastic opening pick in the gap, right next to the plastic opening tool.
-
-
-
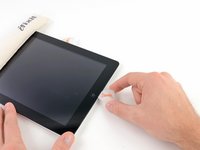
Remove the plastic opening tool from the iPad, and push the opening pick further underneath the front glass to a depth of ~0.5 inches.
-
-
-
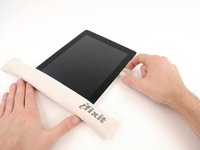
While you work on releasing the adhesive on the right side of the iPad, reheat the iOpener, and replace it on the bottom edge of the iPad.
-
-
-
While the bottom edge is being heated by the iOpener, begin releasing the adhesive from the right edge of the iPad.
-
Slide the opening pick down along the edge of the iPad, releasing the adhesive as you go.
-
-
-
-
If the opening pick gets stuck in the adhesive, "roll" the pick along the side of the iPad, continuing to release the adhesive.
-
-
-
Before removing the first opening pick from the bottom corner of the iPad, insert a second pick under the right edge of the front glass to keep the adhesive from re-adhering.
-
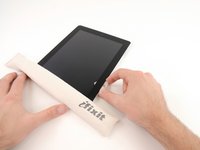
Re-heat the iOpener, and move it to the top edge of the iPad.
-
-
-
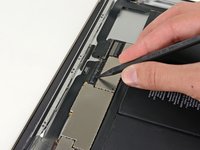
You will have to release the adhesive securing the antenna to the front panel without damaging the delicate parts attaching the antenna to the bottom of the iPad. Follow the next steps carefully.
-
-
-
Slide the opening pick around the bottom right corner of the iPad, releasing the adhesive there.
-
-
-
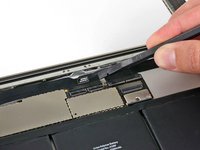
Slide the tip of the opening pick along the bottom edge of the iPad, releasing the adhesive over the Wi-Fi antenna.
-
-
-
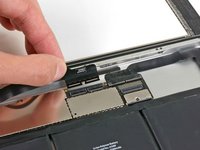
Once you have moved past the Wi-FI antenna (approximately 3" (75 mm) from the right edge, or right next to the home button) re-insert the opening pick to its full depth.
-
Slide the pick to the right, releasing the adhesive securing the Wi-Fi antenna to the front glass.
-
The antenna is attached to the bottom of the iPad via screws and a cable. This step detaches the antenna from the front panel, ensuring that when you remove the panel, the antenna will not be damaged.
-
-
-
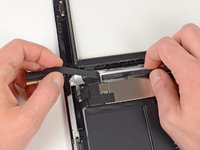
Continue releasing the adhesive along the bottom of the iPad, pulling the opening pick out far enough to go around the home button, and re-inserting it to a depth of 1/2 inch (10 mm) once the pick is past the home button.
-
-
-
Continue releasing the adhesive all the way along the bottom edge of the iPad.
-
Leave the opening pick wedged underneath the front glass near the home button.
-
-
-
Reheat the iOpener in the microwave and set it on the left edge of the iPad to start warming the adhesive in that section.
-
-
-
Slide the opening pick along the top edge of the iPad, pulling it out slightly to go around the front-facing camera bracket.
-
The adhesive along this section is very thick, and a fair amount of force may be required. Work carefully and slowly, making sure to not slip and damage yourself or your iPad.
-
-
-
Continue releasing the adhesive along the top edge of the iPad, and slide the opening pick around the top left corner.
-
-
-
Slide the opening pick along the left edge of the iPad, releasing the adhesive as you go. The adhesive is thin here due to the digitizer along the whole left side. Make sure the pick is not too deep (max 1/2 inch) 10 mm to prevent damaging the digitizer.
-
-
-
Using the opening pick that is still underneath the bottom edge of the iPad, release the adhesive along the bottom left corner.
-
-
-
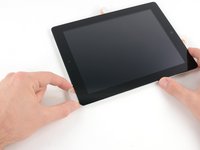
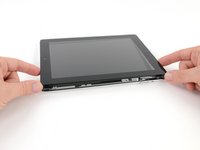
Using one of the opening picks, pry up the bottom right corner of the iPad and grab it with your fingers.
-
-
Инструмент, используемый на этом этапе:Microfiber Cleaning Cloths$3.99
-
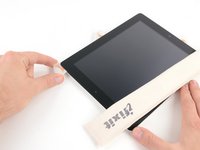
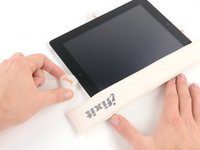
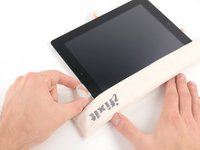
Holding the iPad by the top and bottom right corners, rotate the front glass away from the iPad.
-
-
-
Remove the four 2 mm Phillips #00 screws securing the LCD to the aluminum frame.
-
-
-
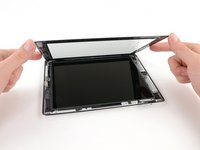
Using a plastic opening tool or a spudger, lift the right edge of the LCD out of the iPad.
-
Rotate the LCD along its left edge and lay it down on top of the front panel.
-
-
-
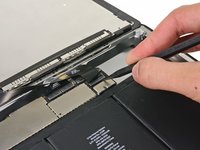
Using the tip of a spudger, peel back the piece of tape covering the LCD ribbon cable connector.
-
-
Инструмент, используемый на этом этапе:Tweezers$4.99
-
Flip up the retaining flap on the LCD ribbon cable ZIF connector.
-
Using your fingers or a pair of tweezers, pull the LCD ribbon cable from its socket on the logic board.
-
-
-
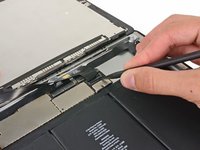
Flip up the retaining flap on both of the digitizer ribbon cable ZIF connectors.
-
-
-
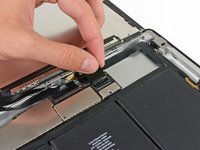
Use the flat end of a spudger to loosen the adhesive underneath the digitizer ribbon cable.
-
Very carefully pull the digitizer ribbon cable straight out of its sockets on the logic board.
-
-
-
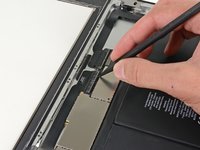
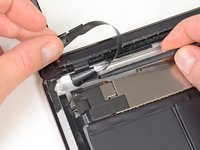
Peel back the digitizer ribbon cable and use the flat end of a spudger to release the adhesive securing the cable to the rear aluminum case.
-
-
-
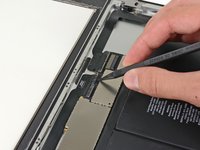
Using your fingers, pull the digitizer ribbon cable out of its recess in the aluminum frame.
-
Remove the front panel from the iPad.
-


To reassemble your device, follow these instructions in reverse order.
To reassemble your device, follow these instructions in reverse order.
Отменить: Я не выполнил это руководство.
97 человек успешно провели ремонт по этому руководству.

4 Комментариев
I would recommend that in cases of replacing shattered screens, that you tape the front panel glass with clear packing tape using overlapping strips, before you begin. This helps to ensure that the panel stays intact, and reduces the chances of puncturing the digitizing layer, and damaging the LCD upon removal.
You want to use clear tape so that you are able to see how any of the glass remnants are shifting during removal.
Comments from a fresh iPad4 WiFi repair.
* Get the assembled panel with the camera bracket and home button. It's worth it.
* These instructions (for the 3?) don't account for the home button cable. It runs along the bottom edge next to the left corner. It's almost impossible to not sever during removal. I have some photos of it I'll try to post when I can figure out how.
* Have light compressed air available to make sure the LCD is clean before reassembling.
* Test fit before pulling off the adhesive strips. I had to do some minor aluminum straightening because of a corner drop, almost blew it had I not test fitted and found this out before sticking it down.
* Test the display and home button before sticking the new glass down, make sure it works, and is all clean.
* I second recommendations for clear tape. Mine was so shattered on the left edge, I had to peel it out in chunks. Tape helped a lot.
* I needed 3 hours for the whole process.
Good luck, and take your time. It can be done!
One problem with the guide saying "To reassemble your device, follow these instructions in reverse order" is that some of the trivial reassembly steps get missed. Like the fact that for repairs involving disconnecting the LCD, you may need to hold the home and power buttons simultaneously for 10 seconds to get the display to light up after reconnecting items. I had tried multiple times to get the display to function, and only after doing this step did it finally come on. If this info is somewhere in the guide, or in the iFixit Front Panel Assembly package, I must have missed it. I just wish I had found this advice BEFORE I managed to break the flap on the LCD ZIF connector through repeated attempts to seat the cable "properly"...