Эта версия возможно содержит некорректные исправления. Переключить на последнюю проверенную версию.
Выберете то, что вам нужно
-
-
Если стекло дисплея разбито, то в процессе ремонта важно предотвратить его дальнейшее разрушение (которое, кстати, может повлечь за собой серьёзные травмы). Заклейте стекло клейкой лентой.
-
Наложите столько слоёв прозрачной ленты, сколько потребуется. Дисплей должен быть заклеен полностью.
-
-
Этот шаг не переведен. Помогите перевести
-
Remove the two Phillips #00 screws from the dock-connector end of the iPhone.
-
-
Этот шаг не переведен. Помогите перевести
-
Remove the metal handle from the suction cup. It's easier and safer to grip the suction cup's base instead of the metal handle.
-
Use a small suction cup near the Home button to gently pull up the lower portion of the iPhone's display assembly.
-
-
Этот шаг не переведен. Помогите перевести
-
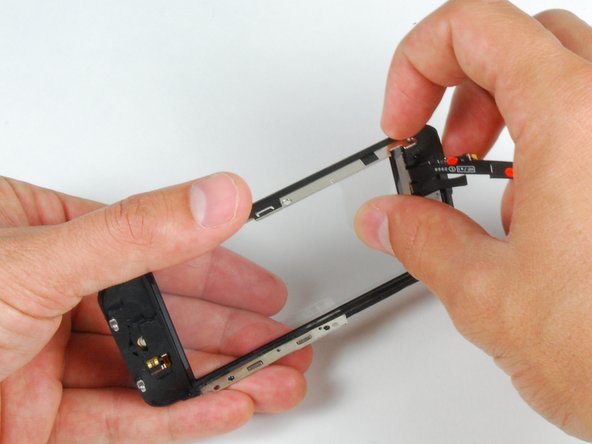
Rotate the display assembly up until it is at an angle of approximately 45 degrees.
-
-
Этот шаг не переведен. Помогите перевести
-
Continue to hold the display assembly with one hand, and use your other hand and a spudger to disconnect the black ribbon cable labeled "1."
-
Ribbon cable "1" is connected with a plug style connector. The block at the end of the cable is the plug which is simply pushed into a socket on the circuit board. No other locking mechanism is used.
-
-
Этот шаг не переведен. Помогите перевести
-
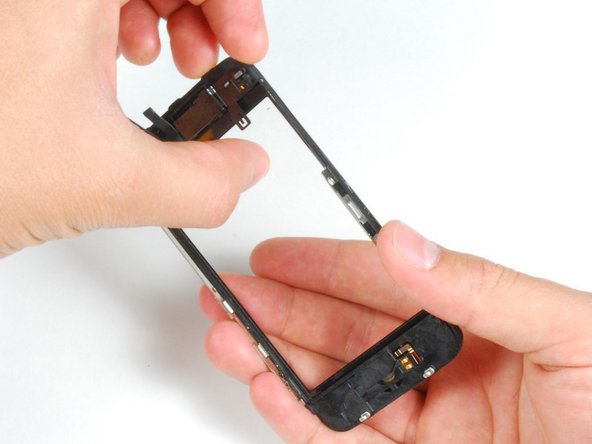
Rotate the display assembly up until it is roughly vertical. This will allow easier access for disconnecting the remaining cables.
-
Use a spudger to disconnect the black ribbon cable labeled "2."
-
-
Этот шаг не переведен. Помогите перевести
-
Slide the ribbon cable out of the connector, and remove the display assembly from the iPhone.
-
-
Этот шаг не переведен. Помогите перевести
-
Remove the single Phillips #00 screw from the corner of the display assembly.
-
-
Этот шаг не переведен. Помогите перевести
-
Remove the two Phillips #00 screws from the right side of the display assembly.
-
-
-
Этот шаг не переведен. Помогите перевести
-
Turn the display around, and if there is a thin strip of black tape on the edge of the display assembly, carefully peel it up.
-
-
Этот шаг не переведен. Помогите перевести
-
Remove the three Phillips #00 screws from the left side of the display assembly.
-
-
Этот шаг не переведен. Помогите перевести
-
Turn the display assembly over and again carefully insert a metal spudger between the two metal rails along the edge of the display assembly. Gently rotate the spudger to lift the LCD up from the glass.
-
-
Этот шаг не переведен. Помогите перевести
-
Separate the LCD and glass by sliding the LCD panel away from the ribbon cables on the glass.
-
-
Этот шаг не переведен. Помогите перевести
-
If the glass has shattered at the top or bottom be especially patient and gentle when removing fragments. In extreme cases you may have to pick off any glass shards that remain glued to the plastics.
-
Using a heat gun or hairdryer, heat the top left area of the touch screen.
-
Use your fingernails to slowly lift up the left corner. The touch screen plastics are held to the touch screen with adhesive. It may take some work to free the corners.
-
Heat and repeat for the right side.
-
-
Этот шаг не переведен. Помогите перевести
-
Once the top is free, use the heat gun to heat the sides of the touch screen.
-
Use a spudger to free the sides of the touch screen plastics.
-
-
Этот шаг не переведен. Помогите перевести
-
Heat the bottom corners with the heat gun.
-
Again, use your fingernails to free the corners.
-
Remove the touch screen plastics from the touch screen.
-
-
Этот шаг не переведен. Помогите перевести
-
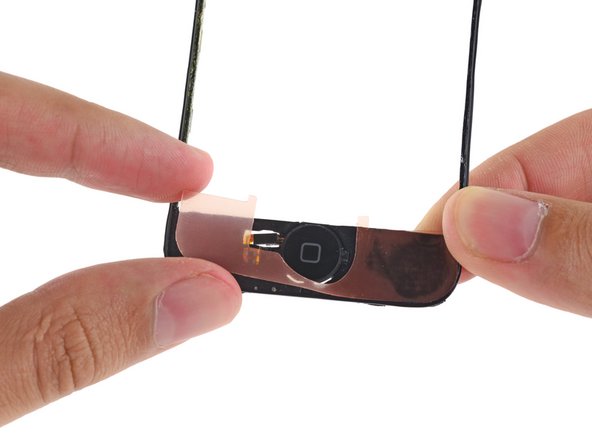
In order to adhere the new panel, peel as much of the existing adhesive off of the front panel frame as you can.
-
-
Этот шаг не переведен. Помогите перевести
-
Place custom fit adhesive strips or double stick tape on the upper area of the front panel plastics.
-
Use the flat end of a spudger to press the adhesive strips to the plastic frame.
-
-
Этот шаг не переведен. Помогите перевести
-
Place the second adhesive strip or double stick tape on the home button end of the front panel frame.
-
Run the flat end of a spudger over the strip to stick it down and push bubbles out from under the sticker.
-
-
Этот шаг не переведен. Помогите перевести
-
Using the tip of a spudger to start, peel the adhesive backings off of the strips on the front panel plastic.
-
-
Этот шаг не переведен. Помогите перевести
-
Peel the protective plastic off of the inside of the front panel glass.
-
-
Этот шаг не переведен. Помогите перевести
-
Fold the front panel cables down toward the home button recess to get them out of the way.
-
-
Этот шаг не переведен. Помогите перевести
-
Ensuring that the upper cables are folded clear, align the top of the front glass with the front panel frame.
-
-
Этот шаг не переведен. Помогите перевести
-
Press the front panel and front panel frame together, ensuring the the home button ends are aligned.
-
-
Этот шаг не переведен. Помогите перевести
-
Firmly press both ends of the phone to ensure the attachment of the adhesive.
-


Отменить: Я не выполнил это руководство.
479 участников успешно повторили данное руководство.


17 Комментариев
Success! It took me quite abit longer than some of those above, but in under 3hrs, it was complete. I am totally satisfied; the only potential problem I've found is that the rubber originally covering the front panel glass and the front panel plastic on the side--i.e., the rubber filling in the gap between the glass and the metal bevel/bezel?sp?--had been partially destroyed during the repair. Now there are spots at the top and bottom where dust could potentially get into the internals more easily. As it is, I opened my phone and it was extremely dusty, so that if it worked well with that kind of dust, I suppose it'll be alright with some more. Besides, now I know how to open it up and clean it! Thanks iFixit! You saved me $140, which is what Apple would have charged to fix my screen.
Цитата от(из) Chelsea:
Everything worked except now my home button does not work, help please.
Is the front panel completely snapped into place? I believe there are some contacts on the front panel that have to touch contacts on the inside of the phone for the home button to work.
I have followed all the steps and the phone has turned on, BUT it wont let me slide to open. HELP!!
I'm assuming Sally found the problem to this issue of the phone working but I just had the same problem of no touch screen even though the phone and screen were working otherwise.
Re-open the phone and ensure Cable #2 just isn't attached properly. If this is loose or not correctly connected then the screen will come on but the touch screen won't work.
andrew -