Введение
Use this guide to replace the headphone jack cable which also contains the upper microphone and electronic portions of the volume buttons and silent switch.
Выберете то, что вам нужно
-
-
Power off your iPhone before beginning disassembly.
-
Your phone's rear cover may have two #000 Phillips screws or Apple's 5-Point "Pentalobe" screws. Check which screws you have, and ensure you also have the correct screwdriver in order to remove them.
-
Remove the two 3.6 mm Pentalobe or Phillips #000 screws next to the dock connector.
-
-
-
Pinch the rear panel with your fingers, and lift it away from the iPhone. Alternatively, use a Small Suction Cup .
-
-
-
Remove the single 1.5 mm Phillips screw securing the battery connector to the logic board (if present).
-
-
-
Use the edge of a plastic opening tool to gently pry the battery connector up from its socket on the logic board.
-
Remove the metal clip covering the antenna connector.
-
-
-
Pull up on the exposed clear plastic tab to peel the battery off the adhesive securing it to the iPhone.
-
If there's any alcohol solution remaining in the phone, carefully wipe it off or allow it to air dry before installing your new battery.
-
Remove the battery.
-
Before reassembly, clean metal-to-metal contact points with a de-greaser such as windex. The oils from your fingers have the potential to cause wireless interference issues.
-
Perform a hard reset after reassembly. This can prevent several issues and simplify troubleshooting.
-
-
-
Remove the two 1.8 mm Phillips screws securing the dock connector cable to the logic board.
-
Remove the thin metal dock connector cable cover.
-
-
-
Use the edge of a plastic opening tool to pry the dock cable up from its socket on the logic board.
-
-
-
Peel the dock connector cable off the adhesive securing it to the logic board and the side of the speaker enclosure.
-
-
-
Remove the 1.6 mm Phillips screw securing the pressure contact to the logic board near the vibrator.
-
Remove the pressure contact.
-
-
-
Use the edge of a plastic opening tool to pry the cellular antenna cable up from its socket on the logic board.
-
De-route the cellular antenna cable out from under the metal fingers attached to the logic board.
-
-
-
Remove the following five screws:
-
Three 1.3 mm Phillips screws
-
One 1.5 mm Phillips screw
-
One 2.4 mm Phillips screw
-
-
-
-
Lift the cable cover from its edge nearest the top of the iPhone.
-
Pull the cable cover tabs out of their slots cut into the EMI shield on the logic board and remove it from the iPhone.
-
-
-
Use the edge of a plastic opening tool to pry the rear camera connector up from its socket on the logic board.
-
Remove the rear camera from the iPhone.
-
-
-
Disconnect the five cables near the top of the logic board in the following order:
-
Headphone jack/volume button cable
-
Power button cable
-
Front facing camera cable
-
Digitizer cable
-
Display data cable
-
To disconnect the cables, use the edge of a plastic opening tool to gently lift their connectors up and out of the sockets on the logic board.
-
-
-
Lift the small grounding clip up off the logic board and remove it from the iPhone.
-
-
-
Use the edge of a plastic opening tool to disconnect the Wi-Fi antenna cable connector from the logic board.
-
-
-
Remove the 2.5 mm Phillips #000 screw securing the logic board near the power button.
-
Remove the 4.8 mm standoff screw near the headphone jack.
-
-
-
Remove the 3.4 mm Phillips screw near the vibrator motor.
-
Remove the two 3.6 mm standoff screws along the side of the logic board nearest the battery opening.
-
-
-
Carefully lift the logic board from the end closest to the speaker enclosure and slide it away from the top edge of the iPhone.
-
Remove the logic board.
-
-
-
Use the edge of a plastic opening tool to carefully pry the metal front facing camera retainer away from the case of your iPhone.
-
Remove the front facing camera retainer.
-
-
-
Use the edge of a plastic opening tool to peel the upper antenna off the headphone jack.
-
-
-
Use the edge of a plastic opening tool to gently move the top antenna contact away from the headphone jack.
-
-
-
Use the edge of a plastic opening tool to peel the top microphone away from the outer case.
-
Pull the body of the headphone jack away from the top edge of the iPhone.
-
-
-
Remove the four 1.6 mm Phillips screws securing the volume button and silent switch brackets to the outer case.
-
-
-
Carefully peel the headphone jack/volume button cables off the adhesive securing them to the rear case.
-
-
-
Gently pull the silent switch bracket away from the outer case and peel its small ribbon cable off the inside of the iPhone.
-
-
-
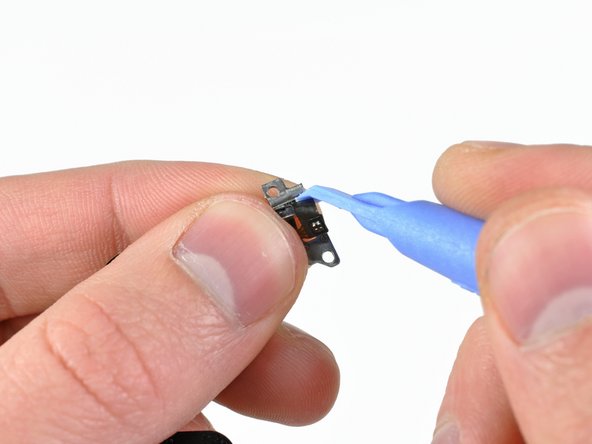
If you are replacing the headphone jack cable, use the edge of a plastic opening tool to remove the steel brackets for the volume buttons and the silent switch.
-
Transfer these steel brackets to the new headphone jack cable.
-


To reassemble your device, follow these instructions in reverse order.
To reassemble your device, follow these instructions in reverse order.
Отменить: Я не выполнил это руководство.
28 участников успешно повторили данное руководство.
