Выберете то, что вам нужно
-
-
Используйте пластиковую лопатку для очистки ушного динамика от клейкой поролоновой прокладки.
-
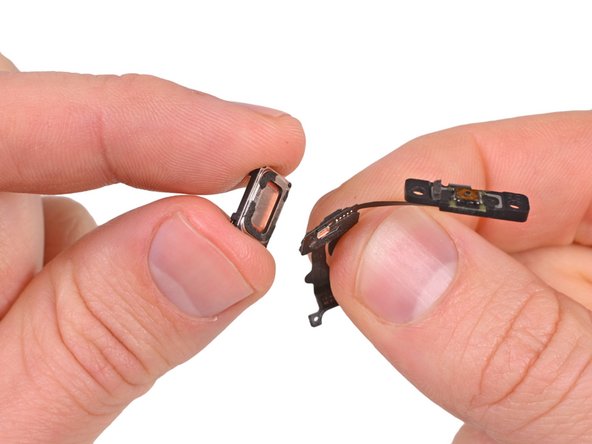
Удалите ушной динамик.
-
-

Почти готово!
To reassemble your device, follow these instructions in reverse order.
Заключение
To reassemble your device, follow these instructions in reverse order.
Особая благодарность этим переводчикам:
en ru
100%

Tobias Isakeitпомогает нам починить мир! Хотите внести свой вклад?
Начните переводить ›

Go ahead and order a new speaker - its nearly impossible not to break the foam
nweeks - Ответить
The foam can be replaced by similar double side tape.
davidsotl -
Tools plus parts plus shipping (FedEx) costs me about $100. Probably would cost about the same to have some do it for me, but what's the fun in that! The small magnetic mat is a must have, so handy.
davidsotl - Ответить
Agree with "nweeks" on it being impossible not to break the foam. However, I reinstalled without the foam. Since the earpiece is wrapped in the ribbon cable and it's also very securely contained in the recess, I can't see the foam adding a ton of value. My phone worked fine after I reused the earpiece without any new foam.
Song - Ответить
Its really easy to remove the foam and tape intact and re-use. grab an exacto blade and slice in between the flex cable and foam, once you have the edge started it will sparate pretty easily. dont worry about damaging the cable, you're replacing that anyway.
Andrew - Ответить
I tried this and it worked easily. Thanks for the tip.
davisyang -
Does it matter which orientation the earpiece gets reattached to the cable?
Robert Lindsley - Ответить
The second piece of tape was missing on the new speaker I purchased. The speaker buzzes for voice except for loud/slow speaking.
wmarkwitherspoon - Ответить
On reassembly, fix the earphone speaker before the top sensor assembly. The first step is to glue the Power and Sensor Cable down on the iPhone base. Then put the earphone speaker on top of the cable, oriented as in the photos. Then bend the cable over the speaker and reassemble the top sensor assembly.
gregm - Ответить
Note: be sure that the foam on your brand-new replacement sticker is centered properly! Mine was originally glued down onto the speaker improperly - off-center. This made the foam touch the actual speaker diaphragm instead of just sitting on the case, and made it extremely quiet - almost inaudible. It took two tear-downs for me to think of trying to re-seat the foam, but it immediately fixed the problem.
jil24 - Ответить