Эта версия возможно содержит некорректные исправления. Переключить на последнюю проверенную версию.
Выберете то, что вам нужно
-
Этот шаг не переведен. Помогите перевести
-
Remove the two 3.4 mm P2 Pentalobe screws on the bottom edge of the iPhone, on either side of the Lightning connector.
-
-
Этот шаг не переведен. Помогите перевести
-
Pull the blue handle backwards to unlock the Anti-Clamp's arms.
-
Slide the arms over either the left or right edge of your iPhone.
-
Position the suction cups near the bottom edge of the iPhone just above the home button—one on the front, and one on the back.
-
Squeeze the cups together to apply suction to the desired area.
-
-
Этот шаг не переведен. Помогите перевести
-
Pull the blue handle forwards to lock the arms.
-
Turn the handle clockwise 360 degrees or until the cups start to stretch.
-
Insert an opening pick under the screen when the Anti-Clamp creates a large enough gap.
-
Skip the next three steps.
-
-
Этот шаг не переведен. Помогите перевести
-
If you don't have an Anti-Clamp, follow the next three steps to use a suction handle.
-
Apply mild heat to the lower edge of the iPhone using an iOpener or hair dryer for about a minute.
-
-
Этот шаг не переведен. Помогите перевести
-
Apply a suction cup to the lower left corner of the display assembly.
-
Take care not to place the suction cup over the home button.
-
-
Этот шаг не переведен. Помогите перевести
-
Pull up on the suction cup with firm, constant pressure to create a slight gap between the front panel and rear case.
-
-
Этот шаг не переведен. Помогите перевести
-
Place the flat edge of a spudger into the gap between the screen and rear case, directly above the headphone jack.
-
-
Этот шаг не переведен. Помогите перевести
-
Twist the spudger to widen the gap between the front panel assembly and the rest of the phone.
-
-
Этот шаг не переведен. Помогите перевести
-
Insert the flat end of the spudger on the left side of the phone, between the display assembly and rear case.
-
Slide the spudger up the side of the phone to separate the adhesive and pop the clips free.
-
-
Этот шаг не переведен. Помогите перевести
-
Remove the spudger and reinsert it on the bottom edge, where you pried the phone open.
-
Slide the spudger to the right, along the bottom edge of the phone.
-
-
Этот шаг не переведен. Помогите перевести
-
Slide the spudger up the right side to continue separating the adhesive and popping the display clips free from the iPhone.
-
-
Этот шаг не переведен. Помогите перевести
-
Use the suction cup to open the display, breaking the last of the adhesive.
-
-
Этот шаг не переведен. Помогите перевести
-
Pull up on the nub on the top side of the suction cup to remove it from the front panel.
-
-
Этот шаг не переведен. Помогите перевести
-
Gently grasp the display assembly and lift it up to open the phone, using the clips at the top of the front panel as a hinge.
-
Open the display to about a 90º angle, and lean it against something to keep it propped up while you're working on the phone.
-
Add a rubber band to keep the display securely in place while you work. This prevents undue strain on the display cables.
-
-
Этот шаг не переведен. Помогите перевести
-
Remove two Phillips screws securing the battery connector bracket, of the following lengths:
-
One 2.9 mm screw
-
One 2.2 mm screw
-
-
Этот шаг не переведен. Помогите перевести
-
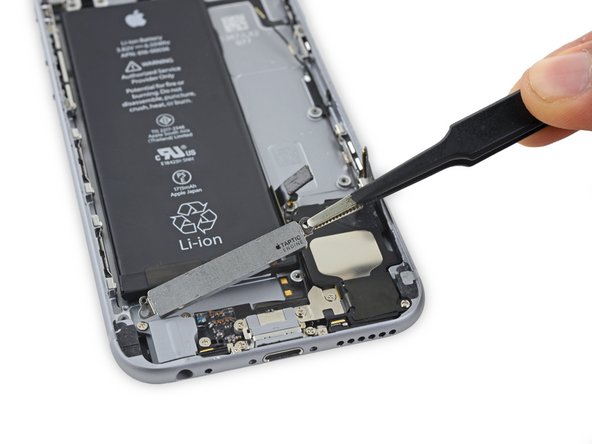
Use the point of a spudger to disconnect the battery connector by prying it straight up from the logic board.
-
-
Этот шаг не переведен. Помогите перевести
-
Push the battery connector away from the logic board until it stays separated from its socket, so as to avoid any accidental connection to the battery while you work.
-
-
Этот шаг не переведен. Помогите перевести
-
Remove the following four Phillips screws securing the display cable bracket:
-
Three 1.2 mm screws
-
One 2.8 mm screw
-
-
Этот шаг не переведен. Помогите перевести
-
Use a spudger or a clean fingernail to disconnect the front camera flex cable by prying it straight up from its socket on the logic board.
-
-
Этот шаг не переведен. Помогите перевести
-
Disconnect the digitizer cable by prying it straight up from its socket on the logic board.
-
-
Этот шаг не переведен. Помогите перевести
-
Disconnect the display cable by prying it straight up from its socket on the logic board.
-
-
Этот шаг не переведен. Помогите перевести
-
Use the flat end of a spudger to disconnect the rear camera from its socket on the logic board.
-
-
-
Этот шаг не переведен. Помогите перевести
-
Remove the following two Phillips screws over the rear camera bracket:
-
One 1.6 mm screw
-
One 2.0 mm screw
-
-
Этот шаг не переведен. Помогите перевести
-
Insert a spudger to the side of the camera, between the rear case and the camera module.
-
Gently pry up on the camera to nudge it out from its housing.
-
-
Этот шаг не переведен. Помогите перевести
-
Insert a SIM card eject tool or a paperclip into the small hole in the SIM card tray.
-
Press to eject the tray.
-
-
Этот шаг не переведен. Помогите перевести
-
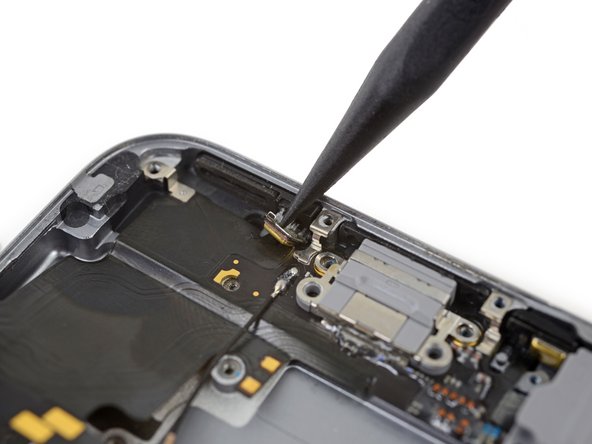
Remove the two 2.3 mm Phillips screws securing the upper component cable connector bracket.
-
-
Этот шаг не переведен. Помогите перевести
-
Remove the following five Phillips screws securing the top left Wi-Fi antenna:
-
Two 1.5mm screws
-
One 2.3 mm screw
-
One 1.9 mm screw
-
One 2.0 mm screw
-
-
Этот шаг не переведен. Помогите перевести
-
Use the flat end of a spudger to disconnect the audio control cable from its socket on the logic board.
-
-
Этот шаг не переведен. Помогите перевести
-
Use the pointed tip of a spudger to disconnect the antenna cable from its socket on the upper right corner of the logic board.
-
-
Этот шаг не переведен. Помогите перевести
-
Use the pointed tip of a spudger to disconnect the antenna cable from its socket on the lower left corner of the logic board.
-
-
Этот шаг не переведен. Помогите перевести
-
Insert the flat end of a spudger underneath the Lightning connector ribbon cable. Lift up to disconnect it from its socket on the logic board.
-
-
Этот шаг не переведен. Помогите перевести
-
Gently pull up on the antenna cable to de-route it from the two clips on the right side of the logic board.
-
-
Этот шаг не переведен. Помогите перевести
-
Remove the 1.3 mm Phillips screw securing the NFC bracket to the logic board.
-
-
Этот шаг не переведен. Помогите перевести
-
Remove the following two Phillips screws:
-
One 2.5 mm screw at the top of the logic board
-
One 1.4 mm screw set into the upper edge of the rear case
-
-
Этот шаг не переведен. Помогите перевести
-
Remove the final three screws securing the logic board to the rear case:
-
One 1.9 mm Phillips screw
-
One 2.5 mm hex nut
-
One 1.8 mm Phillips screw
-
-
Этот шаг не переведен. Помогите перевести
-
Insert an opening pick below the lower edge of the logic board, between the board and the loudspeaker.
-
Use the opening pick to gently lift the logic board out of its housing.
-
Remove the logic board.
-
-
Этот шаг не переведен. Помогите перевести
-
Remove the two 1.5 mm Phillips screws holding the Taptic Engine in place.
-
Remove the Taptic Engine.
-
-
Этот шаг не переведен. Помогите перевести
-
Use tweezers to peel up the tips of the battery adhesive strips at the lower edge of the battery.
-
-
Этот шаг не переведен. Помогите перевести
-
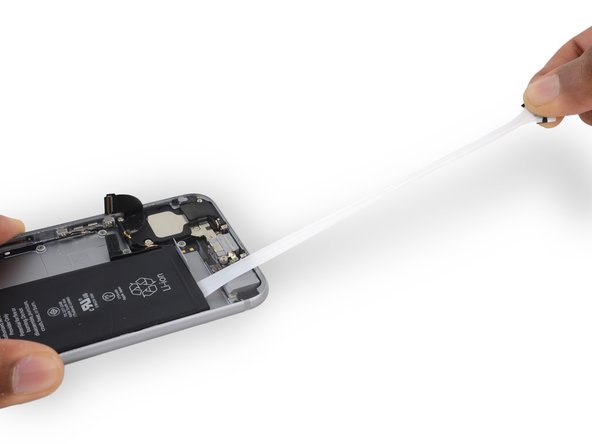
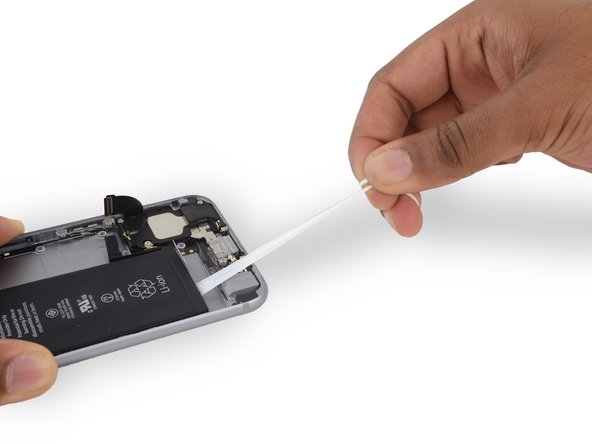
Pull one of the adhesive strips straight out, towards the bottom of the iPhone.
-
For best results, pull the strip at a 60º angle or less.
-
Continue pulling until the strip is fully removed.
-
If one of the adhesive strips breaks under the battery during this procedure, and cannot be retrieved, remove the remaining strip, and then skip to Step 48.
-
-
Этот шаг не переведен. Помогите перевести
-
If you successfully removed all three adhesive strips, move on to the next step. Otherwise, you will need to pry the battery from the rear case.
-
Prepare an iOpener and apply it to the back of the rear case, directly over the battery. Alternatively, you can apply heat using a heat gun or hair dryer.
-
After about a minute, flip the phone over and use a plastic card to break up any remaining adhesive behind the battery.
-
-
Этот шаг не переведен. Помогите перевести
-
Remove the single 1.3 mm Phillips screw securing the flash bracket.
-
Remove the flash bracket.
-
-
Этот шаг не переведен. Помогите перевести
-
Use the flat end of a spudger to lift the flash out of its housing in the rear case.
-
-
Этот шаг не переведен. Помогите перевести
-
Remove the following five Phillips screws:
-
Two 2.5 mm screws set into the left edge of the rear case
-
One 2.1 mm Phillips #000 screw set into the left edge of the rear case
-
Two 2.1 mm screws set into the right edge of the rear case
-
-
Этот шаг не переведен. Помогите перевести
-
Use the pointed tip of a spudger to gently separate the microphone from the rear case.
-
-
Этот шаг не переведен. Помогите перевести
-
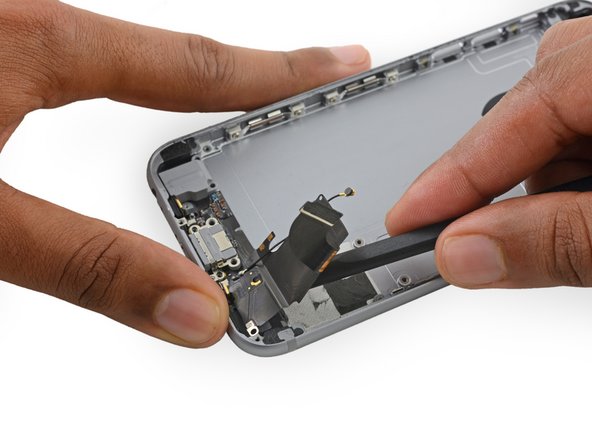
Slide an opening pick between the upper component cable and the rear case.
-
Gently separate the cable from the rear case.
-
-
Этот шаг не переведен. Помогите перевести
-
Continue pushing the opening pick under the cable until it fully separates from the rear case.
-
-
Этот шаг не переведен. Помогите перевести
-
If your replacement part did not come with the mute switch cover, you will need to remove the switch cover and transfer It.
-
Use the flat end of the spudger to press down and hold the old bracket firmly in place.
-
Use tweezers or your fingers to carefully rock the switch cover such that the switch cover pins swing out of their clips.
-
Lift the switch cover straight up.
-
-
Этот шаг не переведен. Помогите перевести
-
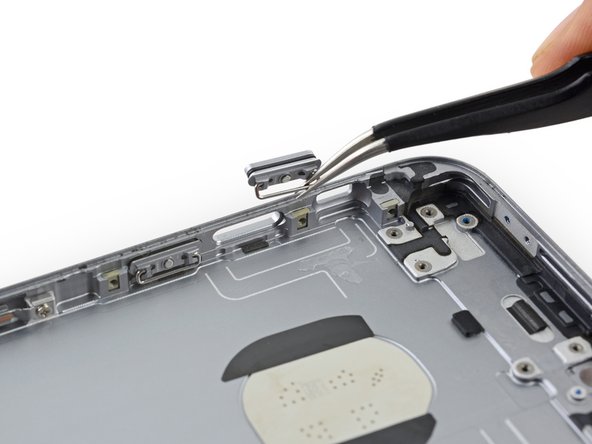
Grasp the metal bar behind either of the two volume control button covers, and pull the button cover out of its housing in the rear case.
-
Repeat for the second volume control button cover.
-
-
Этот шаг не переведен. Помогите перевести
-
Grasp the metal bar on the back of the power button cover.
-
Remove the power button cover.
-
-
Этот шаг не переведен. Помогите перевести
-
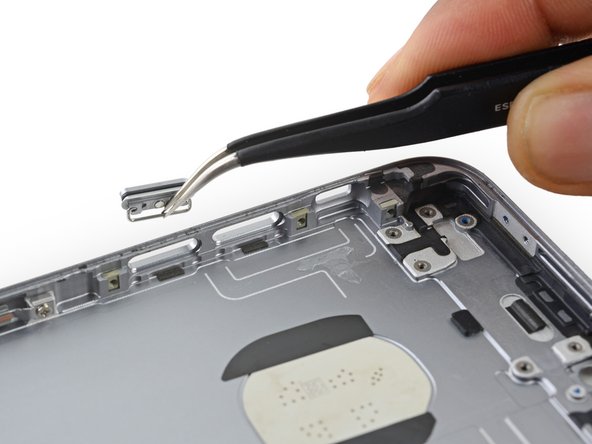
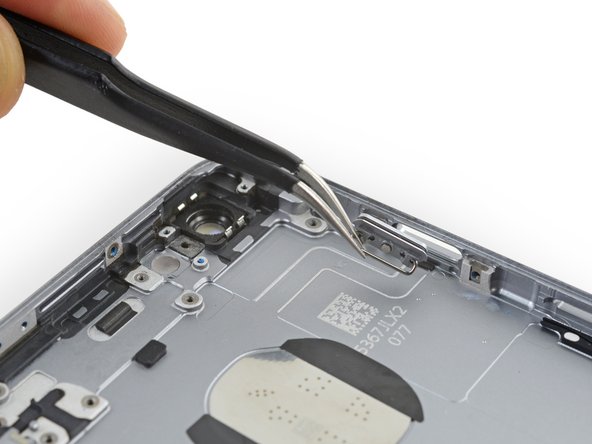
Deroute the antenna cable from its rubber sleeve on the right edge of the rear case.
-
-
Этот шаг не переведен. Помогите перевести
-
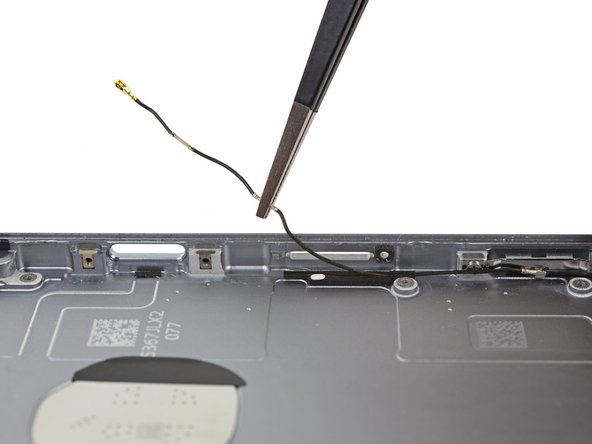
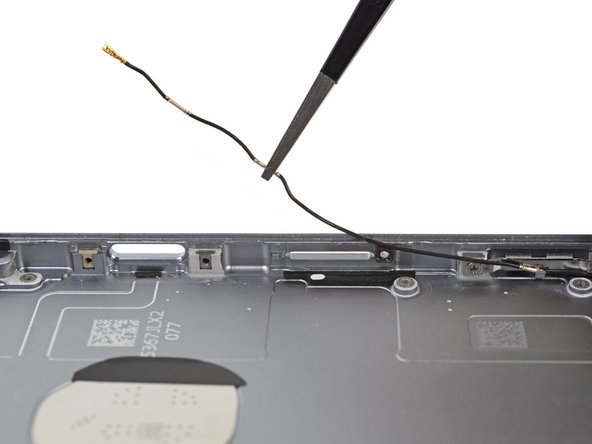
Remove the antenna cable from the metal clip on the right edge of the rear case.
-
-
Этот шаг не переведен. Помогите перевести
-
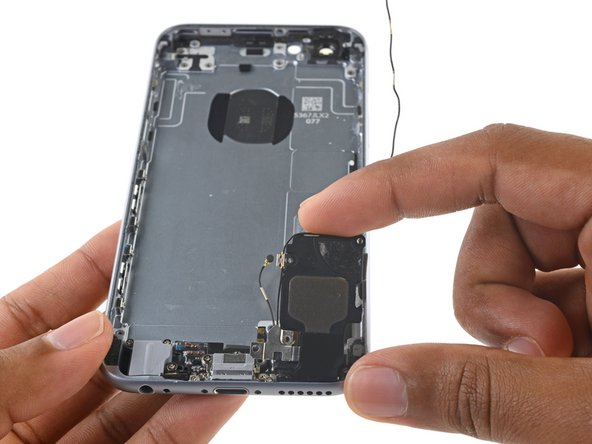
Remove the following five Phillips screws securing the speaker to the rear case:
-
Two 2.6 mm screws
-
Two 2.3 mm screws
-
One 3.0 mm screw
-
-
Этот шаг не переведен. Помогите перевести
-
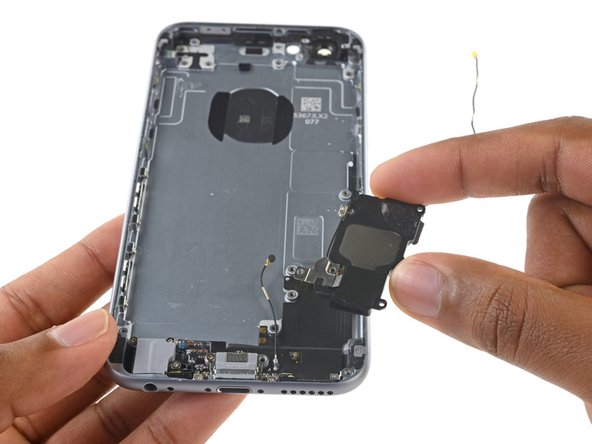
Use your fingers to lift the speaker out of its housing in the rear case.
-
Remove the speaker assembly.
-
-
Этот шаг не переведен. Помогите перевести
-
Remove the following eight Phillips screws:
-
Two 2.9 mm screws securing the headphone jack
-
One 3.7 mm screw securing the microphone bracket
-
Two 1.3 mm screws on the lower edge of the iPhone
-
Two 1.9 mm screws on either side of the Lighting connector
-
One 3.0 mm screw to the left of the connector
-
-
Этот шаг не переведен. Помогите перевести
-
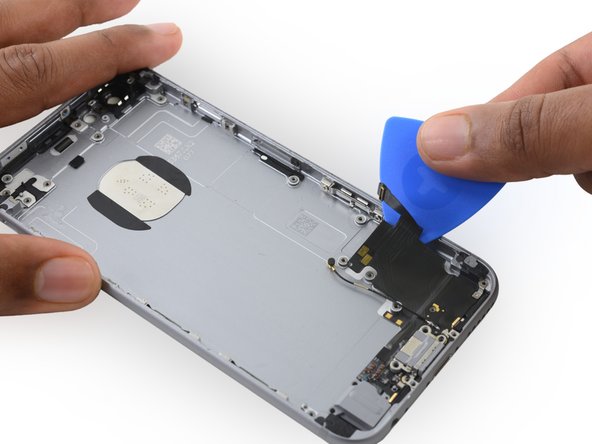
Insert an opening pick between the Lightning connector assembly and the rear case to begin breaking up the adhesive holding the flex cable in place.
-
-
Этот шаг не переведен. Помогите перевести
-
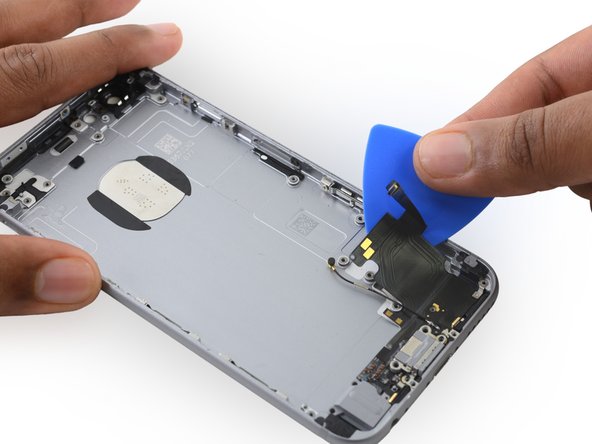
Use the flat end of a spudger to continue separating the Lightning connector assembly from the rear case.
-
-
Этот шаг не переведен. Помогите перевести
-
Use the tip of a spudger to separate the two microphones from the lower edge of the rear case.
-
-
Этот шаг не переведен. Помогите перевести
-
Remove the Lightning connector and headphone jack assembly.
-


Отменить: Я не выполнил это руководство.
88 участников успешно повторили данное руководство.

8 Комментариев
I can't get the phillips 000 screw out on step 52, now it's become too hollow within to open. What do I do?
Stripped screws are the worst! We have a guide on how to remove stripped screws that you may find helpful. Remember to maintain lots of pressure on the screw and stop applying force and try a different method if the bit is still slipping.
Every thing works fine except I have no sound, either on speakerphone or normally. Did I break the upper component cable? I've checked all the plug connections and they seem ok.
I have no sound at all from the normal speaker or in speakerphone mode. I have good cellular and Wi-Fi connections and the phone sees to work perfectly otherwise. The battery charges fine through the Lightning connector. Can't use it as a phone though! Did I break the upper component cable in the disassembly? Any other ideas?