Эта версия возможно содержит некорректные исправления. Переключить на последнюю проверенную версию.
Выберете то, что вам нужно
-
Этот шаг не переведен. Помогите перевести
-
Before you begin, it's a good idea to test-fit your new battery in the iPhone.
-
-
Этот шаг не переведен. Помогите перевести
-
If your test-fit looks good, take the battery back out and place it face-down on your work surface (with the connector contacts facing up).
-
If you have a two-cell battery, make sure the cells are aligned as they would be when installed in the iPhone.
-
-
Этот шаг не переведен. Помогите перевести
-
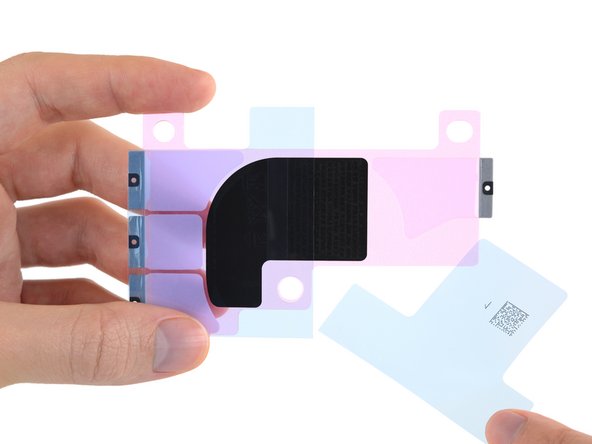
Peel off the blue plastic liner from your new set of adhesive strips, and discard it.
-
-
-
Этот шаг не переведен. Помогите перевести
-
Double-check the orientation of the adhesive strips, and make sure your battery is still lying face-down (with the connector contacts facing up).
-
Carefully position the adhesive strips over the battery, and stick them in place as shown.
-
-
Этот шаг не переведен. Помогите перевести
-
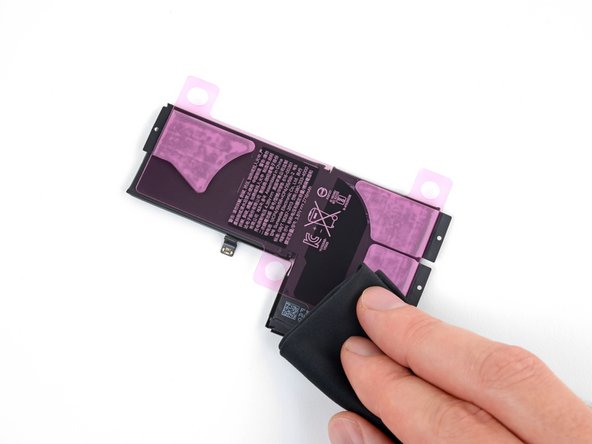
Use your fingers or a cloth to press the strips firmly into place on the battery.
-
Press in the center to adhere the black regulatory label to the battery as well.
-
-
Этот шаг не переведен. Помогите перевести
-
Roll your fingertip along the edges of the battery to stick down the black pull tab at the end of each adhesive strip.
-
-
Этот шаг не переведен. Помогите перевести
-
Peel off and discard the pink liner, fully exposing the adhesive strips.
-
-
Этот шаг не переведен. Помогите перевести
-
Carefully position the battery and set it into the iPhone.
-
-
Этот шаг не переведен. Помогите перевести
-
Press the battery firmly onto the adhesive strips to secure it in place.
-


Отменить: Я не выполнил это руководство.
23 участников успешно повторили данное руководство.

