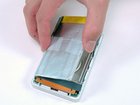
iPod 1st Generation Battery Replacement

iRobot и
Последнее обновление 24 ноя 2018 г.
Просмотров: 53 тыс.
Просмотр статистики:
- За последние 24 часа:
- 18
- За последние 7 дней:
- 122
- За последние 30 дней:
- 470
- За все время:
- 53 096
Комментарии: 8
5 комментариев к шагам, 3 комментариев к инструкции.
Перейти к комментариям инструкцииЗавершено: 34 35
34 пользователей отметили эту инстркукцию как "завершенное". Вы будете следующим?
35 пользователей отметили эту инструкцию как "завершенное". В том числе и Вы — отличная работа!
Избранные: 15 16
15 эта инструкция понравилась многим пользователям (и они подписались на нее). Вы будете следующим?
16 эта инструкция понравилось многим пользователям (и они подписались на нее), в том числе и Вам!
Предлагаемое руководство
Эта инструкция была специально выделена сотрудниками iFixit.
Введение
Перейти к шагу 1 ↓Battery not lasting long? Swap it out.
Выберете то, что Вам нужно
Запчасти
Инструменты

-
-
-
Insert a plastic iPod opening tool in the seam between the white plastic front and metal back of the iPod. It helps to hold the iPod at top and bottom as shown and squeeze to help pop out the edge. Once you've inserted the tool, run it along the seam to free the five tabs holding the iPod together.
-
-
-
Continue to run the opening tool along the side of the case until all five tabs have been released.
-
-
-
-
Work around the corner of the iPod and release the two tabs holding the iPod together near the dock connector.
-
-
-
Free the five tabs holding the iPod together on the other side. You may be able to free the tabs by gently wiggling the front panel of the iPod.
-
Lift the rear panel away from the iPod.
-
-
-
-
Lift the battery up from the adhesive holding it to the iPod.
-
Lay the battery next to the iPod (it is still connected to the logic board).
-
-
-
Lift up the end of the hard drive near the Firewire port to allow easy access to the battery connector.
-
-
-
Carefully disconnect the white battery connector from the logic board. Be sure to pull only on the connector itself and not on the cables.
-
-

 Спросите у FixBot


To reassemble your device, follow these instructions in reverse order.
Отменить: Я не выполнил это руководство.
34 человек успешно провели ремонт по этому руководству.

3 Комментарии к руководству
There are so many iPods, it's confusing as to what battery to buy. I have 3 of these old bricks and sure it's battery time. Can you please provide a link to the specific battery for this (above) iPod?
The iPod that I,m trying to resssurect has a connection that has 50t pin connection. I ordered the battery shown in the picture and now have to exchange it
In Step 4 "holding the iPod together near the dock connector": this iPod didn't get a dock connector. They came with later models. First charging: "Charge it to 100%, and then keep charging it for at least 2 more hours. Then, unplug and use it normally to drain the battery until it goes to sleep due to low battery. Wait at least 5 hours, then charge uninterrupted to 100%". If iFixit recommends it for laptops, why not for iPods?
