Перейти к основному содержанию

Этот документ имеет более свежие изменения. Перейти к последней непроверенной версии.

iPod 4th Generation or Photo Headphone Jack Replacement

Выберете то, что вам нужно

  1. iPod 4th Generation or Photo Headphone Jack Replacement, Rear Panel: шаг 1, изображение 1 из 1
    • Before opening your iPod, ensure that the hold switch is in the locked position. The orange bar should be visible, indicating hold is active.

  2. iPod 4th Generation or Photo Headphone Jack Replacement: шаг 2, изображение 1 из 3 iPod 4th Generation or Photo Headphone Jack Replacement: шаг 2, изображение 2 из 3 iPod 4th Generation or Photo Headphone Jack Replacement: шаг 2, изображение 3 из 3
    • Insert an opening pick as far as possible into the seam between the plastic front and the metal rear panel, on the right edge of the iPod.

    • You may need to rock the pick back and forth to slide it in farther.

    • Use the opening pick to pry up against the plastic front panel and release five retaining tabs (seen in the third photo).

    • Slide the pick along the edge of the iPod and continue prying to release the rest of the retaining tabs.

    • After all five tabs along the right side are free, the case should easily open.

  3. iPod 4th Generation or Photo Headphone Jack Replacement: шаг 3, изображение 1 из 1
    • The iPod case is now open, but don't separate the two halves just yet. There is still an orange ribbon cable connecting the headphone jack to the logic board.

    • Open the case like a book with the dock connector edge at the top, and lay the rear panel next to the front half of the iPod.

  4. iPod 4th Generation or Photo Headphone Jack Replacement: шаг 4, изображение 1 из 1
    • Use a plastic tool or your fingernails to carefully disconnect the orange headphone jack cable. Be sure to pull straight up on the connector, not the cable itself.

    • This ribbon cable is very fragile. If you are replacing the battery, you can choose to skip this step and keep the headphone jack connected to the motherboard. Prop and tape the rear case against a box to keep it in place. Be very careful not to strain the fragile headphone jack cable as you work.

  5. iPod 4th Generation or Photo Headphone Jack Replacement, Headphone Jack: шаг 5, изображение 1 из 1
    • Remove the 2 silver T6 Torx screws from the headphone jack.

  6. iPod 4th Generation or Photo Headphone Jack Replacement: шаг 6, изображение 1 из 1
    • Grasp the headphone jack board and lift it out of the iPod.

  7. iPod 4th Generation or Photo Headphone Jack Replacement: шаг 7, изображение 1 из 1
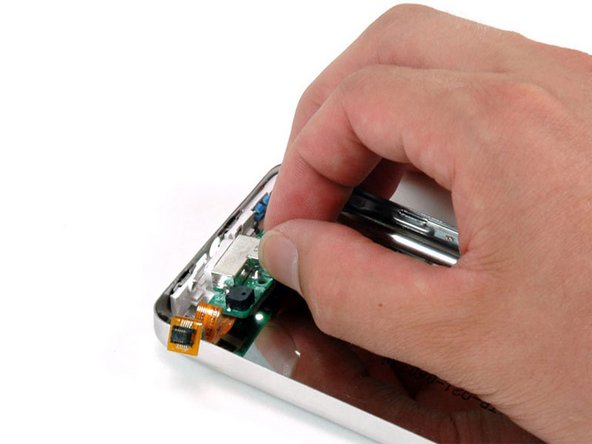
    • Turn the headphone jack board over.

    • Use the tip of your finger or a spudger to carefully flip up the black connector holding the headphone jack cable connector in place.

  8. iPod 4th Generation or Photo Headphone Jack Replacement: шаг 8, изображение 1 из 1
    • Pull the orange headphone jack cable directly out of its connector.

Заключение

To reassemble your device, follow these instructions in reverse order.

19 участников успешно повторили данное руководство.

iRobot

Участник с: 09/24/09

1 Репутация

Автор 636 руководств

4 Комментариев

How do you add a "confirmed success"? This worked perfectly for me. Thanks iRobot!

I agree that these pry tools pretty low quality. They did work faster than the guitar picks I've used in the past, but the material is just not durable. They were pretty much destroyed after one case opening.

anja - Ответить

The instructions are great, however when you ask about spares required there is no mention of the ribbon cable I require, just the board assembly!

Chris Stockley - Ответить

Hi

Where can I buy these components?

Thanks

Pablo Carter - Ответить

Do you repair iPod 4th type? How much do you charge? Thanks

wcname - Ответить

Добавить комментарий

Просмотр статистики:

За последние 24часов: 4

За последние 7 дней: 21

За последние 30 дней: 72

За всё время: 25,123