Введение
Replace a damaged rubber control button cover.
Выберете то, что вам нужно
-
-
Use a heat gun, hairdryer, iOpener, etc. to heat the back of the Shuffle until it's slightly too hot to the touch.
-
-
-
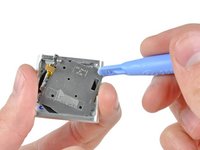
Use a combination of iPod opening tools and metal spudgers to pry the rear panel away from the Shuffle by the seam nearest the ON/OFF switch.
-
-
-
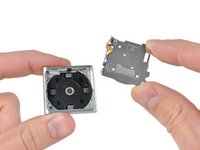
Remove the rear panel from the Shuffle.
-
There may be a piece of black rubber covering the logic board, or it may come out with the rear panel. This piece is part of a rubber seal that goes around the edges of the rear panel and covers the controls from the inside.
-
-
-
Remove the single 2.1 mm Phillips screw securing the logic board to the front case.
-
-
-
Инструмент, используемый на этом этапе:Tweezers$4.99
-
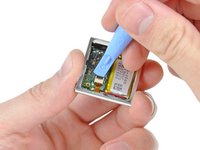
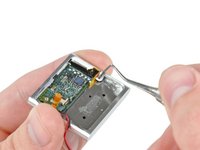
Use the edge of an iPod opening tool to flip up the retaining flap on the control button cable ZIF socket.
-
Use a pair of tweezers to gently pull the control button ribbon cable out of its socket.
-
-
-
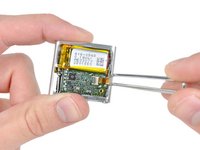
Use an iPod opening tool to gently pry the battery off the adhesive securing it to the front case.
-
Lift the battery out of the front case, being sure not to strain its delicate leads.
-
-
-
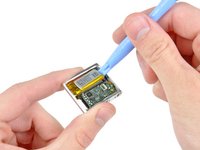
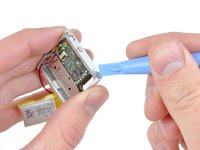
Insert the tip of a metal probe into the hole molded into the logic board retainer nearest the logic board.
-
Pry the retainer first away from the front of the front case, then pull it away from the side of the front case.
-
Remove the logic board retainer from the Shuffle.
-
-
-
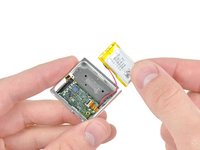
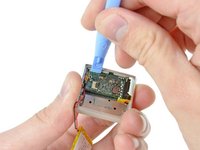
Use the edge of an iPod opening tool to push the headphone jack down toward the center of the Shuffle.
-
-
-
Continue pushing the logic board down away from the top edge of the Shuffle.
-
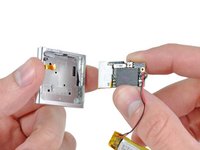
Pull the logic board out of the front case by the side nearest the ON/OFF button and gently maneuver the headphone jack out of its recess in the front case.
-
Remove the logic board assembly from the Shuffle.
-
-
-
Remove the following four screws:
-
Two 1.2 mm Phillips screws with large heads.
-
Two 1.6 mm Phillips screws with small heads.
-
-
-
Use an iPod opening tool to pull the control button plate out of the front case.
-
Remove the control buttons from the Shuffle.
-
-
-
Push the rubber control button cover out of the front case.
-


To reassemble your device, follow these instructions in reverse order.
Отменить: Я не выполнил это руководство.
2 человек успешно провели ремонт по этому руководству.

2 Комментарии к руководству
Great job my friend
Hola, quisiera saber donde poder localizar las piezas de repuesto de la botonera play/pause tanto la pieza electrónica como la botonera. Gracias