Перейти к основному содержанию

iRobot Braava 320 Wheel Replacement

Выберете то, что вам нужно

  1. iRobot Braava 320 Wheel Replacement, Battery: шаг 1, изображение 1 из 1
    • Flip your device over and locate the battery cover.

    • The battery cover is located in the center of the device in between both wheels.

  2. iRobot Braava 320 Wheel Replacement: шаг 2, изображение 1 из 1
    • Using a Flathead #4 screwdriver, gently turn the 12mm screw that holds the battery cover in.

    • The screw does not remove, it stays attached to the cover.

  3. iRobot Braava 320 Wheel Replacement: шаг 3, изображение 1 из 2 iRobot Braava 320 Wheel Replacement: шаг 3, изображение 2 из 2
    • Gently remove the battery from the tray and disconnect the battery cable.

    • To remove the battery, pull it straight up. To disconnect the cable, gently pull it straight out of the connector.

    • To reinstall the cable, hold it near the end and gently push it in the connector.

  4. iRobot Braava 320 Wheel Replacement, Body Shell and Control Panel: шаг 4, изображение 1 из 1
    • With the battery removed, rotate your device so the front of it is facing you.

    • Remove the four 10mm Phillips #2 screws that attach the shell.

  5. iRobot Braava 320 Wheel Replacement: шаг 5, изображение 1 из 2 iRobot Braava 320 Wheel Replacement: шаг 5, изображение 2 из 2
    • Using both hands, hold the device together while you flip it over.

    • Starting from the front, gently lift up the shell and slowly tilt back until it is fully removed.

  6. iRobot Braava 320 Wheel Replacement, Wheel: шаг 6, изображение 1 из 3 iRobot Braava 320 Wheel Replacement, Wheel: шаг 6, изображение 2 из 3 iRobot Braava 320 Wheel Replacement, Wheel: шаг 6, изображение 3 из 3
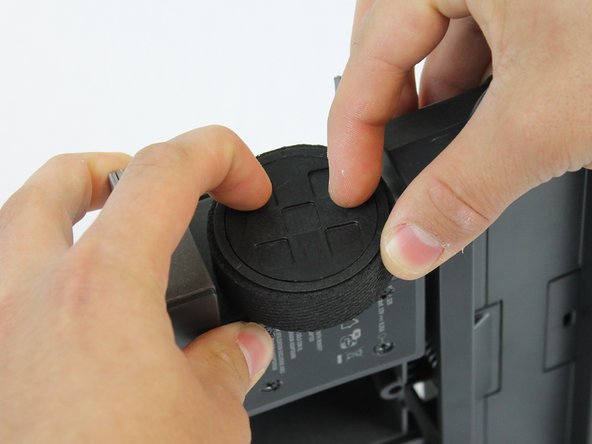
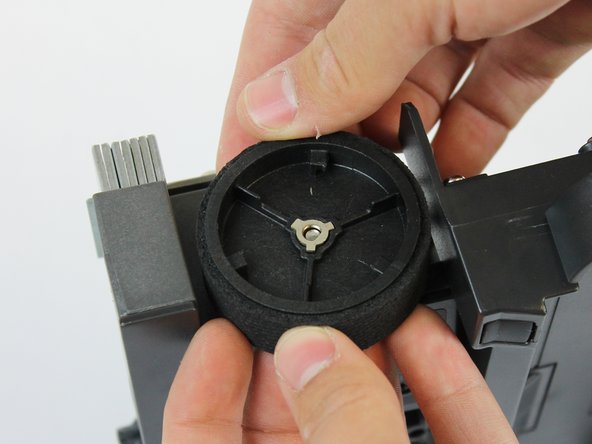
    • To remove the wheel covers, hold the wheel in place with one hand while turning the cover clock-wise with the other.

    • The cover should come off as soon as you hear a 'click' sound.

    • When replacing the cover, align the notches on the cover just to the right of the ones on the wheel.

  7. iRobot Braava 320 Wheel Replacement: шаг 7, изображение 1 из 3 iRobot Braava 320 Wheel Replacement: шаг 7, изображение 2 из 3 iRobot Braava 320 Wheel Replacement: шаг 7, изображение 3 из 3
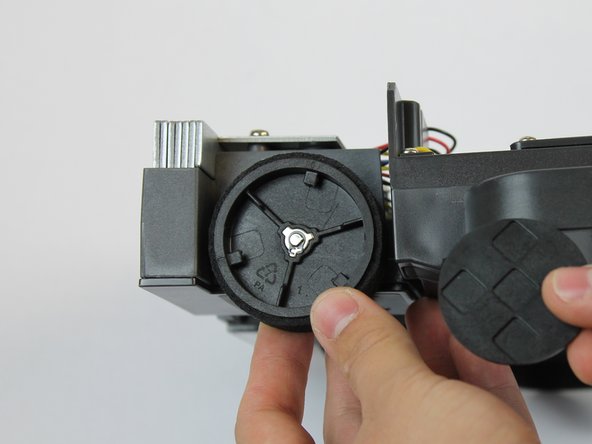
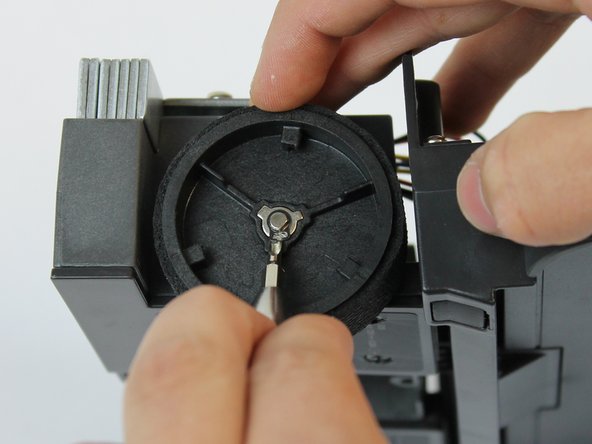
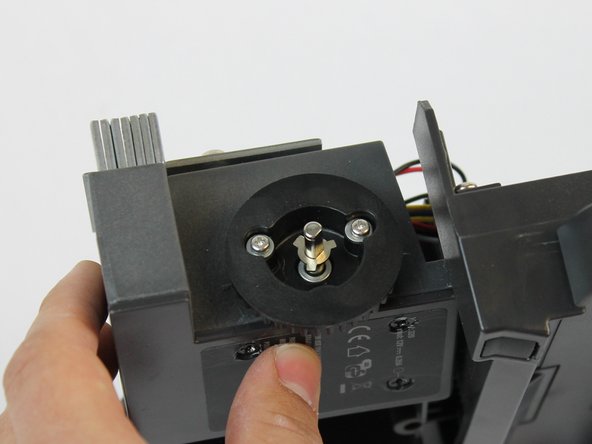
    • Using a small Flathead screwdriver, remove the small black clip in the center of the wheel.

    • To ensure the clip does not fly off, place your hand over the wheel to cover it as you remove the clip.

  8. iRobot Braava 320 Wheel Replacement: шаг 8, изображение 1 из 3 iRobot Braava 320 Wheel Replacement: шаг 8, изображение 2 из 3 iRobot Braava 320 Wheel Replacement: шаг 8, изображение 3 из 3
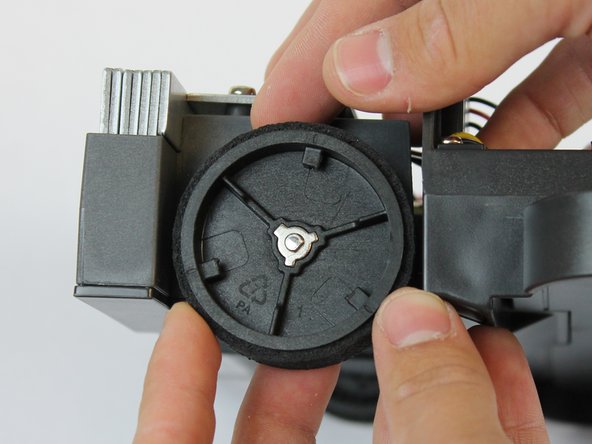
    • Once the small black clip is removed, the wheel should come off by gently pulling on it.

    • Be careful not to lose the two small chrome pieces located on each side of the wheel.

Заключение

To reassemble your device, follow these instructions in reverse order.

13 участников успешно повторили данное руководство.

Ruven Tapia-Vargas

Участник с: 02/28/17

381 Репутация

1 руководство автора

Команда

USF Tampa, Team S1-G3, Nance Spring 2017 Участник USF Tampa, Team S1-G3, Nance Spring 2017

USFT-NANCE-S17S1G3

4 членов

Автор 10 руководств

Один комментарий

O roteiro descritivo para a troca das rodas do Braava foi muito útil. Obrigada!

Vanilda Chueiri - Ответить

Добавить комментарий

Просмотр статистики:

За последние 24часов: 1

За последние 7 дней: 14

За последние 30 дней: 64

За всё время: 9,718