Введение
If all efforts to repair the Roomba® 980 vacuum fail, replacing its motherboard is usually the last step before a full resolution is achieved. There can be several reasons why this replacement is necessary, from water to physical damage, the process can be a complicated, lengthy installation. Finally, proceed with caution when handling the circuit board’s connectors and pins as damaging this can result in irreparable damage.
Выберете то, что вам нужно
-
-
Flip over the device and remove the two 11.5 mm screws using the Phillips #1 screwdriver.
-
-
-
Unscrew the back plate using a Phillips #1 screwdriver.
-
Carefully lift the panel up once the screws are removed.
-
-
-
With both hands, grab the two black tabs on each end of the battery.
-
Pull the tabs upwards to remove the battery.
-
-
-
Remove the dust bin by pressing down on the rear button on the device.
-
Pull the bin towards you to remove it.
-
-
-
Insert the opening tool in the back of the device under the wedge.
-
Slowly pry the plate loose and lift it from the device.
-
-
-
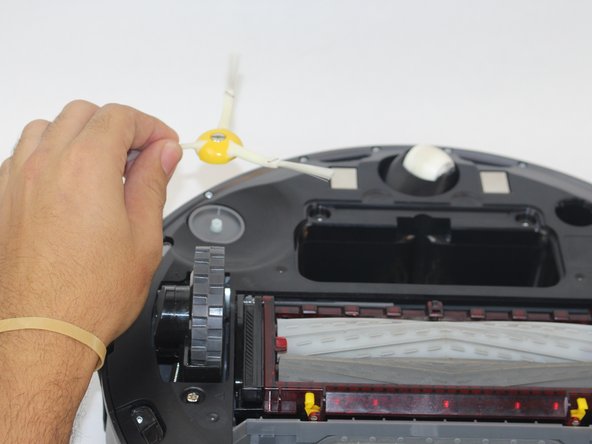
Loosen the screw holding the side brush in place, by using a Phillips #1 screwdriver
-
Lift the side brush.
-
-
-
-
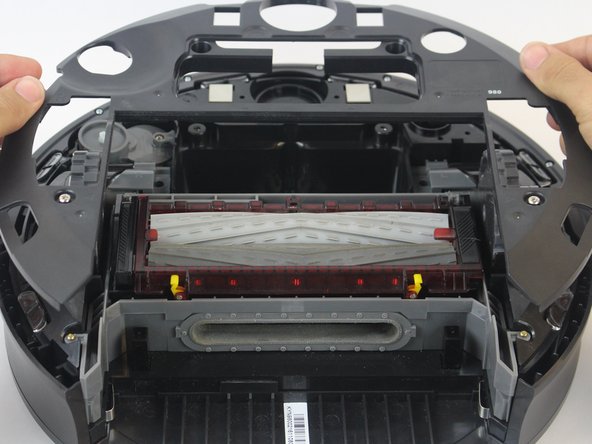
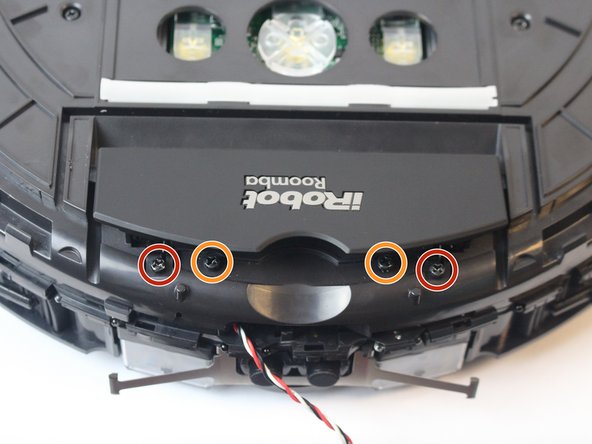
Remove the two 11.5mm screws holding down the bottom plate using a Phillips #1 screwdriver
-
Carefully lift the bottom plate.
-
-
-
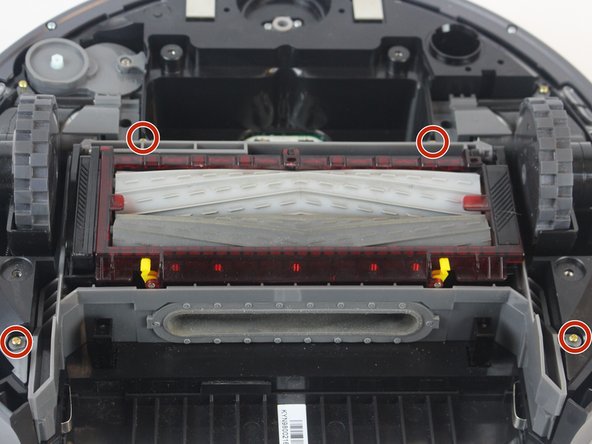
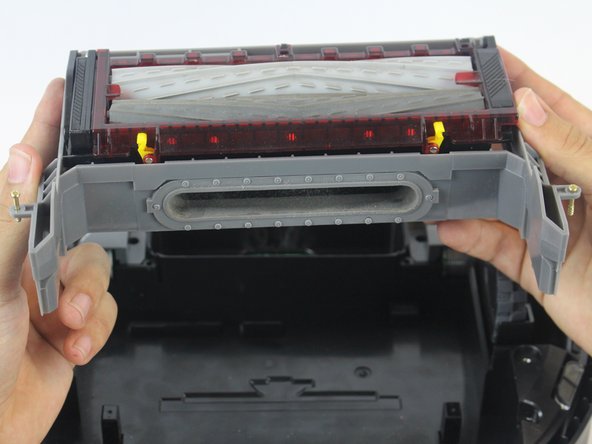
Remove the four 15.8mm gold screws around the brush module using the Phillips #1 screwdriver.
-
Lift the brush module carefully using both hands.
-
-
-
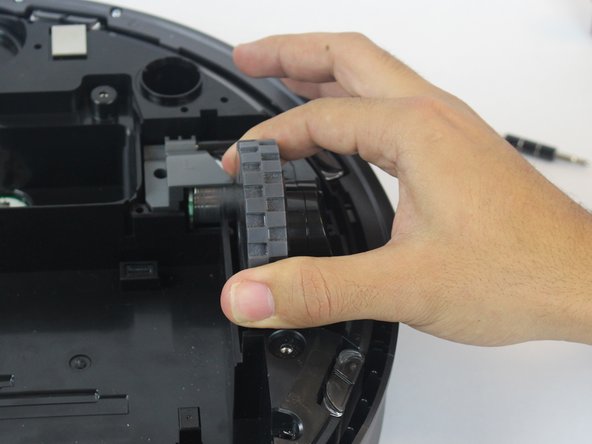
Remove the three 15.8mm gold screws with a Phillips #1 screwdriver.
-
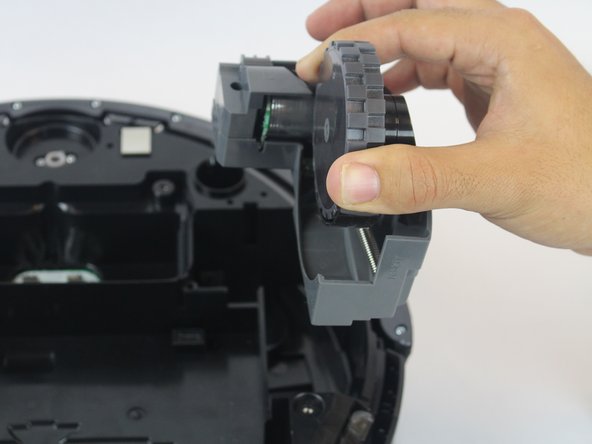
Lift the wheel module to remove it from the vacuum.
-
Remove the other wheel by repeating these steps.
-
-
-
Remove the ten 6.1 mm silver screws using a Phillips #1 screwdriver.
-
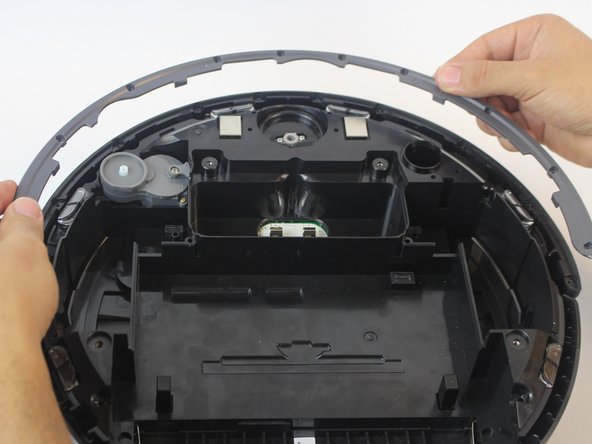
Lift the bottom guard off the front sensor panel by pulling it upwards.
-
-
-
Lift the two corner guards at the rear of the device by lifting and popping them out.
-
Pull the front sensor away slowly from the vacuum.
-
-
-
Flip the sensor over and use a Phillips #1 screwdriver to remove the two 3.8 mm silver screws that hold the sensors to the panel.
-
Once removed, pull the panel away carefully.
-
-
-
Remove the fourteen 6.6 mm black screws holding down the top plate using a Phillips #1 screwdriver.
-
Push the lip back towards the logo to remove two 6.6 mm black screws found under it using a Phillips #1 screwdriver.
-
-
-
Lift the top plate slowly, being careful not to damage the vacuum components while exposing the motherboard.
-
-
-
Remove the nine 6.4 mm silver screws holding the motherboard to the vacuum body and the clear plastic guard using a Phillips #1 screwdriver.
-
Carefully remove the connector-clips that are attached to the motherboard.
-
-
-
Using both hands, lift the motherboard connected to the camera away from the device's main motherboard.
-
Remove the black plastic guard that is placed in between the two computer boards
-
-
-
Lift the main motherboard upward and off of the vacuum.
-
Remove the motherboard from your device.
-


To reassemble your device, follow these instructions in reverse order.
To reassemble your device, follow these instructions in reverse order.
Отменить: Я не выполнил это руководство.
21 участников успешно повторили данное руководство.
Команда

USF Tampa, Team S14-G2, Boczar Fall 2017 Участник USF Tampa, Team S14-G2, Boczar Fall 2017
USFT-BOCZAR-F17S14G2
4 членов
Автор 5 руководств
9 Комментариев
Thank you for the replacement instructions & pictures…so helpful!
Any idea where I can purchase a roomba 980 motherboard?
Where can I purchase the roomba 980 motherboard?
aliexpress my friend
you don’t need to take out the modules to take out the circuit board
If you find a rectangular rubber grommet left over when you’ve finished, it goes in a slot behind the dust bin and you can reinsert it from the outside just by removing the bin first.