Перейти к основному содержанию

ilo 1Gb Mp3 Player External volume button and hold switch Replacement

Выберете то, что вам нужно

  1. ilo 1Gb Mp3 Player External volume button and hold switch Replacement, Belt Clip: шаг 1, изображение 1 из 2 ilo 1Gb Mp3 Player External volume button and hold switch Replacement, Belt Clip: шаг 1, изображение 2 из 2
    • Remove the belt clip by pulling the clip casing up and away from the device starting at the top over the slightly protruding headphones jack.

  2. ilo 1Gb Mp3 Player External volume button and hold switch Replacement, Battery Cover: шаг 2, изображение 1 из 3 ilo 1Gb Mp3 Player External volume button and hold switch Replacement, Battery Cover: шаг 2, изображение 2 из 3 ilo 1Gb Mp3 Player External volume button and hold switch Replacement, Battery Cover: шаг 2, изображение 3 из 3
    • Remove the battery cover by gently pushing inward on the arrow on the cover.

    • While maintaining pressure push the cover upward.

  3. ilo 1Gb Mp3 Player External volume button and hold switch Replacement, Battery: шаг 3, изображение 1 из 2 ilo 1Gb Mp3 Player External volume button and hold switch Replacement, Battery: шаг 3, изображение 2 из 2
    • Remove the Battery from the socket

    • When installing the battery take note of the signs displayed in the socket to determine which direction the negative and positive ends should be.

  4. ilo 1Gb Mp3 Player External volume button and hold switch Replacement, ilo 1 Gb Mp3 Player Motherboard: шаг 4, изображение 1 из 2 ilo 1Gb Mp3 Player External volume button and hold switch Replacement, ilo 1 Gb Mp3 Player Motherboard: шаг 4, изображение 2 из 2
    • Under the cover you will find Three (3) 5mm screws that will need to be removed. For this you will need to use the PH00 screw tip included in your iFixit kit. Make sure to keep track of these screws as they will need to be reinserterd during the reassembly of your device.

    • These screws are different from the two other screws from the interior

  5. ilo 1Gb Mp3 Player External volume button and hold switch Replacement: шаг 5, изображение 1 из 3 ilo 1Gb Mp3 Player External volume button and hold switch Replacement: шаг 5, изображение 2 из 3 ilo 1Gb Mp3 Player External volume button and hold switch Replacement: шаг 5, изображение 3 из 3
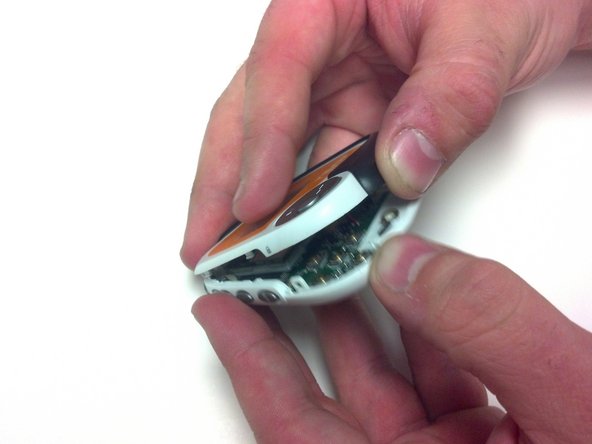
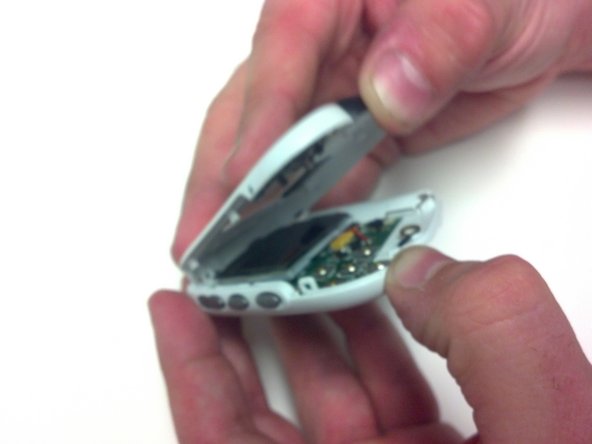
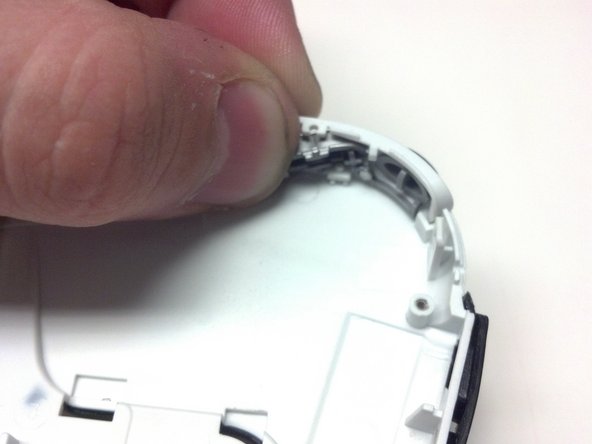
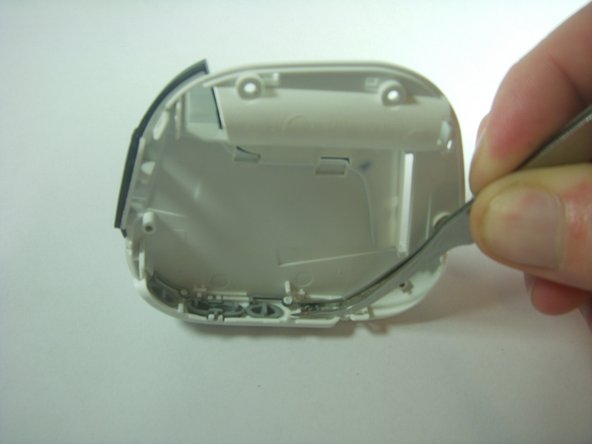
    • Separate the front housing from the back housing using your thumbs. Carefully pry around the edge of the bottom of device then be sure to unhook the clip inside just below the hold switch.

  6. ilo 1Gb Mp3 Player External volume button and hold switch Replacement: шаг 6, изображение 1 из 2 ilo 1Gb Mp3 Player External volume button and hold switch Replacement: шаг 6, изображение 2 из 2
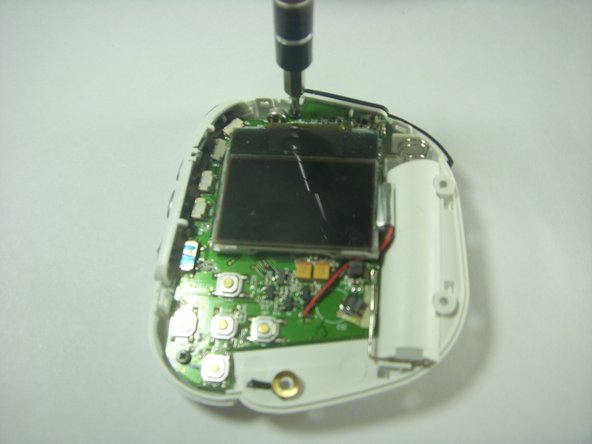
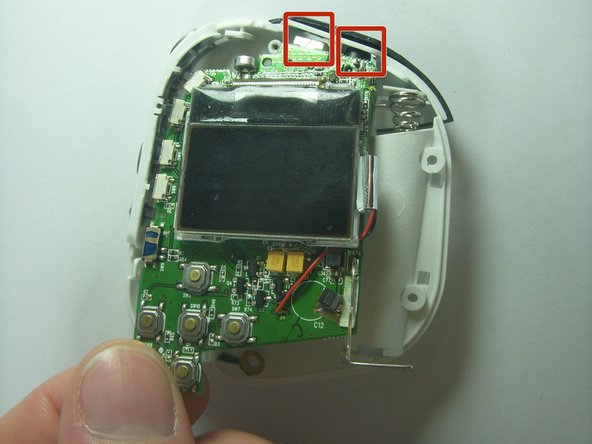
    • Once you have removed the front housing and exposed the internal board and screen locate and Remove the Two (2) 4mm PH00 screws on the board.

    • One is located in the top middle above the screen and the other is located at the bottom left between the Stop and Back buttons.

  7. ilo 1Gb Mp3 Player External volume button and hold switch Replacement: шаг 7, изображение 1 из 2 ilo 1Gb Mp3 Player External volume button and hold switch Replacement: шаг 7, изображение 2 из 2
    • Once those screws are removed, gently remove the board from the rear casing.

    • When installing the motherboard into the case be especially careful with the headphone and USB jacks located at the top of the motherboard. These should be slid into their sockets first.

  8. ilo 1Gb Mp3 Player External volume button and hold switch Replacement, Volume Rocker: шаг 8, изображение 1 из 2 ilo 1Gb Mp3 Player External volume button and hold switch Replacement, Volume Rocker: шаг 8, изображение 2 из 2
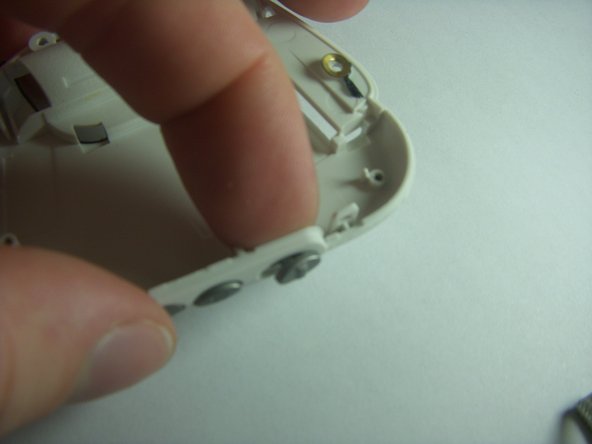
    • Remove the Volume button from its rocker socket by gently pushing in on the button until it pops out if the two sockets.

  9. ilo 1Gb Mp3 Player External volume button and hold switch Replacement, Hold Switch: шаг 9, изображение 1 из 3 ilo 1Gb Mp3 Player External volume button and hold switch Replacement, Hold Switch: шаг 9, изображение 2 из 3 ilo 1Gb Mp3 Player External volume button and hold switch Replacement, Hold Switch: шаг 9, изображение 3 из 3
    • Remove Hold Switch from Socket by squeezing the prongs that hold the button in the socket together and push the button outward.

Заключение

To reassemble your device, follow these instructions in reverse order.

Еще один человек закончил это руководство.

Joe

Участник с: 06/04/13

291 Репутация

Автор 2 руководств

Команда

University of Kentucky Louisville, Team 1-3, Chamberlain Fall 2012 Участник University of Kentucky Louisville, Team 1-3, Chamberlain Fall 2012

LOUISVILLE-CHAMBERLAIN-F12S1G3

2 членов

Автор 5 руководств

0 Комментариев

Добавить комментарий

Просмотр статистики:

За последние 24часов: 0

За последние 7 дней: 0

За последние 30 дней: 1

За всё время: 630