Введение
You should firstly follow first instruction how to open the device before proceeed to this instruction.
Pay attention to the precautions mentioned in the guide.
Выберете то, что вам нужно
-
-
First ensure your laptop is turned off and check if you have the necessary tools
-
-
-
All screws are identified by circles. Pay special attention to the yellow circles, as the rubber feet hide screws.
-
-
-
With the opening tool, remove a rubber foot.
-
For this action you will have to exert some force, because the foot is glued with a resistant glue.
-
-
-
Remove all screws with a Philips screwdriver PH1
-
All screws are the same so don't worry about identifying them.
-
-
-
-
With the plastic tool, insert between the plastics and gently pry open.
-
With your fingers continue to force open the bottom cover on the side indicated in the figure.
-
You will feel and hear several clicks, perfectly normal, nothing is breaking. Remove the cover completely.
-
-
-
Finally, we have the laptop open and ready to replace most of its components. Look elsewhere on how to replace a component.
-
To close the laptop just follow this guide in reverse.
-
-
-
Be careful to don't touch if not necessary any electrical part of the product and insure you're properly grounding.
-
-
-
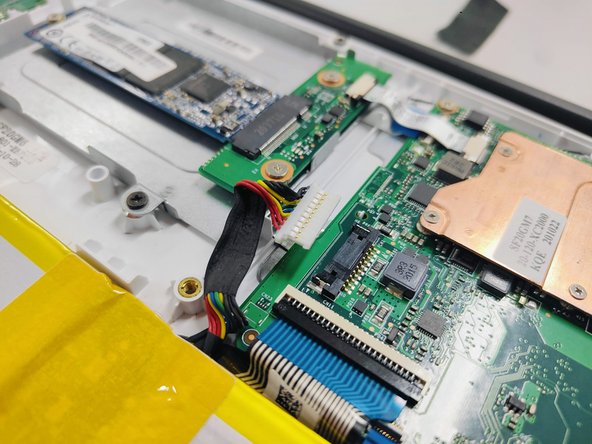
Disconnect the cable marked in the figure gently, pulling it out of the connector.
-
-
-
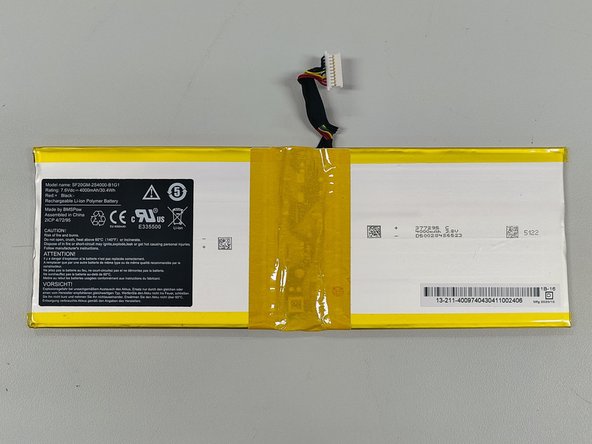
Gently remove the battery.
-
CAUTION!!
-
Some products may have this battery fixed with double-sided adhesive tape. In these cases, use a wide spatula to remove the battery without bending it.
-
SAFETY WARNING!
-
Never bend or puncture the battery. Danger of explosion. If you detect a swollen or damaged battery, handle it with extreme care and place it in a protective container.
-


To reassemble your device, follow these instructions in reverse order.
To reassemble your device, follow these instructions in reverse order.
Отменить: Я не выполнил это руководство.
Еще один человек закончил это руководство.
