Перейти к основному содержанию

nikon s3700 Lens Replacement

Выберете то, что вам нужно

  1. nikon s3700 Lens Replacement, Removing the Screws: шаг 1, изображение 1 из 3 nikon s3700 Lens Replacement, Removing the Screws: шаг 1, изображение 2 из 3 nikon s3700 Lens Replacement, Removing the Screws: шаг 1, изображение 3 из 3
    • group screws according to color code.

    • Remove exterior screws

  2. nikon s3700 Lens Replacement, Replace LCD: шаг 2, изображение 1 из 3 nikon s3700 Lens Replacement, Replace LCD: шаг 2, изображение 2 из 3 nikon s3700 Lens Replacement, Replace LCD: шаг 2, изображение 3 из 3
    • Remove Rear casing.

    • With a thin blade, gently lift the top tight hand side of the buttons board releasing a peg from a hole on the midframe below. Whilst doing so, gently push on the top left hand side in order to release the buttons board from a clip. At the same time, the bottom left hand corner wil be released from another clip.

    • Flip over rear buttons board to expose LCD ZIF clamp.

    • Flip open the clamp of the ZIF connector and slide the ribbon cable out. (The connector may have a piece of sticky tape over it. Removing this may well open the connector clamping bar.)

    • The ZIF clamp is very fragile so please use caution when releasing the ZIF clamp. It breaks easily.

    • Remove the LCD.

  3. nikon s3700 Lens Replacement, Lens: шаг 3, изображение 1 из 3 nikon s3700 Lens Replacement, Lens: шаг 3, изображение 2 из 3 nikon s3700 Lens Replacement, Lens: шаг 3, изображение 3 из 3
    • Remove screws

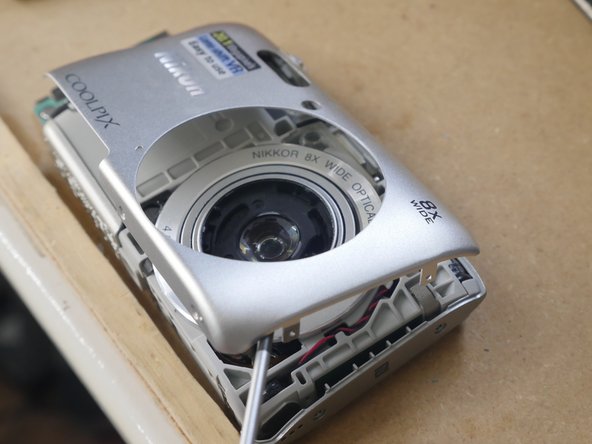
    • Remove front housing case

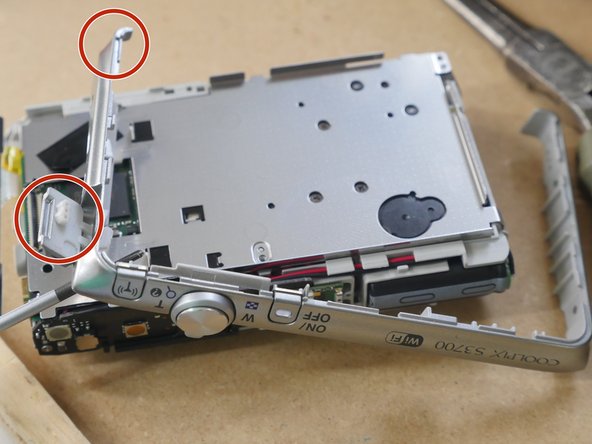
    • Remove top cabinet part

    • The two areas highlighted in red have loose parts. Please keep your eyes on these parts because they can get lost easily. Once you remove the top cabinet they will most likely fall off. In particular, there is a tiny spring behind the battery retainer which is very easy to loose.

  4. nikon s3700 Lens Replacement: шаг 4, изображение 1 из 2 nikon s3700 Lens Replacement: шаг 4, изображение 2 из 2
    • Discharge the capacitor to avoid getting shocked.

    • Dislodge clamps on all 4 sides and remove rear metal plate.

    • Release lens & CCD flex from ZIF sockets by gently lifting the black locking bar at the rear of the sockets. These may be a little stiff so care is needed.

    • Remove lens from housing and replace. Reverse steps for re-assembly

    • Area highlighted in orange can be lost easily. Please keep your eyes on this part. If unit is tilted part will fall out.

Заключение

To reassemble your device, follow these instructions in reverse order.

Sales Cameraparts4you

Участник с: 07/01/16

3 150 Репутация

Автор 20 руководств

0 Комментариев

Добавить комментарий

Просмотр статистики:

За последние 24часов: 0

За последние 7 дней: 7

За последние 30 дней: 28

За всё время: 722