Перейти к основному содержанию

Desconexión de batería

Примечание: Вы редактируете необходимое руководство. Любые внесённые вами изменения влияют на все 12 руководства, которые включают этот шаг.

Английский
Испанский

Перевод шага 1

Шаг 1
Battery Disconnection, Battery Disconnection: шаг 0, изображение 1 из 2 Battery Disconnection, Battery Disconnection: шаг 0, изображение 2 из 2
Battery Disconnection
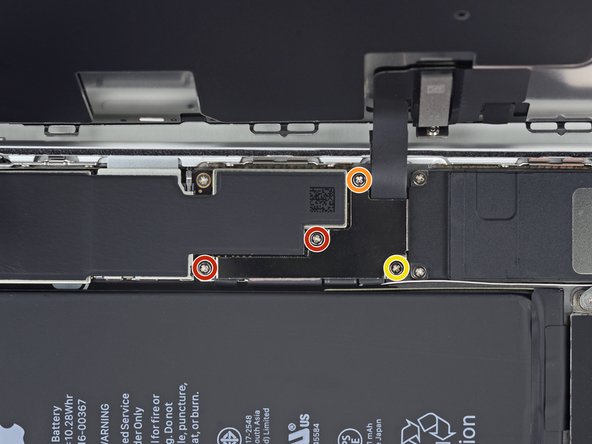
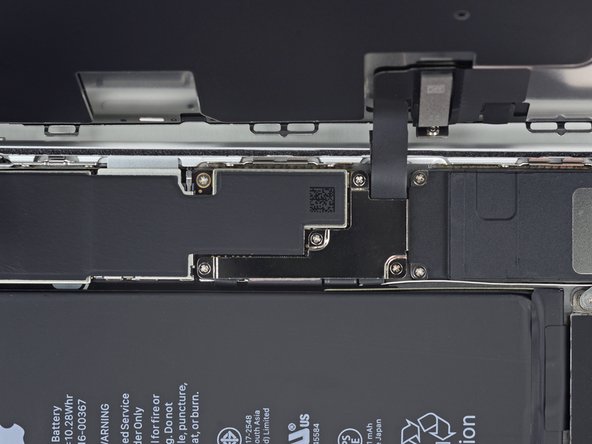
  • Remove four Phillips (JIS) screws securing the lower display cable bracket to the logic board, of the following lengths:

  • Two 1.3 mm screws

  • One 1.4 mm screw

  • One 2.7 mm screw

  • Throughout this guide, keep careful track of your screws so that each one goes back where it came from during reassembly. Installing a screw in the wrong place can cause permanent damage.

Remueve los cuatro tornillos Phillips (JIS) que sujetan el soporte de cable de pantalla inferior a la placa lógica:

Dos tornillos de 1.3 mm

Un tornillo de 1.4 mm

Un tornillo de 2.7 mm

Durante toda esta guía, mantén un registro de todos tus tornillos para que cada uno vuelva de donde vino durante el reensamblaje. Instalar un tornillo en el lugar equivocado puede causar daño permanente.

Ваш вклад лицензируется под свободной лицензией Creative Commons .