Перейти к основному содержанию

Sostituzione vetro posteriore Samsung Galaxy S8+

Примечание: Вы редактируете необходимое руководство. Любые внесённые вами изменения влияют на все 5 руководства, которые включают этот шаг.

Английский
Итальянский
Шаг 6
Samsung Galaxy S8+ Back Glass Replacement: шаг 0, изображение 1 из 2 Samsung Galaxy S8+ Back Glass Replacement: шаг 0, изображение 2 из 2
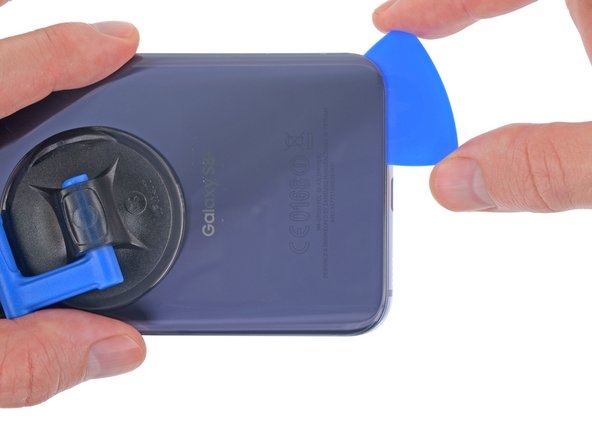
  • Continue slicing through the adhesive along the bottom edge of the phone.

  • Re-heat the back cover as needed to prevent the glue from cooling and hardening.

  • The glued area is larger here, so you'll need to insert your pick farther into the phone to fully separate it.

  • Again, it may help to leave the opening pick in place and grab another one for the following step.

Continua a tagliare l'adesivo lungo il bordo inferiore del telefono.

Scalda di nuovo la cover posteriore secondo necessità per evitare che l'adesivo si raffreddi e si solidifichi.

L'area incollata è più larga in questo punto, devi inserire il tuo plettro più in profondità nel telefono per staccare completamente il pannello.

Può di nuovo essere utile lasciare il plettro di apertura in posizione e prenderne un altro per il passo seguente.

Ваш вклад лицензируется под свободной лицензией Creative Commons .