Перейти к основному содержанию

Remplacement des caméras arrière de l'iPhone 8 Plus

Примечание: Вы редактируете необходимое руководство. Любые внесенные вами изменения повлияют на руководство, которое включает эту стадию.

Английский
Французский
Шаг 6
iPhone 8 Plus Rear-Facing Cameras Replacement: шаг 0, изображение 1 из 3 iPhone 8 Plus Rear-Facing Cameras Replacement: шаг 0, изображение 2 из 3 iPhone 8 Plus Rear-Facing Cameras Replacement: шаг 0, изображение 3 из 3
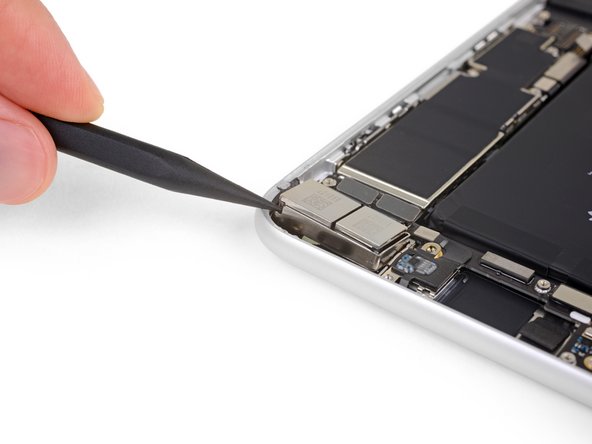
  • Use the flat end of a spudger to pry up the rear-facing camera assembly from the top edge of the iPhone.

  • If you have trouble, switch to the point of your spudger and lever the camera out from its top right corner.

Utilisez l'extrémité plate d'une spatule (spudger) pour soulever l'ensemble caméra arrière du bord supérieur de l'iPhone.

Si vous avez du mal, retournez la spatule et servez-vous de la pointe pour faire levier sur le coin supérieur droit de la caméra.

Ваш вклад лицензируется под свободной лицензией Creative Commons .