Перейти к основному содержанию

iPhone 8 Plus Lightningコネクタアセンブリの交換

Английский
Японский
Шаг 16
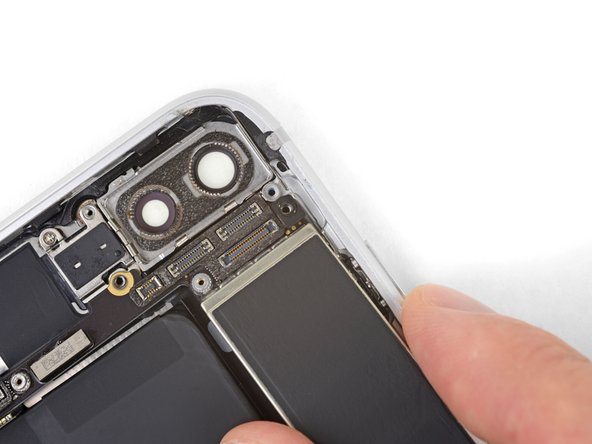
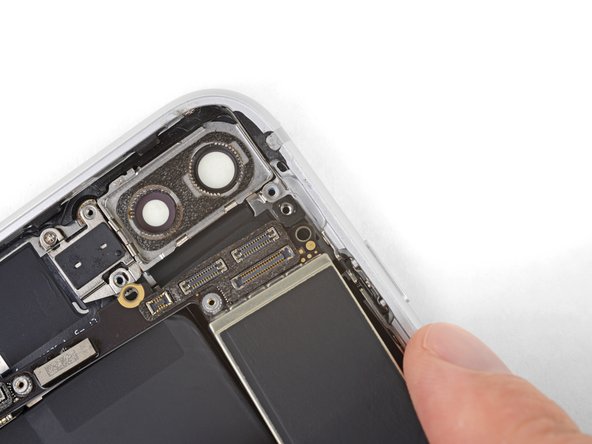
iPhone 8 Plus Lightning Connector Assembly Replacement: шаг 0, изображение 1 из 3 iPhone 8 Plus Lightning Connector Assembly Replacement: шаг 0, изображение 2 из 3 iPhone 8 Plus Lightning Connector Assembly Replacement: шаг 0, изображение 3 из 3
  • Lift the logic board from the bottom edges and slide it toward the bottom of the iPhone to remove it.

  • Be careful not to snag the logic board on any cables.

  • During reassembly, note the position of the black grounding clip at the top right edge of the logic board, near the rear cameras. The logic board should slide underneath the clip.

ロジックボードを底側端から持ち上げて、iPhone下側に向けてスライドしてから取り出します。

ロジックボードをケーブルに引っかけないようご注意ください。

再組み立ての際は、リアカメラ付近のロジックボード右上端に付いている黒い接地クリップの位置にご注意ください。ロジクボードはクリップの下側にスライドして取り付けます。

Ваш вклад лицензируется под свободной лицензией Creative Commons .