Перейти к основному содержанию

iPhone 8 Plus Lightningコネクタアセンブリの交換

Английский
Японский

Перевод шага 31

Шаг 31
iPhone 8 Plus Lightning Connector Assembly Replacement: шаг 0, изображение 1 из 3 iPhone 8 Plus Lightning Connector Assembly Replacement: шаг 0, изображение 2 из 3 iPhone 8 Plus Lightning Connector Assembly Replacement: шаг 0, изображение 3 из 3
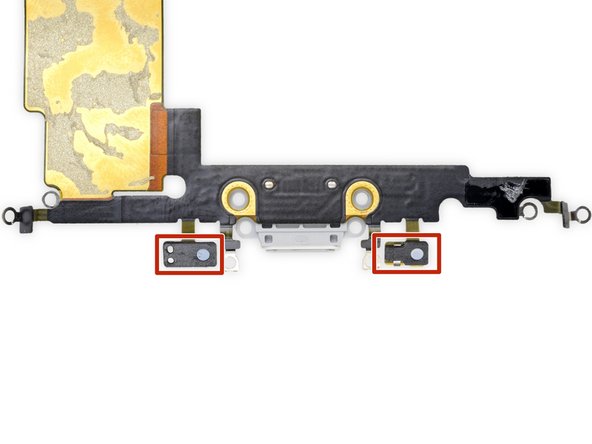
  • A rubber gasket on the bottom of the Lightning connector protects your iPhone from liquid and dust intrusion. If you are installing a new Lightning connector assembly, you may need to carefully remove and transfer the gasket to the new part.

  • The small adhesive patch on the bottom of each microphone also protects your iPhone from liquid and dust intrusion. For best results, replace the two adhesive patches before installing your Lightning connector assembly.

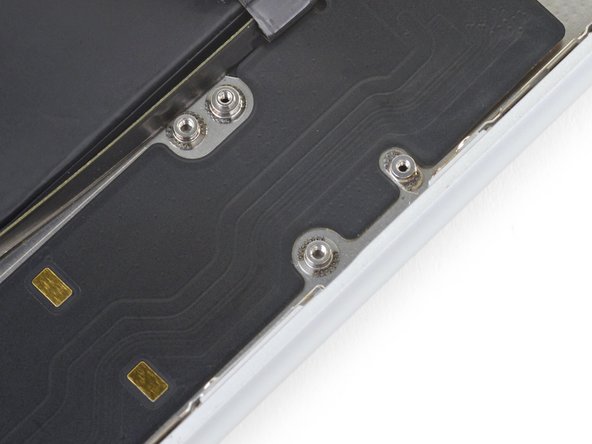
  • Important: During installation, correctly position your new Lightning connector assembly so that the cutouts in the cable are exactly centered around the four screw bosses in the rear case. Otherwise, the flex cable will be misaligned and you won't be able to reconnect it to its socket on the logic board.

Lightningコネクタ底にゴム製のガスケットが付いており、iPhoneの防水防塵機能を果たしています。新しいLightningコネクタアセンブリを装着する場合は、このガスケットを新しい交換用のパーツに移植してください。

各マイクの底に小さな接着剤のパッチが付いており、これも iPhoneの防水防塵機能を担っています。一番良い手順はLightning コネクタアセンブリを取り付ける前に、この2つの接着剤パッチを交換することです。

重要:再組み立ての間、新しい交換用のLightningコネクタアセンブリを正しい位置に取り付けてください。ケーブルの切り欠きは、リアケースの4つのねじボス周辺の中央に配置されています。正しい位置に取り付けていない場合は、フレックスケーブルの位置が合致せず、ロジックボード上のソケットに再接続できません。

Ваш вклад лицензируется под свободной лицензией Creative Commons .