-
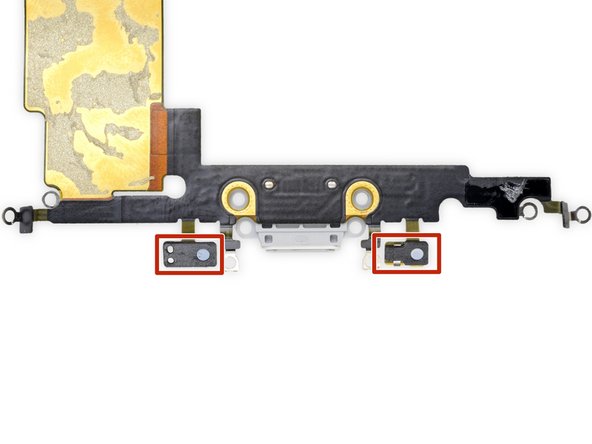
A rubber gasket on the bottom of the Lightning connector protects your iPhone from liquid and dust intrusion. If you are installing a new Lightning connector assembly, you may need to carefully remove and transfer the gasket to the new part.
-
The small adhesive patch on the bottom of each microphone also protects your iPhone from liquid and dust intrusion. For best results, replace the two adhesive patches before installing your Lightning connector assembly.
-
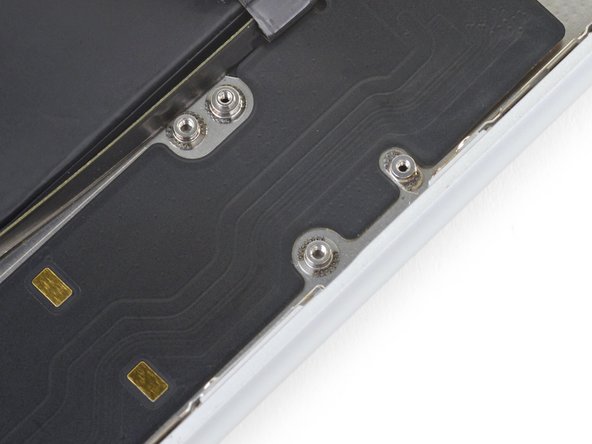
Important: During installation, correctly position your new Lightning connector assembly so that the cutouts in the cable are exactly centered around the four screw bosses in the rear case. Otherwise, the flex cable will be misaligned and you won't be able to reconnect it to its socket on the logic board.
Ваш вклад лицензируется под свободной лицензией Creative Commons .
Редактор последовательности шагов руководства, сочетание клавиш:
Ctrl + N
Следующая строка
Ctrl + P
Предыдущая строка
Ctrl + Shift + N
Вставьте новую строку ниже
Ctrl + Shift + P
Вставьте новую строку выше
Ctrl + ]
Отступ для текущей строки
Ctrl + [
Текущая строка без отступа
Ctrl + D
Удалить текущую строку
Shift + ;
Перейдите к следующему шагу.
Shift + H
Перейдите к предыдущему шагу.
Shift + /
Открыть справку
Посмотреть все ярлыки