Перейти к основному содержанию

Sostituzione batteria iPad Mini CDMA

Примечание: Вы редактируете необходимое руководство. Любые внесённые вами изменения влияют на все 5 руководства, которые включают этот шаг.

Английский
Итальянский

Перевод шага 1

Шаг 1
iPad Mini CDMA Battery Replacement: шаг 0, изображение 1 из 2 iPad Mini CDMA Battery Replacement: шаг 0, изображение 2 из 2
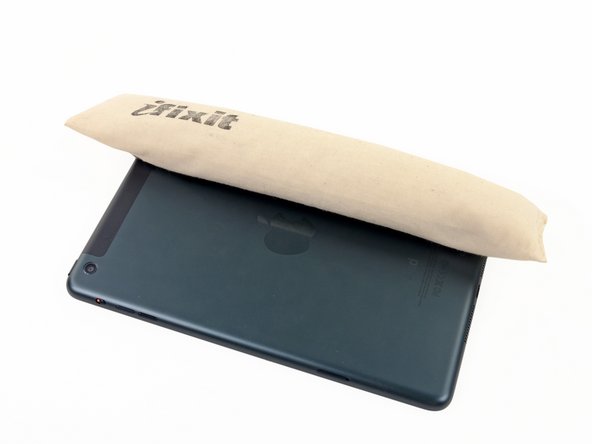
  • Reheat the iOpener in the microwave for one minute.

  • Remember to be careful not to overheat the iOpener during the repair procedure. Wait at least two minutes before reheating the iOpener, and never microwave it for more than one minute.

  • Place the heated iOpener on the back of the iPad, along the center. Let it sit there for 90 seconds to soften the battery adhesive.

  • Move the iOpener to the right of the back of the iPad (the side opposite the rear-facing camera), and let the iOpener sit for another 90 seconds.

  • If the iOpener cools significantly between sittings, reheat it for another minute.

Riscalda l'iOpener nel microonde per un minuto.

Ricordati di non surriscaldare l'iOpener durante questa procedura. Aspetta almeno due minuti prima di scaldare di nuovo l'iOpener, e non riscaldarlo nel microonde per più di un minuto.

Appoggia l'iOpener sul retro dell'iPad, lungo il centro. Lascialo appoggiato per 90 secondi per ammorbidire l'adesivo della batteria.

Sposta l'iOpener sulla destra del retro dell'iPad (il lato opposto alle fotocamere) e lascialo in questa posizione per altri 90 secondi.

Se l'iOpener si è raffreddato notevolmente dopo i primi 90 secondi, riscaldalo per un altro minuto.

Ваш вклад лицензируется под свободной лицензией Creative Commons .