Перевод шага 15
Шаг 15


-
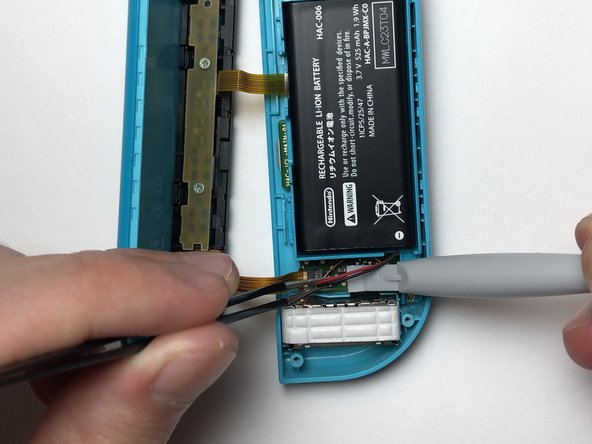
Place the battery into the mid-frame.
-
Use tweezers to align the battery plug over the socket and with a pry tool or an object with a flat edge, press the plug into the socket.
Ваш вклад лицензируется под свободной лицензией Creative Commons .