Перейти к основному содержанию

Remplacement de l'écran de l'iPad Pro 12,9"

Примечание: Вы редактируете необходимое руководство. Любые внесённые вами изменения влияют на все 4 руководства, которые включают этот шаг.

Английский
Французский
Шаг 9
iPad Pro 12.9" Display Assembly Replacement: шаг 0, изображение 1 из 3 iPad Pro 12.9" Display Assembly Replacement: шаг 0, изображение 2 из 3 iPad Pro 12.9" Display Assembly Replacement: шаг 0, изображение 3 из 3
  • Lay a hot iOpener along the bottom left corner of the iPad, spanning from the opening pick to the home button.

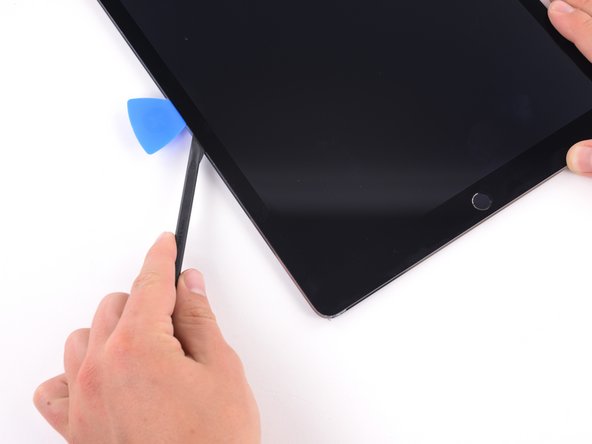
  • After letting the adhesive soften, insert an opening pick or halberd spudger into the gap next to the Smart Connector.

  • Be careful not to insert the halberd spudger more than 2 mm.

  • Use an opening pick or halberd spudger to slice the adhesive along the bottom left side of the iPad. If the slicing becomes difficult, reheat the edge and try again.

Placez un iOpener chaud le long du coin inférieur gauche de l'iPad, du médiator au bouton home.

Après avoir laissé ramollir l'adhésif, insérez un médiator ou une spatule hallebarde (halberd spudger) dans l'espace à côté du Smart Connector.

Veillez à ne pas insérer la spatule hallebarde de plus de 2 mm.

Utilisez un médiator ou une spatule hallebarde pour découper l'adhésif le long du côté inférieur gauche de l'iPad. Si le découpage devient difficile, réchauffez le bord et réessayez.

Ваш вклад лицензируется под свободной лицензией Creative Commons .