Перейти к основному содержанию

iPhone 15 Plus Akku tauschen

Английский
Немецкий
Шаг 2
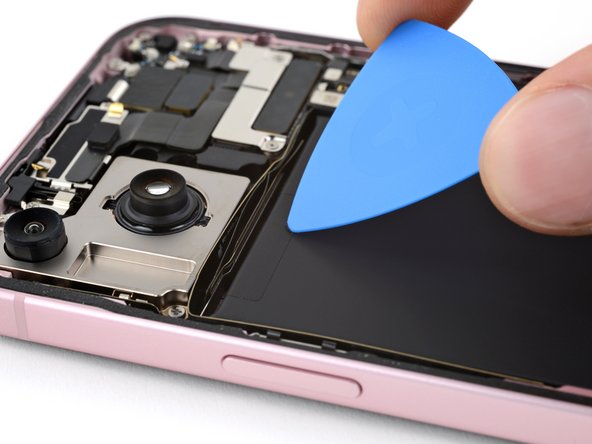
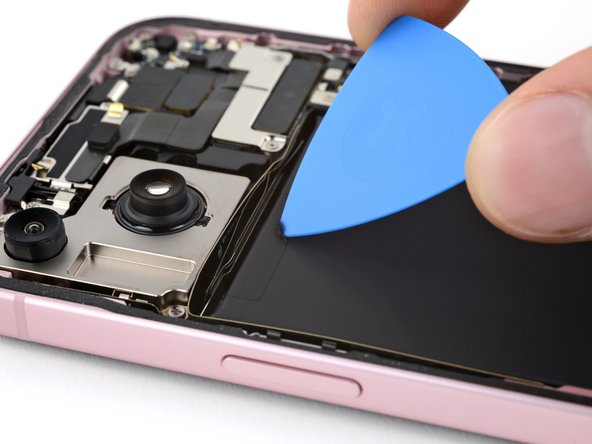
iPhone 15 Plus Battery Replacement, Peel up a corner of the pull tabs: шаг 0, изображение 1 из 3 iPhone 15 Plus Battery Replacement, Peel up a corner of the pull tabs: шаг 0, изображение 2 из 3 iPhone 15 Plus Battery Replacement, Peel up a corner of the pull tabs: шаг 0, изображение 3 из 3
Peel up a corner of the pull tabs
  • Your iPhone's battery is secured with two stretch release adhesive strips. The next four steps show how to remove them and free your battery.

  • Be careful not to dent or puncture the battery, and avoid using sharp tools near it.

  • Use the tip of an opening pick to scrape up an edge of each stretch release pull tab from the top of the battery until you can grip the tab with blunt nose tweezers.

Der Akku deines iPhones ist mit zwei elastischen Klebestreifen befestigt. Die nächsten vier Schritte zeigen, wie sie entfernt werden, so dass der Akku frei ist.

Achte darauf, dass du den Akku mit deinem Werkzeug nicht beschädigst oder anstichst, vermeide den Gebrauch von scharfen Werkzeug in seiner Nähe.

Schabe jede der elastischen Zuglaschen an einer Kante mit der Spitze eines Plektrums so weit vom oberen Rand des Akkus ab, dass du sie mit einer stumpfen Pinzette fassen kannst.

Ваш вклад лицензируется под свободной лицензией Creative Commons .