Перейти к основному содержанию

Wireless Charging Coil and Loudspeaker Removal

Примечание: Вы редактируете необходимое руководство. Любые внесённые вами изменения влияют на все 11 руководства, которые включают этот шаг.

Английский
Японский

Перевод шага 1

Шаг 1
Wireless Charging Coil and Loudspeaker Removal, Disconnect the wireless charging coil: шаг 0, изображение 1 из 2 Wireless Charging Coil and Loudspeaker Removal, Disconnect the wireless charging coil: шаг 0, изображение 2 из 2
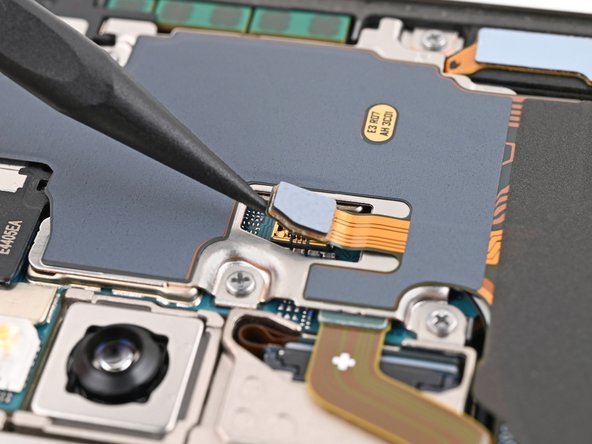
Disconnect the wireless charging coil
  • Use a spudger to pry up and disconnect the wireless charging coil press connector from the motherboard.

  • There's an arrow printed on the board near each press connector that indicates the recommended prying location. Only pry in this location for each press connector to avoid dislodging surface-mounted components.

  • To reconnect press connectors, align the connector carefully over its socket and press down with your fingertip—first on one side, then the other—until it clicks into place. Don't try to force the connector into place. If you're having trouble, reposition it and try again.

Вставьте перевод здесь

Вставьте перевод здесь

Вставьте перевод здесь

Ваш вклад лицензируется под свободной лицензией Creative Commons .