Перейти к основному содержанию

Sostituzione pannello frontale iPad Air Wi-Fi

Примечание: Вы редактируете необходимое руководство. Любые внесённые вами изменения влияют на все 76 руководства, которые включают этот шаг.

Английский
Итальянский
Шаг 7
iPad Air Wi-Fi Front Panel Replacement: шаг 0, изображение 1 из 3 iPad Air Wi-Fi Front Panel Replacement: шаг 0, изображение 2 из 3 iPad Air Wi-Fi Front Panel Replacement: шаг 0, изображение 3 из 3
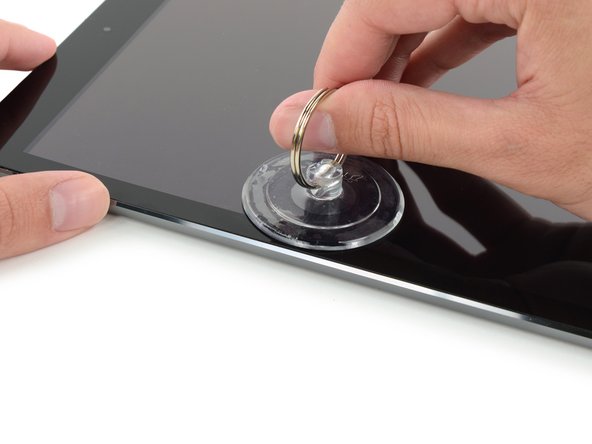
  • Carefully place a suction cup halfway up the heated side.

  • Be sure the cup is completely flat on the screen to get a tight seal.

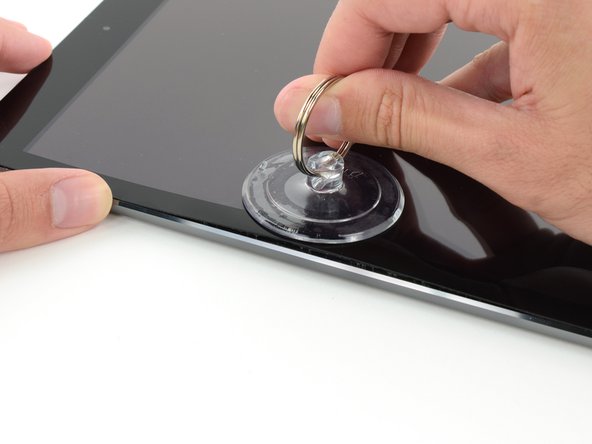
  • While holding the iPad down with one hand, pull up on the suction cup to slightly separate the front panel glass from from the rear case.

  • If your iPad's screen is badly cracked, covering it with a smooth layer of clear packing tape may help the suction cup adhere. Alternatively, use a strong piece of tape (such as duct tape) and fold it into a handle.

Con cura, posiziona una ventosa circa a metà altezza del lato riscaldato.

Assicurati che la ventosa sia completamente piatta sullo schermo per ottenere una buona aderenza.

Tenendo l'iPad fermo con una mano, tira la ventosa verso l'alto per separare leggermente il vetro del pannello frontale dal case posteriore.

Se lo schermo del tuo iPad è molto danneggiato, ricoprirlo con uno strato di nastro adesivo trasparente potrebbe aiutare la ventosa ad aderire. In alternativa, usa un pezzo di nastro adesivo tenace, come il nastro "americano" e piegalo per formare una sorta di manico.

Ваш вклад лицензируется под свободной лицензией Creative Commons .