Перейти к основному содержанию

Ventilador de Refacción de MacBook Pro 15" Unibody Mid 2010

Примечание: Вы редактируете необходимое руководство. Любые внесённые вами изменения влияют на все 20 руководства, которые включают этот шаг.

Английский
Испанский
Шаг 2
MacBook Pro 15" Unibody Mid 2010 Left Fan Replacement: шаг 0, изображение 1 из 3 MacBook Pro 15" Unibody Mid 2010 Left Fan Replacement: шаг 0, изображение 2 из 3 MacBook Pro 15" Unibody Mid 2010 Left Fan Replacement: шаг 0, изображение 3 из 3
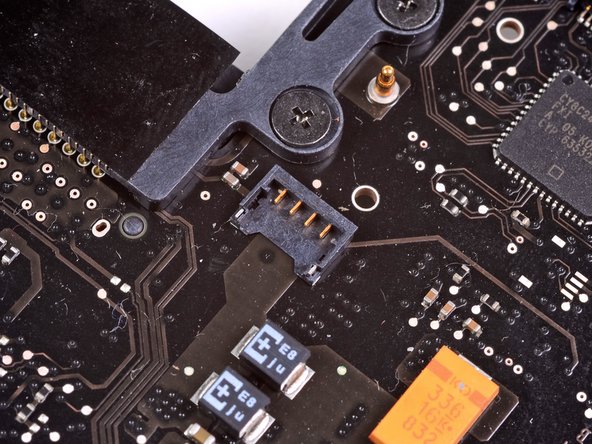
  • Use the flat end of a spudger to disconnect the left fan connector from the logic board.

  • It is useful to twist the spudger axially from beneath the fan cable wires to release the connector.

  • The fan socket and the fan connector can be seen in the second and third pictures. Be careful not to break the plastic fan socket off the logic board as you use your spudger to lift the fan connector straight up and out of its socket. The layout of the logic board shown in the second picture may look slightly different than your machine but the fan socket is the same.

Utiliza la parte plana del spudger para desconectar el conector de ventilador izquierdo de la tarjeta lógica

Facilitará tu trabajo el girar el spudger axialmente desde abajo de los cables del ventilador para liberar el conector (este conector es de presión vertical, no de enchufe tipo toma corriente).

El zócalo y conector del ventilador pueden verse en la 2º y 3º imagen. TEN cuidado de no romper el zócalo plástico del ventilador en la tarjeta lógica mientras utilizas el spudger para levantar rectamente y hacia afuera el conector del ventilador. El zócalo es igual aunque en la segunda foto difiera la placa electrónica.

Ваш вклад лицензируется под свободной лицензией Creative Commons .