Перейти к основному содержанию

Remplacement de l'écran LCD de l'iPad Mini 3 Wi-Fi

Примечание: Вы редактируете необходимое руководство. Любые внесённые вами изменения влияют на все 20 руководства, которые включают этот шаг.

Английский
Французский
Шаг 5
iPad Mini 3 Wi-Fi LCD Replacement: шаг 0, изображение 1 из 2 iPad Mini 3 Wi-Fi LCD Replacement: шаг 0, изображение 2 из 2
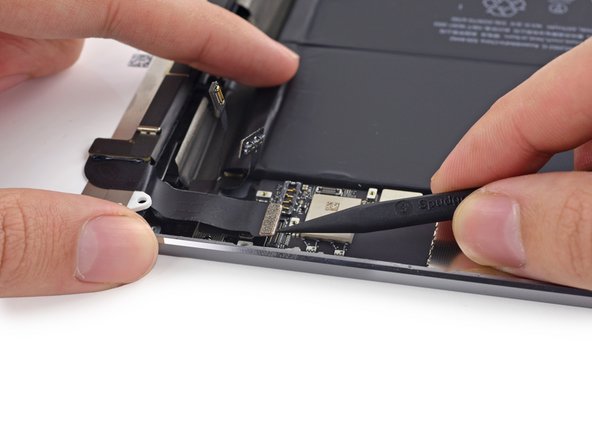
  • Use the tip of a spudger to lift the LCD connector up off its socket on the logic board.

  • Do not pry against the large IC next to the connector, or you may break it. Gently pry from the side of the connector as shown.

Utilisez la pointe d'un spudger pour soulever le connecteur LCD hors de sa prise sur la carte mère.

Ne prenez pas appui contre le grand IC à côté du connecteur, vous risqueriez de le casser. Faites délicatement levier du côté du connecteur comme illustré.

Ваш вклад лицензируется под свободной лицензией Creative Commons .