Перейти к основному содержанию

iPad Air 2 Wi-Fi Frontkamera austauschen

Английский
Немецкий

Перевод шага 3

Шаг 3
iPad Air 2 Wi-Fi Front-Facing Camera Replacement: шаг 0, изображение 1 из 2 iPad Air 2 Wi-Fi Front-Facing Camera Replacement: шаг 0, изображение 2 из 2
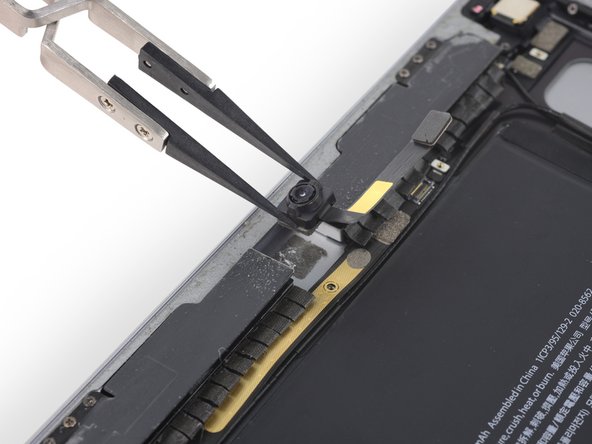
  • Firmly grasp the FaceTime camera with your hands or tweezers and pull up to remove it from the rear case.

  • The camera is attached to the rear case with single-use foam adhesive. When replacing the camera, use new adhesive or double-sided tape to install it.

Fasse die Facetime Kamera fest mit den Fingern oder einer Pinzette, und ziehe sie nach oben aus dem Rückgehäuse heraus.

Die Kamera ist mit einem Stückchen Schaumstoff, das nur einmal benutzt werden kann, am Rückgehäuse verklebt. Wenn du die Kamera austauschst, brauchst du ein neues Klebeband oder doppelseitiges Klebeband.

-[* black] Firmly grasp the FaceTime camera with your hands or tweezers and pull up to remove it from the rear case.
+[* black] Firmly grasp the FaceTime camera with your hands or [product|IF145-020|tweezers] and pull up to remove it from the rear case.
[* icon_reminder] The camera is attached to the rear case with single-use foam adhesive. When replacing the camera, use new adhesive or double-sided tape to install it.

Ваш вклад лицензируется под свободной лицензией Creative Commons .