Перейти к основному содержанию

iPad Air2 Wi-Fi バッテリーの交換

Английский
Японский
Шаг 10
iPad Air 2 Wi-Fi Battery Replacement: шаг 0, изображение 1 из 2 iPad Air 2 Wi-Fi Battery Replacement: шаг 0, изображение 2 из 2
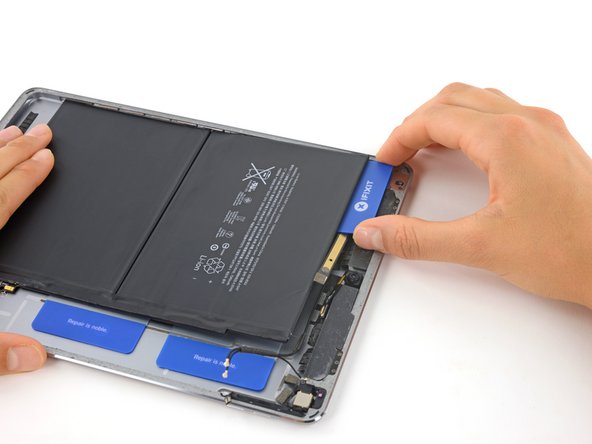
  • Remove the card and slide it under the top edge of the battery again, on the left side near the edge of the iPad.

  • Be extremely careful to slide the card over the front-facing camera and headphone jack cables to avoid cutting them.

  • Push the card in as far as it will go, breaking through as much of the adhesive underneath the battery as you can.

カードを取り出してバッテリー上部端の下、iPadの左側コーナー付近に再度差し込みます。

正面カメラとヘッドホンジャックケーブルの上にカードを差し込み、これらを切断しないよう特に注意しながらスライドします。

カードをスライドしながら、できるだけ奥に押し込んでバッテリーの下に付けられた接着剤を剥がします。

Ваш вклад лицензируется под свободной лицензией Creative Commons .