Перейти к основному содержанию

Sostituzione HP TouchPad gruppo pannello frontale

Примечание: Вы редактируете необходимое руководство. Любые внесённые вами изменения влияют на все 15 руководства, которые включают этот шаг.

Английский
Итальянский
Шаг 3
HP TouchPad Front Panel Assembly Replacement: шаг 0, изображение 1 из 2 HP TouchPad Front Panel Assembly Replacement: шаг 0, изображение 2 из 2
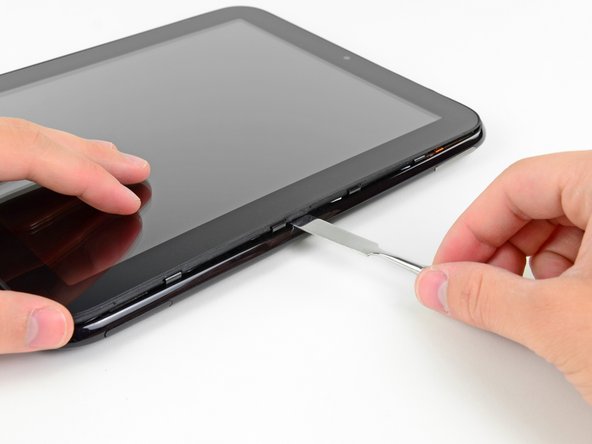
  • As in the previous step, use a spudger to pry the front panel up from the rear case along its long edge on the volume button side of the TouchPad.

  • Continue to pry the front panel assembly up along the volume button side of the TouchPad until there is a gap between it and the rear case.

Come nel passaggio precedente, usa uno spudger per sollevare il pannello frontale dal case posteriore lungo il suo lato lungo, dalla parte del TouchPad con il pulsante del volume.

Continua a sollevare il gruppo pannello frontale lungo il lato del pulsante del volume del TouchPad finché non si forma uno spazio tra esso e il case posteriore.

Ваш вклад лицензируется под свободной лицензией Creative Commons .