Перейти к основному содержанию

Reemplazo de placa lógica de iPhone 7 Plus

Примечание: Вы редактируете необходимое руководство. Любые внесенные вами изменения повлияют на руководство, которое включает эту стадию.

Английский
Испанский

Перевод шага 17

Шаг 17
iPhone 7 Plus Logic Board Replacement: шаг 0, изображение 1 из 3 iPhone 7 Plus Logic Board Replacement: шаг 0, изображение 2 из 3 iPhone 7 Plus Logic Board Replacement: шаг 0, изображение 3 из 3
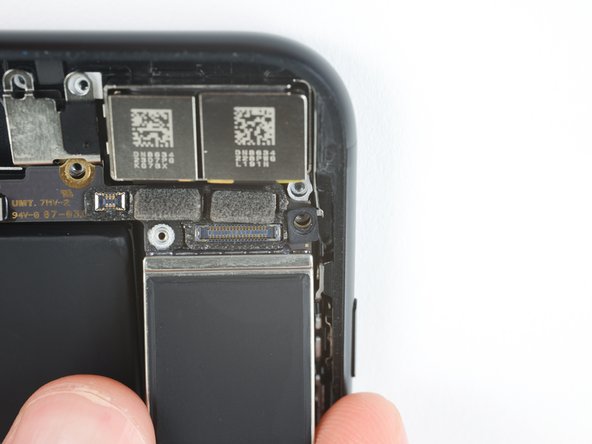
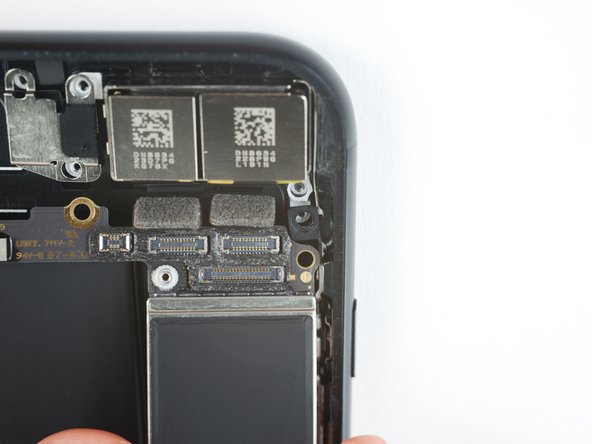
  • Lift the logic board from the bottom edges and slide it toward the bottom of the iPhone to remove it.

  • Be careful not to snag the logic board on any cables.

  • During reassembly, note the position of the black grounding clip at the top right edge of the logic board, near the rear cameras. The logic board should slide underneath the clip.

Levanta la placa lógica de los bordes inferiores y deslízala hacia la parte inferior del iPhone para quitarla.

Ten cuidado de no enganchar la placa lógica en ningún cable.

Durante el reensamblaje, observa la posición del clip negro de conexión a tierra en el borde superior derecho de la placa lógica, cerca de las cámaras traseras. La placa lógica debe deslizarse debajo del clip.

Ваш вклад лицензируется под свободной лицензией Creative Commons .