Перейти к основному содержанию

why! N240JU Replacing the LCD screen

Выберете то, что вам нужно

  1. why! N240JU Replacing the LCD screen, Battery: шаг 1, изображение 1 из 2 why! N240JU Replacing the LCD screen, Battery: шаг 1, изображение 2 из 2
    • Start by unlocking the right locking latch.

    • Then, by simultaneously unlocking the left latch, lift the battery out of its socket.

  2. why! N240JU Replacing the LCD screen, Access to main components: шаг 2, изображение 1 из 2 why! N240JU Replacing the LCD screen, Access to main components: шаг 2, изображение 2 из 2
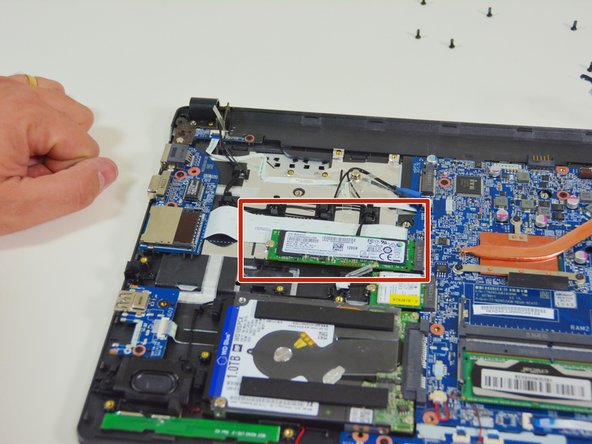
    • Begin by spotting the dummy memory card.

    • Then, remove it and put it on your workplan.

  3. why! N240JU Replacing the LCD screen: шаг 3, изображение 1 из 3 why! N240JU Replacing the LCD screen: шаг 3, изображение 2 из 3 why! N240JU Replacing the LCD screen: шаг 3, изображение 3 из 3
    • Locate the 15 screws that hold the bottom cover of the device in place.

    • Unscrew them and place them on your work surface.

    • Then, un-clip the bottom cover, starting with the side shown in the third picture.

  4. why! N240JU Replacing the LCD screen, LCD screen: шаг 4, изображение 1 из 3 why! N240JU Replacing the LCD screen, LCD screen: шаг 4, изображение 2 из 3 why! N240JU Replacing the LCD screen, LCD screen: шаг 4, изображение 3 из 3
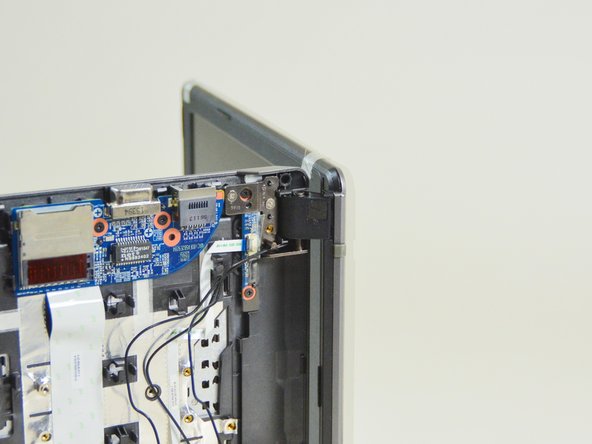
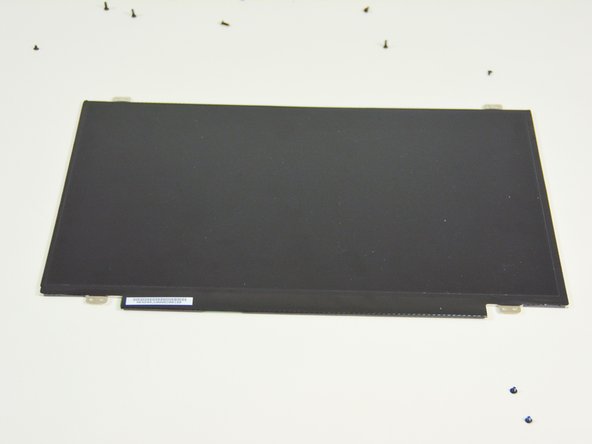
    • In order to remove the LCD screen, you must remove the connection cables from the Wi-Fi chipset.

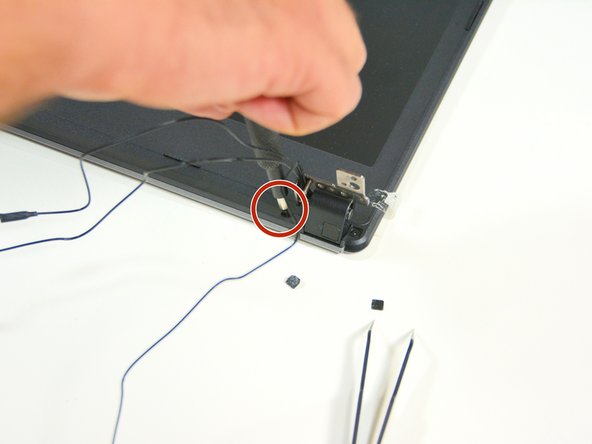
    • Then locate the two connectors on the LCD screen.

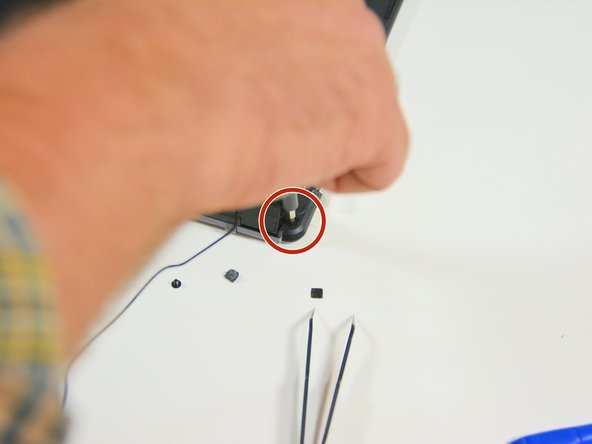
    • Disconnect the first connector.

  5. why! N240JU Replacing the LCD screen: шаг 5, изображение 1 из 3 why! N240JU Replacing the LCD screen: шаг 5, изображение 2 из 3 why! N240JU Replacing the LCD screen: шаг 5, изображение 3 из 3
    • Peel off the tape from the second connector.

    • Then disconnect the second connector.

    • Locate the SSD M.2 drive.

  6. why! N240JU Replacing the LCD screen: шаг 6, изображение 1 из 3 why! N240JU Replacing the LCD screen: шаг 6, изображение 2 из 3 why! N240JU Replacing the LCD screen: шаг 6, изображение 3 из 3
    • Then dismount this disk because it must release the connection cables of the Wi-Fi chipset.

    • Free Wi-Fi connection cables now

    • Now locate the two screws that secure the screen to the rest of the Laptop (fan side)

  7. why! N240JU Replacing the LCD screen: шаг 7, изображение 1 из 3 why! N240JU Replacing the LCD screen: шаг 7, изображение 2 из 3 why! N240JU Replacing the LCD screen: шаг 7, изображение 3 из 3
    • Now locate the two screws that secure the screen to the rest of the Laptop (the other side).

    • Then lift the Laptop as shown in the second image of this step.

    • Unscrew the first screw.

  8. why! N240JU Replacing the LCD screen: шаг 8, изображение 1 из 3 why! N240JU Replacing the LCD screen: шаг 8, изображение 2 из 3 why! N240JU Replacing the LCD screen: шаг 8, изображение 3 из 3
    • Then unscrew the second screw.

    • Rest the Laptop as shown in the second image of this step and unscrew the third screw.

    • Then the fourth screw.

  9. why! N240JU Replacing the LCD screen: шаг 9, изображение 1 из 3 why! N240JU Replacing the LCD screen: шаг 9, изображение 2 из 3 why! N240JU Replacing the LCD screen: шаг 9, изображение 3 из 3
    • With the four screws unscrewed, separate the screen from the rest of the Laptop. Note that the hinge remains attached to the screen.

    • On the screen near the hinge now locate the two caches screws on the left.

    • Then look for those on the right.

  10. why! N240JU Replacing the LCD screen: шаг 10, изображение 1 из 3 why! N240JU Replacing the LCD screen: шаг 10, изображение 2 из 3 why! N240JU Replacing the LCD screen: шаг 10, изображение 3 из 3
    • Now remove the screw covers near the left hinge.

    • first on the right side of the hinge.

    • then on the left side.

  11. why! N240JU Replacing the LCD screen: шаг 11, изображение 1 из 3 why! N240JU Replacing the LCD screen: шаг 11, изображение 2 из 3 why! N240JU Replacing the LCD screen: шаг 11, изображение 3 из 3
    • Repeat near the right hinge

    • .Now return to the hinge on the left side and unscrew the outer screw.

  12. why! N240JU Replacing the LCD screen: шаг 12, изображение 1 из 3 why! N240JU Replacing the LCD screen: шаг 12, изображение 2 из 3 why! N240JU Replacing the LCD screen: шаг 12, изображение 3 из 3
    • Then unscrew the inner screw.

    • Repeat on the side of the right hinge.

  13. why! N240JU Replacing the LCD screen: шаг 13, изображение 1 из 3 why! N240JU Replacing the LCD screen: шаг 13, изображение 2 из 3 why! N240JU Replacing the LCD screen: шаг 13, изображение 3 из 3
    • You can now gently unclip the screen cover.

    • Locate the left hinge screw cover.

    • Locate the right hinge screw cover.

  14. why! N240JU Replacing the LCD screen: шаг 14, изображение 1 из 3 why! N240JU Replacing the LCD screen: шаг 14, изображение 2 из 3 why! N240JU Replacing the LCD screen: шаг 14, изображение 3 из 3
    • Gently remove the screw cover on the left hinge.

    • Also remove the screw cover on the right hinge.

    • Once the screw caps are removed you will see the fixing screws.

  15. why! N240JU Replacing the LCD screen: шаг 15, изображение 1 из 3 why! N240JU Replacing the LCD screen: шаг 15, изображение 2 из 3 why! N240JU Replacing the LCD screen: шаг 15, изображение 3 из 3
    • Now unscrew the screw on the left hinge.

    • Then unscrew the screw on the right hinge.

    • Once this is done you can now remove the hinge cover (left).

  16. why! N240JU Replacing the LCD screen: шаг 16, изображение 1 из 3 why! N240JU Replacing the LCD screen: шаг 16, изображение 2 из 3 why! N240JU Replacing the LCD screen: шаг 16, изображение 3 из 3
    • Left hinged cover removed.

    • Then remove the cover from the right hinge.

    • Right hinge cover removed.

  17. why! N240JU Replacing the LCD screen: шаг 17, изображение 1 из 3 why! N240JU Replacing the LCD screen: шаг 17, изображение 2 из 3 why! N240JU Replacing the LCD screen: шаг 17, изображение 3 из 3
    • once these operations are done you see the LCD screen ready to be dismounted.

    • Now locate the screws that secure the LCD screen to the bracket and unscrew them. Two on the left.

    • Two on the right.

  18. why! N240JU Replacing the LCD screen: шаг 18, изображение 1 из 3 why! N240JU Replacing the LCD screen: шаг 18, изображение 2 из 3 why! N240JU Replacing the LCD screen: шаг 18, изображение 3 из 3
    • Once the screws are unscrewed, lift the LCD screen gently and flip it over.

    • You will then see the connection cable of the screen.

    • Locate its connector.

  19. why! N240JU Replacing the LCD screen: шаг 19, изображение 1 из 2 why! N240JU Replacing the LCD screen: шаг 19, изображение 2 из 2
    • Disconnect the cable.

    • And here you can now put it on your work plan.

Заключение

To reassemble your device, Follow these instructions in reverse order.

Еще один человек закончил это руководство.

Особая благодарность этим переводчикам:

fr en

100%

irlandaпомогает нам починить мир! Хотите внести свой вклад?
Начните переводить ›

Felice Suglia

Участник с: 06/15/13

30 908 Репутация

Автор 264 руководств

0 Комментариев

Добавить комментарий

Просмотр статистики:

За последние 24часов: 0

За последние 7 дней: 1

За последние 30 дней: 5

За всё время: 441