Перейти к основному содержанию

why! W670SZQ1 HDD Hard Disk Replacement

Архивированное руководство
Это руководство сохранено для исторических целей. Используйте его обновлённую версию, чтобы выполнить ремонт.

Выберете то, что вам нужно

  1. why! W670SZQ1 HDD Hard Disk Replacement, accumulator: шаг 1, изображение 1 из 3 why! W670SZQ1 HDD Hard Disk Replacement, accumulator: шаг 1, изображение 2 из 3 why! W670SZQ1 HDD Hard Disk Replacement, accumulator: шаг 1, изображение 3 из 3
    • Open the latch of the accumulator on the left side.

    • Open the battery latch on the right side.

    • Remove the accumulator by simultaneously holding the right-hand latch open.

  2. why! W670SZQ1 HDD Hard Disk Replacement, Access to the most important components: шаг 2, изображение 1 из 3 why! W670SZQ1 HDD Hard Disk Replacement, Access to the most important components: шаг 2, изображение 2 из 3 why! W670SZQ1 HDD Hard Disk Replacement, Access to the most important components: шаг 2, изображение 3 из 3
    • Use the Philips screwdriver to remove the two screws at the bottom of the cover.

    • Lift the cover at the bottom right with the iFixit Opening Tool

    • Lift the cover at the bottom left with the iFixit Opening Tool

    • Finally, remove the cover to gain access to the most important components.

  3. why! W670SZQ1 HDD Hard Disk Replacement, HDD hard disk: шаг 3, изображение 1 из 2 why! W670SZQ1 HDD Hard Disk Replacement, HDD hard disk: шаг 3, изображение 2 из 2
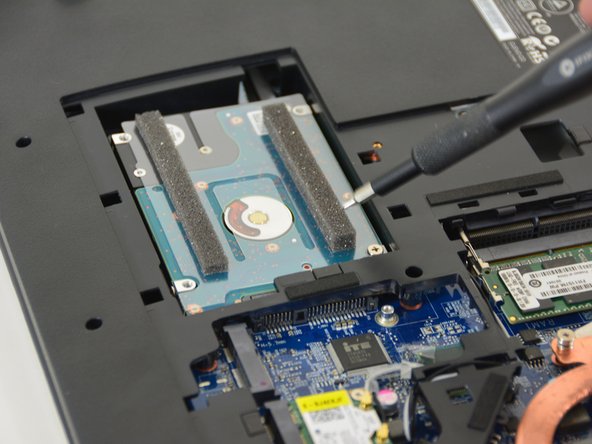
    • Locate the HDD disk.

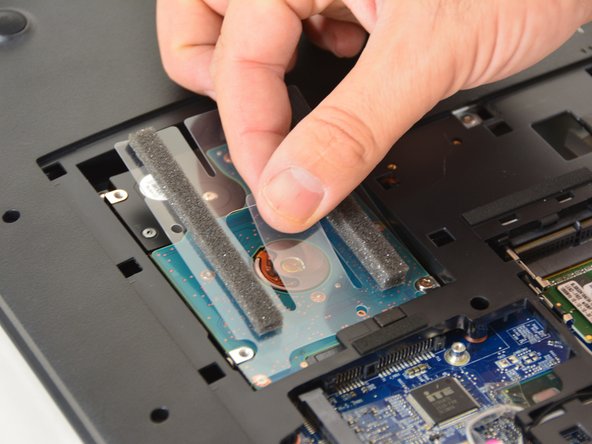
    • Lift the plastic tab and pull the HDD hard drive out of its SATA connector.

Заключение

Repeat the steps in reverse order to reassemble your device.

Особая благодарность этим переводчикам:

de en

100%

Эти переводчики помогают нам починить мир! Хотите внести свой вклад?
Начните переводить ›

Felice Suglia

Участник с: 06/15/13

30 884 Репутация

Автор 264 руководств

0 Комментариев

Добавить комментарий

Просмотр статистики:

За последние 24часов: 0

За последние 7 дней: 0

За последние 30 дней: 0

За всё время: 95