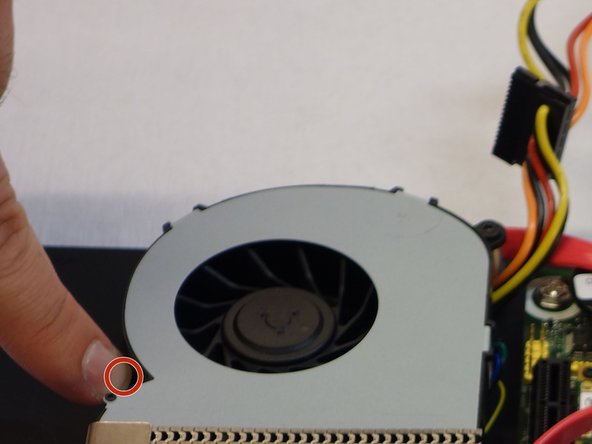
Перейти к основному содержанию

why! WDi7SSD Fan replacement

  1. why! WDi7SSD Fan replacement, Fan: шаг 1, изображение 1 из 3 why! WDi7SSD Fan replacement, Fan: шаг 1, изображение 2 из 3 why! WDi7SSD Fan replacement, Fan: шаг 1, изображение 3 из 3
    • Make sure the computer is disconnected from the power source.

    • Turn the computer over.

    • Remove the 6 screws with a 2mm Allen key.

    • Carefully remove the left and right rear panels.

  2. why! WDi7SSD Fan replacement: шаг 2, изображение 1 из 1
    • Now open the bottom of the case, to which all the components are attached.

  3. why! WDi7SSD Fan replacement: шаг 3, изображение 1 из 2 why! WDi7SSD Fan replacement: шаг 3, изображение 2 из 2
    • Remove the two Phillips PH2 screws holding the fan.

  4. why! WDi7SSD Fan replacement: шаг 4, изображение 1 из 2 why! WDi7SSD Fan replacement: шаг 4, изображение 2 из 2
    • Disconnect the cable connecting the front part (with the LEDs) to the power source.

    • Remove the part with the cable.

  5. why! WDi7SSD Fan replacement: шаг 5, изображение 1 из 3 why! WDi7SSD Fan replacement: шаг 5, изображение 2 из 3 why! WDi7SSD Fan replacement: шаг 5, изображение 3 из 3
    • Remove the four screws on the heat sink with a Phillips PH2 screwdriver.

    • Remove the heat sink and lay it to the side.

  6. why! WDi7SSD Fan replacement: шаг 6, изображение 1 из 2 why! WDi7SSD Fan replacement: шаг 6, изображение 2 из 2
    • Carefully remove the fan together with its case.

    • Carefully remove the plug connecting the fan to the power source.

Заключение

In order to reassemble your device, follow the steps of this guide in reverse order.

Особая благодарность этим переводчикам:

de en

100%

Эти переводчики помогают нам починить мир! Хотите внести свой вклад?
Начните переводить ›

Felice Suglia

Участник с: 06/15/13

30 884 Репутация

Автор 264 руководств

0 Комментариев

Добавить комментарий

Просмотр статистики:

За последние 24часов: 0

За последние 7 дней: 2

За последние 30 дней: 3

За всё время: 184