Перейти к основному содержанию

Выберете то, что вам нужно

Это демонтаж а неруководство по ремонту. Чтобы отремонтировать Car and Drivers Auto HandHeld Vacuum Bagless, воспользуйтесь нашим сервисным руководством.

  1. Car and Drivers Auto HandHeld Vacuum Bagless Teardown, Car and Drivers Auto HandHeld Vacuum Bagless Teardown: шаг 1, изображение 1 из 3 Car and Drivers Auto HandHeld Vacuum Bagless Teardown, Car and Drivers Auto HandHeld Vacuum Bagless Teardown: шаг 1, изображение 2 из 3 Car and Drivers Auto HandHeld Vacuum Bagless Teardown, Car and Drivers Auto HandHeld Vacuum Bagless Teardown: шаг 1, изображение 3 из 3
    • Locate the four screws locate outer gray shelll

    • ''I REMOVED THE SCREWS WITH PH #OO SCREWDRIVER FROM (IFIXIT)

    • New PLace four screws to the side

  2. Car and Drivers Auto HandHeld Vacuum Bagless Teardown: шаг 2, изображение 1 из 1
    • Here are the four screws from vacuum

  3. Car and Drivers Auto HandHeld Vacuum Bagless Teardown: шаг 3, изображение 1 из 3 Car and Drivers Auto HandHeld Vacuum Bagless Teardown: шаг 3, изображение 2 из 3 Car and Drivers Auto HandHeld Vacuum Bagless Teardown: шаг 3, изображение 3 из 3
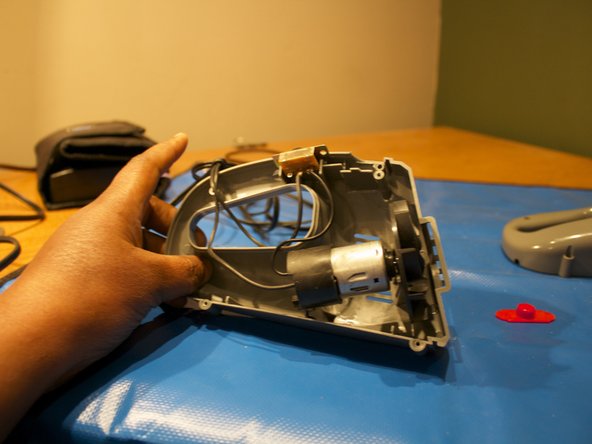
    • Remove the top grey shell of the vacuum

    • Place a red tab to the side

    • Let start looking at the 9volt motor with wire and on/off switch.

    • I remove the outer shell . I remove the motor and wires and on/off switch.

  4. Car and Drivers Auto HandHeld Vacuum Bagless Teardown: шаг 4, изображение 1 из 1
    • This it complete teardown on Car and Driver HandHeld Vacuum bagless!

kempc8

Участник с: 11/22/13

899 Репутация

Автор 7 руководств

Команда

K and K Fixit Участник K and K Fixit

Business

1 член

Автор 11 руководств

0 Комментариев

Добавить комментарий

Просмотр статистики:

За последние 24часов: 3

За последние 7 дней: 7

За последние 30 дней: 17

За всё время: 1,023